This post contains affiliate links. As an Amazon Associate, solveyourtech.com earns from qualifying purchases, at no extra cost to you.
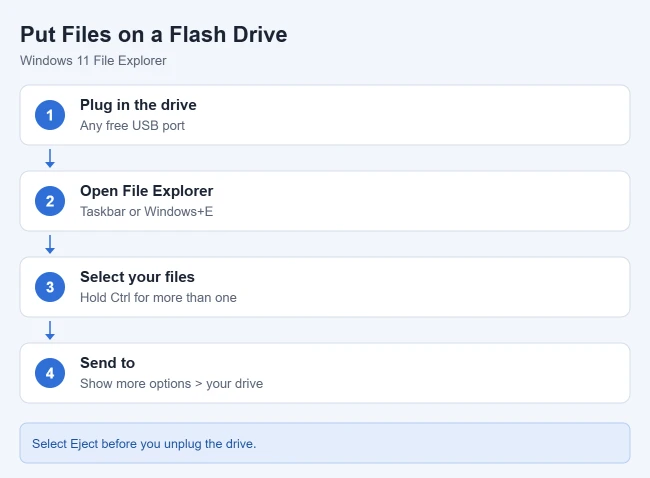
To put files on a flash drive in Windows, plug in the drive, open File Explorer, and select the files. Right-click them, choose Show more options > Send to, and pick your flash drive. Microsoft says to select Eject before you unplug it. If you can’t find the drive in File Explorer, see how to open a USB drive on Windows 11.
These steps follow Microsoft’s Move your files to a new Windows PC using an external storage device article. They also work for SD cards and external hard drives.
How to Copy Files to a Flash Drive
- Plug the flash drive into a USB port on your computer.
- Select File Explorer on the taskbar.
- Find the files or folders you want to copy. Hold Ctrl to select more than one.
- Right-click the selection and choose Show more options > Send to.
- Select your flash drive from the list.
Result: Microsoft says your files and folders start copying to the drive. Large copies can take a while, and you’ll often see a progress bar while it works.
Don’t have a flash drive? The SanDisk Ultra 64GB USB 3.0 drive is one option for a standard USB-A port.
Other Ways to Copy Files
Each one copies your files, leaving the originals in place:
- Copy and paste: right-click the files and choose Copy. Open the flash drive, right-click an empty space, and choose Paste.
- Drag and drop: open a second File Explorer window with Windows+E, open the flash drive in it, and hold Ctrl while dragging the files across to request a copy; check the pointer’s copy indicator before releasing.
- Keyboard shortcuts: select the files, press Ctrl+C, open the flash drive, click an empty space, and press Ctrl+V.
Copy Files From a Flash Drive to the Computer
To copy in the other direction, connect the drive, open File Explorer > This PC, and open the USB drive. Select the intended files, press Ctrl + C, open a destination folder on the computer, and press Ctrl + V. Let the copy finish and open a few destination files before ejecting the USB drive. Copying keeps the source files; Cut or Ctrl + X moves them after pasting. If Windows asks about an existing file, inspect the names before replacing it. This is the reverse of the copy-and-paste method above and follows the archived Windows 11 transfer guide.
How to Find Your Flash Drive
When you plug in a drive, Windows may show an AutoPlay notification. Click it, then choose Open folder to view files. If you miss it, open File Explorer and look under This PC. The drive appears with its name and a drive letter, such as D:, E:, or F:.
How to Safely Remove the Flash Drive
- Open the flash drive in File Explorer and check that your files are there.
- Select Eject for the drive.
- Unplug the drive.
Result: Microsoft says ejecting first makes sure no files are lost or corrupted.

Files Won’t Copy? Try These Fixes
- “The file is too large for the destination file system”: Drives formatted as FAT32 can’t hold single files bigger than 4GB, even with free space. Reformatting as exFAT or NTFS fixes it, but that erases the drive, so back up its contents first. To confirm which format the drive uses now, see how to check the file format of a USB flash drive.
- “There is not enough space”: the drive is full. Try deleting files you no longer need from the drive, using a bigger drive, or copying in smaller batches.
- Write-protected: Some drives have a small lock switch. Make sure it’s set to unlocked.
- Drive not showing up: see how to fix a USB drive not showing up.
Safely Eject a USB Drive in Windows 7
On Windows 7, wait for copying to finish and close files opened from the USB drive. Click the notification area’s up arrow if its icons are hidden, select Safely Remove Hardware and Eject Media and choose Eject for the intended drive, checking its name or letter. Wait for the safe-to-remove message before unplugging. If Windows says the drive is in use, close the relevant documents and programs and try again. If it still cannot eject, finish saving and fully shut down the computer before removing the drive; do not unplug during a transfer.
Safely Eject a USB Drive in Windows 11
Finish copying or saving files and close files or apps using the USB drive. In Windows 11, find Safely Remove Hardware and Eject Media in the taskbar notification area; open the hidden-icons arrow if necessary. Choose Eject for the intended device, checking its name or drive letter so you do not eject a different drive. Wait for the notification that it is safe to remove the hardware, then unplug it. Microsoft’s safe-removal instructions show this tray method. If Windows says the drive is in use, close the relevant files and try again. If it still cannot be ejected, save your work and shut the PC down fully before removing it. Do not unplug it during an active transfer. Ejection reduces the risk of interrupted writes; it does not guarantee that a damaged drive or an earlier failed copy contains intact files.
Frequently Asked Questions
Does Send to move or copy my files?
It copies them. Microsoft’s steps describe the files being copied to the drive, so the originals stay on your computer.
Can I use a USB 3.0 drive in a USB 2.0 port?
Yes. You can mix USB versions, but you only get the speed of the slower one.
More Windows Guides
- How to delete files or erase everything on a flash drive
- How to back up Windows 11 to an external hard drive
- How to fix a slow computer in Windows 11

Matthew Burleigh is the founder, head writer, and editor of Solve Your Tech, which he launched in 2012. He has written technology tutorials since 2008 and worked in IT since 2003, including small-business support, IT management, and consulting. He holds Bachelor’s and Master’s degrees in Computer Science from Arizona State University.
Matthew writes practical guides for Windows, iPhone and iPad, Microsoft Office, Outlook, Google apps, and Android. Solve Your Tech’s guides are tested on current devices or checked against official product documentation, with clear steps, sources, and update dates.
Read more about Matthew and how Solve Your Tech writes and updates its guides, or report a correction.