Occasionally you will want to format your document by only applying an indent to the first line of each paragraph.
While this is uncommon in many situations, it is used enough that there is a first line indent Word setting.
Our guide below will show you where to find and how to use this option in a document that you are editing in the Microsoft word processing application.
How to First Line Indent Word Documents
- Open your document.
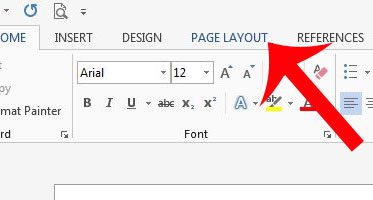
- Click the Page Layout tab.
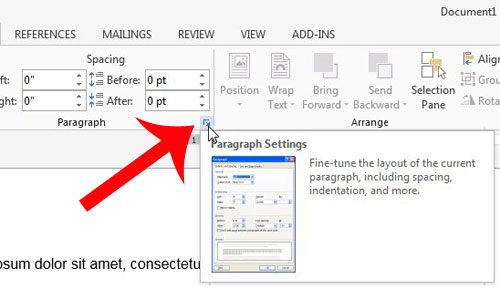
- Click the Paragraph Settings button.
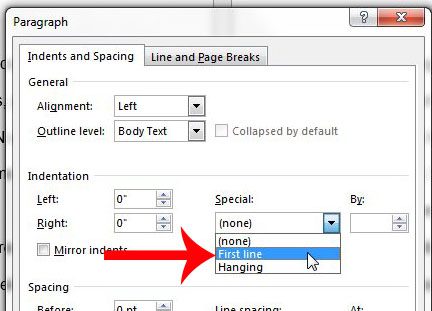
- Click the Special dropdown menu and choose First Line.
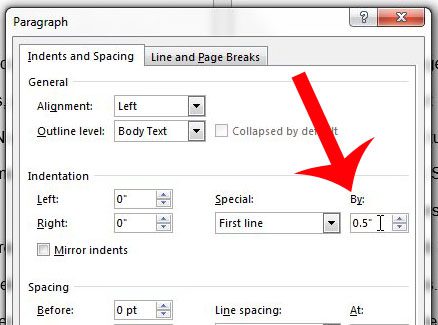
- Choose the Indent value.
- Click OK.
Our guide continues below with additional first line indent Word information, including pictures of these steps.
Different types of documents can require different types of settings, which is one of the reasons why Microsoft Word 2013 has so many customization options. But this high number of options can make it difficult to locate some of the features that you might need, such as the option to automatically indent the first line of every paragraph.
This option exists with the Word 2013 settings, but you may be having trouble locating it. Our guide below will show you where to go to make this change, plus walk you through the steps needed to do so.
Our how to do hanging indent on Google Docs guide can show you a simple way to apply the hanging indent formatting to a document.
How to Set an Automatic Indent for the First Line of a Paragraph in Word 2013 (Guide with Pictures)
The steps below will set up your document so that the first line of every new paragraph is automatically indented by the amount that you specify. We will be using .5″ as the example in this tutorial, but you can select any amount that you wish.
Step 1: Open Microsoft Word 2013.
If you want to edit the indent settings for a document that already exists, then you will also need to click inside of the document, then press Ctrl + A on your keyboard to select the entire document.
Step 2: Click the Page Layout tab at the top of the window.
Step 3: Click the Paragraph Settings button at the bottom-right corner of the Paragraph section of the ribbon.
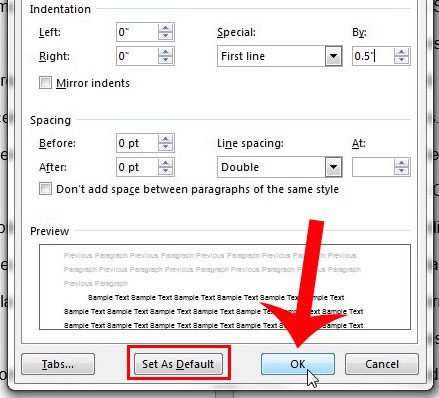
Step 4: Click the drop-down menu under Special, then click the First Line option.
Step 5: You can modify the amount of the indent by entering a new value into the field under By.
The default value is .5″.
Step 6: Click the OK button at the bottom of the window.
Note that this change will only apply to your current document. If you wish to set this as the default behavior for all new documents in Word 2013, then you will need to click the Set as Default option at the bottom of this window before clicking the OK button.
Now that you have completed our first line indent Word tutorial you should have a document with paragraphs that have first lines which have been indented.
Is your document too long because it is double-spaced? Learn how to turn off double-spacing in Word 2013 and reduce the number of pages in your document.

Matthew Burleigh has been writing tech tutorials since 2008. His writing has appeared on dozens of different websites and been read over 50 million times.
After receiving his Bachelor’s and Master’s degrees in Computer Science he spent several years working in IT management for small businesses. However, he now works full time writing content online and creating websites.
His main writing topics include iPhones, Microsoft Office, Google Apps, Android, and Photoshop, but he has also written about many other tech topics as well.