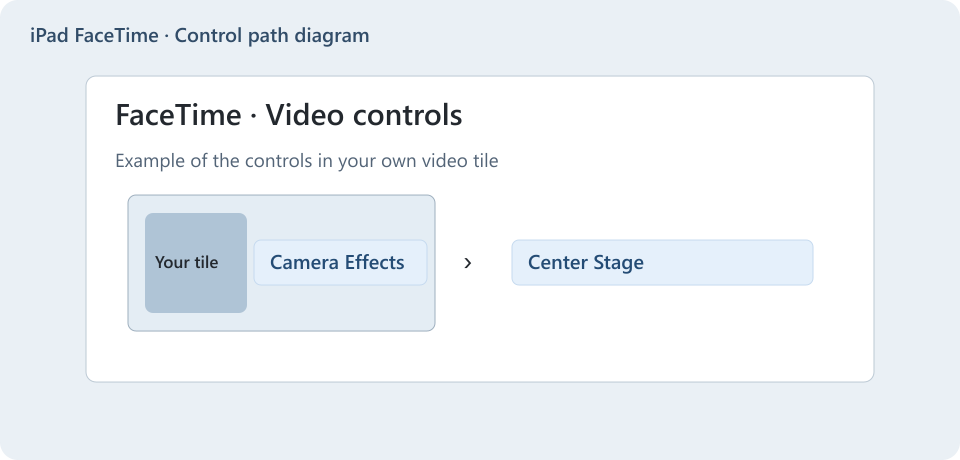
The iPad camera follows you because of Center Stage, and you turn it off during the call. In FaceTime, tap your own video tile, then tap Center Stage. In other video apps, open Control Center, tap the app’s Controls button, then tap Center Stage.
During a FaceTime or video call on an iPad, the picture keeps panning and zooming to follow you around the room, and you want the frame to stay still. These steps cover supported iPads using the front camera.
What Is Making the Camera Follow You
Center Stage is Apple’s automatic framing feature. On iPad, Apple says it automatically adjusts the front camera to frame you as you move around during a call. In practice, the picture pans when you walk to one side and zooms out when you step back, and Apple says it helps keep other people in the frame too. Nothing on the iPad physically moves; the framing of the video you send is adjusted for you.
Apple’s FaceTime settings guide for iPad says that Center Stage is on by default. That is why the movement can seem to appear out of nowhere: nobody switched it on, it was already running the first time you made a call.
Center Stage only works on certain iPads, and only in apps that support it. Apple’s Center Stage support page lists these iPad models, each using its front camera:
- iPad Pro 11-inch (3rd generation) or later, or iPad Pro 12.9-inch (5th generation) or later
- iPad Air (5th generation) or later
- iPad (9th generation) or later
- iPad mini (6th generation) or later
If your iPad is older than those models, Center Stage isn’t the cause. Check whether the iPad itself is shifting on a stand or in your hands, or whether the video app you use has its own framing or background effect.
Turn Off Center Stage During a FaceTime Call
This is the quickest route if you use FaceTime. You need to be in an active call, because the control lives on your own video tile.
- Start or join a FaceTime video call on your iPad.
- Tap your own video tile (the small window that shows you). It expands and shows a row of camera buttons.
- Tap Center Stage. On some versions, the Center Stage button sits behind a Camera Effects button, so tap Camera Effects first if you don’t see Center Stage right away.
- Watch your tile. The framing should stop shifting and hold a fixed view.
The button is a toggle. When it is highlighted, Center Stage is on. When it is dimmed or no longer highlighted, it is off. If you are new to video calls on Apple devices, how FaceTime calls and in-call controls work walks through the basics; the iPad layout is similar.
Turn It Off From Control Center (Works in Other Video Apps)
Control Center gives you the same switch, and it is the route Apple describes for third-party video apps, as long as the app supports Center Stage. Start the call first, so the iPad knows which app is using the camera.
- Open your video app and start or join a call.
- Swipe down from the top-right corner of the screen to open Control Center.
- Tap the [App Name] Controls button at the top of Control Center. In FaceTime, it reads FaceTime Controls. In another app, it shows that app’s name.
- Tap Center Stage in the extra controls that appear, so it is no longer highlighted.
- Swipe up or tap outside Control Center to return to the call.
Apple notes that in iPadOS 17 or earlier, the button at the top of Control Center is called Video Effects instead of [App Name] Controls. Tap Video Effects, then tap Center Stage.
This panel also holds sliders for Portrait blur and Studio Light strength, which comes in handy if you want to keep one effect and drop another.
Quick Reference: Where the Switch Is
| Where you are | What to tap | Notes |
|---|---|---|
| In a FaceTime call | Your video tile, then Center Stage (or Camera Effects, then Center Stage) | Fastest route for FaceTime |
| In any supported video app | Control Center, then [App Name] Controls, then Center Stage | Start the call first |
| iPadOS 17 or earlier | Control Center, then Video Effects, then Center Stage | Older label for the same panel |
| Not in a call | No documented switch | Apple documents the control during calls only |
Why You Might Want the Frame to Stay Still
Center Stage is helpful when you pace while talking or when family members drift in and out of the shot. It gets in the way in a few common situations:
- Showing something on a desk or wall. When you hold up a drawing or point to a whiteboard, the frame may chase your face instead of staying on the object.
- Teaching or demonstrating. A music lesson or a cooking demo works better with a fixed, predictable view so the other person can follow your hands.
- Recording a call or presentation. Constant zooming can look distracting in a saved recording.
- Motion sensitivity. Some people on the other end find the panning uncomfortable to watch.
- A tight, steady shot. If you want a consistent framing for a long meeting, turning Center Stage off and positioning the iPad carefully gives you that.
With Center Stage off, the camera shows the wide view it captures, so set the iPad at eye level and sit where you want to appear before the call starts. If you take photos with the same iPad, turning on the iPad camera grid is a separate setting in the Camera app that helps you line up shots; it does not affect video calls.
If You Don’t See a Center Stage Button
A missing button almost always has one of these causes. Work through them in order.
- You are not in a call yet. The control appears on your video tile and in the [App Name] Controls panel while a video app is using the camera. Start a call, or join a test meeting, then look again.
- Your iPad model does not support it. Compare your model with Apple’s list above. To check your model, open Settings, tap General, then tap About and look for the model name, or use Apple’s Identify your iPad model page to match the model number.
- The app does not support it. Apple says Center Stage is available with a compatible app that supports the feature. If [App Name] Controls appears but there is no Center Stage button, that app may not use it.
- You are using the rear camera. Apple lists Center Stage as a front camera feature on iPad. Switch back to the front camera to see the option.
- The label is different. On iPadOS 17 or earlier, look for Video Effects in Control Center instead of [App Name] Controls.
If the button is there but the frame still seems to move after you tap it, end the call and start a new one, then check the button state again. Restarting the iPad and installing any available update in Settings, General, Software Update are reasonable next steps, though Apple does not list them as a specific fix for Center Stage.
Don’t Confuse Center Stage With Other Camera Effects
The same row of buttons holds several effects, and it is easy to switch off the wrong one. Here is what each does, based on Apple’s iPad User Guide:
- Center Stage keeps you framed as you move. This is the only one that pans and zooms.
- Portrait blurs the background and keeps the focus on you. It does not follow you.
- Studio Light dims the background and brightens your face. It also does not move the frame.
- Flip switches to the rear camera. Tap Flip again to return to the front camera.
- Camera on/off stops sending video entirely. In FaceTime, tap the screen to show the controls, then tap the camera button. Tap it again to turn video back on.
Apple’s guide to video conferencing features on iPad also covers Reactions and Memoji. Memoji works in FaceTime, but Apple says it isn’t available in third-party apps.
If you need to show a document or object without the image shifting, there are two clean options. Turn off Center Stage and keep the front camera, or tap Flip and use the rear camera, which Apple does not list for Center Stage on iPad. The rear camera is often the better choice for showing a page on a table, because you can aim it directly at the item.
Turn Center Stage Back On
Turning it back on uses the same button. Apple’s iPad guide puts it simply: tap Center Stage again.
- During a FaceTime call, tap your video tile, then tap Center Stage so it is highlighted. Or, in any supported app, open Control Center, tap [App Name] Controls, then tap Center Stage.
- Move a little to one side. Your tile should pan to keep you centered, which confirms it is on.
Apple’s guide also notes that on some iPad models, a Center Stage icon appears in your tile. Tapping your tile and then that icon turns the feature on.
Center Stage on Other Apple Devices
If you switch between an iPad and other Apple hardware, the feature has the same name elsewhere. Apple’s Center Stage page lists the front camera on iPhone 17 models and iPhone Air; in FaceTime on those phones, tap your video thumbnail, tap Camera Effects, then tap Center Stage. On a Mac with a supported camera running macOS Sonoma 14 or later, choose Center Stage from the Video menu in the menu bar. Apple says Mac users can also turn Center Stage off and adjust the framing by hand, but that manual framing is described for Mac, not iPad.
Because Center Stage changes the video your iPad sends, people who join your FaceTime call from a Windows PC or Android phone through a link should see the same framing. Joining FaceTime from a Windows browser explains what those callers can do on their end.
Center Stage Questions
Does Center Stage stay off for my next call?
Apple’s pages don’t say whether the choice carries over between calls or between apps. The easy check is to glance at your tile in the first few seconds of each call. If the frame starts tracking you again, tap the button once more. If you use more than one video app, check each one separately.
Can I turn Center Stage off before a call starts?
Apple documents the switch only during a call, on your tile or in the [App Name] Controls panel. Some apps show a camera preview before you join, but don’t count on Center Stage controls appearing there. Joining the call and switching it off in the first moment is the reliable route.
Does Center Stage work in Zoom, Teams or Google Meet?
It works in apps that support it. Apple says to open Control Center during the call and tap the app’s name to reach the effects. If the Center Stage button shows up there, the app supports it, and you can switch it off from the same panel. If it doesn’t, that app isn’t using Center Stage on your iPad.
Is my iPad tracking me?
Center Stage changes how your own camera image is framed during a call. Apple’s Center Stage page describes it as keeping people in the frame; it doesn’t describe it as identifying who you are. If you’d rather it didn’t adjust the picture at all, turning it off as shown above stops the panning and zooming.
Why does my picture look more zoomed out with Center Stage off?
Apple says Center Stage adjusts the front camera to frame you as you move. With it off, the framing stays fixed, so depending on where you sit you may look smaller or off-center. Move the iPad closer or adjust the stand to get the framing you want.
Will turning off Portrait mode stop the camera from following me?
No. Portrait only blurs the background. The panning and zooming come from Center Stage, which has its own button next to Portrait and Studio Light.
For your next call, start it, tap your tile (or open Control Center and tap the app’s Controls button), and switch off Center Stage in the first few seconds. If the button is missing, check your iPad model against Apple’s list and make sure you are on the front camera.

Matthew Burleigh is the founder, head writer, and editor of Solve Your Tech, which he launched in 2012. He has written technology tutorials since 2008 and worked in IT since 2003, including small-business support, IT management, and consulting. He holds Bachelor’s and Master’s degrees in Computer Science from Arizona State University.
Matthew writes practical guides for Windows, iPhone and iPad, Microsoft Office, Outlook, Google apps, and Android. Solve Your Tech’s guides are checked step by step against the device or app maker’s own documentation and tested on his own devices whenever he has the hardware or software, with clear steps, sources, and update dates.
Read more about Matthew and how Solve Your Tech writes and updates its guides, or report a correction.