This post contains affiliate links. As an Amazon Associate, solveyourtech.com earns from qualifying purchases, at no extra cost to you.
To set up a Roku, plug it into an HDMI port on your TV, connect its USB power cable, and switch the TV to that HDMI input. Then follow the on-screen steps: pair the remote, pick a language, connect to Wi-Fi, let it update, and activate it by linking a free Roku account.
The whole process happens on the TV screen, plus one short step on your phone or computer to confirm your email. Activation is free. Roku does not charge to activate a device or to create an account.
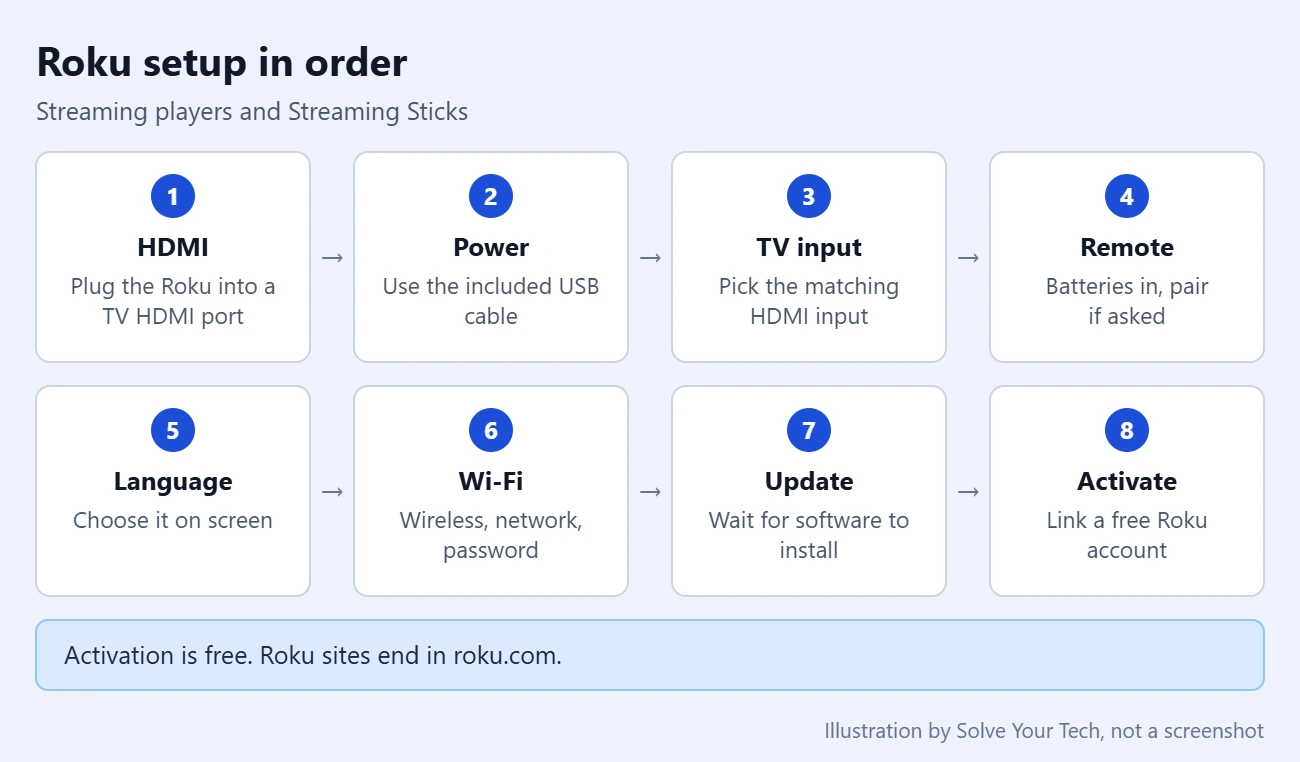
What these steps cover
These steps follow Roku’s general setup instructions for any model, which Roku last updated in June 2026. They apply to Roku streaming players (the small boxes) and Roku Streaming Sticks (the kind that plug straight into the TV). A Roku TV, which has Roku built in, has a slightly different setup that is covered in its own section below.
Exact screens and wording can differ a little between models and software versions. If your screen does not match a step here, follow what the TV shows.
If you are still shopping, the Roku Streaming Stick Plus is one option for 4K TVs. Roku lists it as supporting 4K and HDR. See which Roku to buy for other models. You can also compare the Roku Streaming Stick, Stick Plus, and Stick 4K.
What you need before you start
- A TV with a free HDMI port. HDMI is the flat, wide port that carries both picture and sound.
- Everything from the Roku box. That means the Roku, its remote, the USB power cable, and the HDMI cable or power adapter if your model includes one.
- Your Wi-Fi network name and password. Some Roku models also have an Ethernet port for a wired connection.
- A phone, tablet, or computer. You use it to open an email from Roku during activation.
- Access to your email. Roku sends the activation link there.
Roku may ask for a payment method when you create an account. According to Roku, you are only charged if you choose to buy something later.
Step 1: Connect the Roku to your TV and to power
- Plug the Roku into an HDMI port on the TV. A player uses the HDMI cable from the box: one end in the Roku, the other in the TV. A Streaming Stick plugs directly into the port.
- Note the number printed next to the port, such as HDMI 1 or HDMI 2. You need it in the next step.
- Connect the USB power cable that came with the Roku. Plug the other end into a USB port on the TV, or into a wall outlet using a power adapter.
- Look for a light on the Roku. If your model has one, it turns on or blinks.
Use the cable from the box. Roku warns that a Streaming Stick may not turn on with a different USB cable and can show error 022.
If a stick does not fit because of how the TV’s ports are placed, Roku says you may need a short HDMI extender. For a player, Roku recommends the HDMI cable it supplies. If you have to replace it, Roku says to use a High Speed HDMI cable for 720p and 1080p TVs, or a Premium High Speed HDMI cable for 4K or HDR TVs.
TV USB port or wall outlet?
A TV’s USB port is the tidier choice, but some ports do not supply enough power. Roku calls the wall outlet the most reliable option. It also keeps the Roku powered when the TV is off, which Roku says helps it start faster.
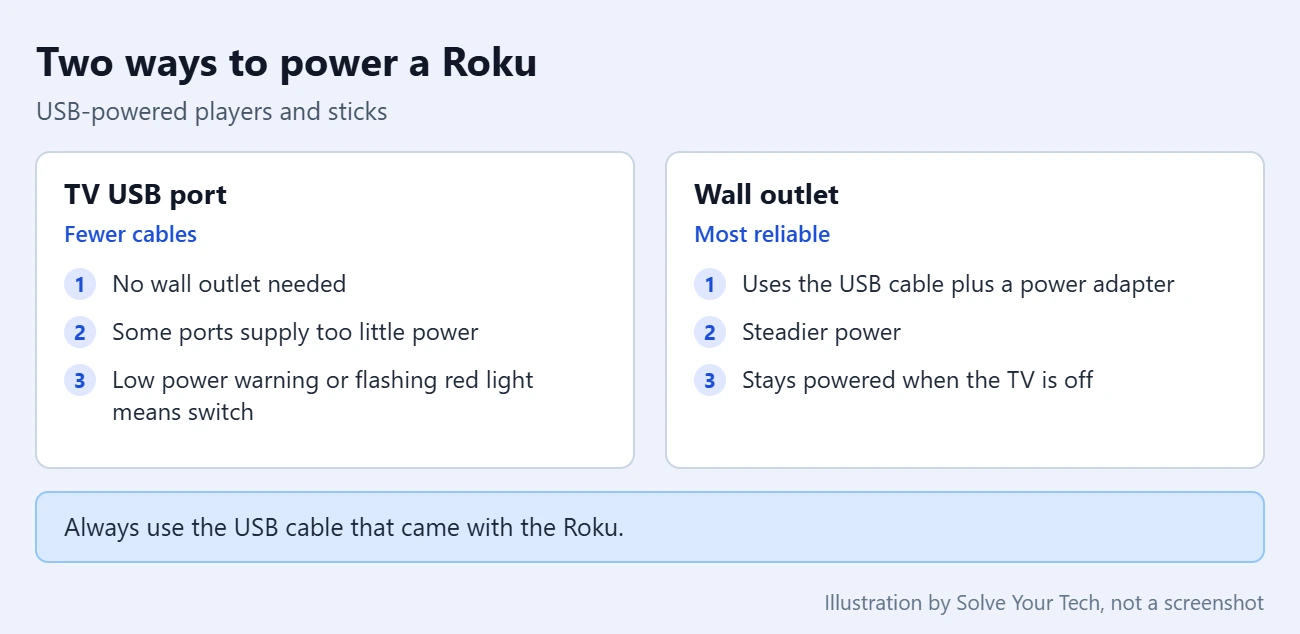
If your Roku did not come with a power adapter, Roku’s low-power article says to use one rated 5 volts and 1 amp, or equivalent.
Step 2: Switch the TV to the Roku’s input
- Turn on the TV.
- On the TV remote (not the Roku remote), press the button labeled Input or Source.
- Choose the HDMI port number the Roku is plugged into. After setup, you can make the TV switch to the Roku input automatically with the 1-touch play setting and HDMI-CEC.
- Wait about 10 seconds for the TV to detect the Roku.
You are in the right place when the Roku logo or a setup screen appears.
Step 3: Set up the Roku remote
Roku remotes come in two broad kinds, and each starts a little differently.
- Voice remote. This kind has a microphone or magnifying glass button. Follow the directions on the TV to pair it. Pairing means linking the remote to this one Roku so they can talk to each other wirelessly.
- Standard remote. Insert fresh batteries. If it does not respond, take the batteries out, wait a few seconds, and put them back in.
Once the remote works, use the arrow buttons to move around the screen and OK to select.
If a voice remote will not pair, follow our Roku remote pairing and TV-control guide. It covers remotes with and without a pairing button, simple infrared remotes, and the separate setup for TV power and volume.
Step 4: Choose a language and connect to the internet
- Choose your language.
- If you see Set up for home use, select it.
- Select Wireless. On some screens this is worded Set up new wireless connection.
- Choose your home Wi-Fi network from the list.
- Enter the Wi-Fi password with the on-screen keyboard. Passwords are case sensitive, so check capital letters.
- Select Connect.
If your Roku has an Ethernet port, you can plug it into your router with a network cable instead of using Wi-Fi. Not every model has that port. See is a Roku wireless? for what connects over Wi-Fi and what still needs a cable.
Step 5: Let it update and check the display type
After it connects, the Roku checks for software updates. Wait until they finish installing. Do not unplug the Roku while this is happening. It may restart on its own.
Next comes the display type, which is the resolution the Roku sends to your TV, such as 1080p or 4K. Roku’s instructions say to choose Automatic so the Roku picks the resolution that matches your TV. You can change the display type on your Roku later in Settings.
For 4K or HDR, Roku says every connection and device in the chain must support HDCP 2.2. HDCP is the copy protection used on HDMI connections. On some TVs only certain HDMI ports support it, so check the labels on the ports or the TV manual. If you see an HDCP error or a purple screen, Roku says to unplug the HDMI cable and the power cords, then reconnect everything firmly.
Optional: let the voice remote control your TV
Some voice remotes can control your TV’s power and volume. If the Roku offers this, follow the prompts. On some TVs the remote controls volume but not power, or the other way around. If you skip it, you can set it up later in Settings > Remotes & devices > Remotes.
Step 6: Activate your Roku
Activation links the Roku to a Roku account. Roku’s activation article describes two ways to do it. Keep the TV on the activation screen until you are done.
Before you start: activation costs nothing. If any website or phone number asks you to pay to activate your Roku, stop. It is not Roku.
Activate with your email address
- Enter your email address on the TV using the Roku remote.
- On your phone or computer, open the email from Roku and select Activate Device.
- Follow the steps to create an account. If you already have one, select Existing Customer? and sign in.
- Add a payment method if asked, or review what Roku says about it on that screen.
- Go back to the TV. When setup is complete, the Roku goes to the Home screen.
Activate with a QR code
- Open the camera on your phone.
- Point it at the QR code on the TV. A QR code is the square pattern of black and white blocks.
- Tap the link that appears, then follow the steps on your phone.
If the QR code will not scan, Roku suggests choosing the option to enter a code instead. Some Roku screens show a short code and a web address. Only type that code at an address ending in roku.com.
How to tell setup worked
Setup is finished when the TV shows the Roku Home screen with a menu and a grid of apps. From there:
- Press Home on the remote, select Streaming Store, pick an app, and select Add app. Roku’s Streaming Store article covers the details. Some apps need a paid subscription of their own. Others are free.
- Sign in to the apps you already pay for. For example, you can sign in to Prime Video on your Roku or smart TV with a code. If the wrong account is signed in, here is how to sign out of Prime Video on a Roku.
- Make it your own. Here is how to change the theme on a Roku.
How to change or undo your setup
Nothing you choose during setup is permanent.
- New router or new Wi-Fi password: see how to connect your Roku to a different Wi-Fi network.
- Wrong resolution: change the display type in Settings.
- Start over completely: a factory reset erases your settings, so you go through setup again. Factory reset it before you sell it or give it away, so the new owner can link their own account.
How to set up a Roku TV
A Roku TV has nothing to plug into an HDMI port, because Roku is built into the TV. Roku’s Roku TV setup guide lists these steps:
- Attach the stands or mount the TV, then plug in the power cord.
- Get the remote ready. Pull the battery tab or insert batteries, depending on the remote.
- Press Power on the Roku remote. Guided Setup starts on its own.
- Pair the remote if the TV asks you to.
- Choose your language, then your country.
- Select Set up for home use. The other choice is for store displays.
- Choose your Wi-Fi network and enter the password. If your network is missing, select Scan again.
- Wait while the TV downloads the latest software and restarts.
- Sign in to your Roku account or create a free one when prompted.
Guided Setup may also offer to set up a cable box, game console, or antenna. Those parts are optional, and you can add devices later in Settings > Remotes & Devices > Add Devices.
Troubleshooting Roku setup problems
The TV shows no picture
The wrong input is the most common cause, according to Roku. Press Input or Source on the TV remote and pause about 10 seconds on each input. If that does not help, check that the Roku is pushed firmly into the HDMI port, try a different HDMI port, and unplug and reconnect the cables, including power. Roku’s no-picture article has more checks.
A low power warning or a flashing red light
The TV’s USB port is not giving the Roku enough power. Make sure you are using the Roku’s own USB cable, try a different USB port on the TV, or plug the Roku into a wall outlet with a power adapter. Roku notes that a solid red light is different and usually means the Roku is overheating. Unplug it and let it cool.
The Roku will not connect to Wi-Fi
First, re-enter the password carefully. Then check that a phone or laptop can get online using the same network. If the connection still fails, unplug both the router and the Roku for 10 seconds and plug them back in. Roku’s Wi-Fi troubleshooting article lists the error codes. Several of them point to a weak signal, where moving the Roku closer to the router is the suggested fix.
The activation email never arrived
Wait a few minutes, then check your spam or junk folder and search your inbox for “Roku”. If the email address was mistyped, press the Star button on the remote and choose Edit Roku email. To get a new link, including when the old one has expired, press Star and choose Resend activation link.
A voice reads everything on screen
That is the screen reader. On a Roku TV, Roku says pressing Star four times quickly turns it on, which is easy to do by accident. See how to turn off the voice on Roku.
Avoid activation scams
Roku’s scam warning says fake activation sites often appear in search results for phrases like “roku activation”, sometimes as paid ads at the top. They may say your code failed and ask for a fee, or give a support number to call.
- Real Roku websites end in roku.com, such as support.roku.com and my.roku.com.
- Roku does not charge for activation, account creation, or setup help.
- Roku does not sell lifetime channel access or support subscriptions.
- Do not let anyone who claims to be Roku support take remote control of your computer.
Frequently asked questions
Does it cost money to set up a Roku?
No. Roku says activation is always free and that it never charges a fee to create an account. You may be asked for a payment method, but Roku says you are only charged if you buy something later. Individual streaming apps can have their own subscription fees.
Can I set up a Roku without Wi-Fi?
You need an internet connection and a free Roku account to start streaming, but it does not have to be Wi-Fi on every model. Roku models with an Ethernet port can connect to your router with a cable. Models without one need Wi-Fi.
What if the Roku freezes right after setup?
Restart it. Roku lists Settings > System > Power > System Restart, or you can unplug it for 10 seconds. Here is how to restart a Roku without erasing anything.
Next step
With the Home screen showing, open Streaming Store and add the two or three apps you watch most. Sign in to each one, and your Roku is ready to use.

Matthew Burleigh is the founder, head writer, and editor of Solve Your Tech, which he launched in 2012. He has written technology tutorials since 2008 and worked in IT since 2003, including small-business support, IT management, and consulting. He holds Bachelor’s and Master’s degrees in Computer Science from Arizona State University.
Matthew writes practical guides for Windows, iPhone and iPad, Microsoft Office, Outlook, Google apps, and Android. Solve Your Tech’s guides are tested on current devices or checked against official product documentation, with clear steps, sources, and update dates.
Read more about Matthew and how Solve Your Tech writes and updates its guides, or report a correction.