To restore a previous version of a Word file, open the document, click the file name at the top of the window, and select Version history. Pick the version you want, and when it opens, select Restore. This works when the file is saved in OneDrive or SharePoint. For files saved only on your PC, check File > Info > Manage Document for AutoRecover versions instead.
In this article:
- Restore a previous version in Word (OneDrive or SharePoint files)
- Restore a Version in Word for Mac or Word for the Web
- Restore a version of a file saved on your PC
- Restore a version from OneDrive in a browser
- Use Windows Previous Versions
- Frequently asked questions
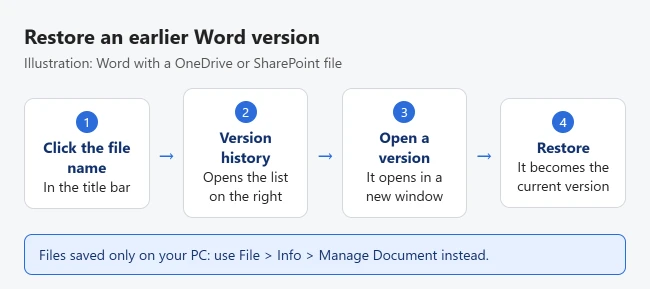
- Open the document in Word.
- Click the file name in the title bar at the top of the window.
- Select Version history. A list of saved versions opens on the right.
- Select a version to open it in a separate window.
- Select Restore to make that version the current one.
Result: The version you picked becomes the current document. Microsoft says the version that was current before is kept in Version history, so you can switch back if needed.
If you only need part of an old version, copy the text you want from it instead of restoring the whole file. According to Microsoft, you can get back the last 25 versions with a personal Microsoft account. Work and school accounts may keep more.
Restore a Version in Word for Mac or Word for the Web
Microsoft’s version history guide lists slightly different menus on other platforms:
- Word for Mac (Microsoft 365): Select the document name in the title bar, then select Browse Version History. In older versions of Office for Mac, select File > Browse Version History.
- Word for the web: Select File > Version History, select a version to open it, and then select Restore.
Result: Just like on Windows, the restored version becomes the current file. The file still needs to be stored in OneDrive or SharePoint.

Restore a version of a file saved on your PC
Version history doesn’t work for files saved only on your computer. If AutoRecover is on, Word may still have a recent copy.
- Open the document.
- Select File > Info.
- Under Manage Document, select a file labeled (when I closed without saving).
- In the bar at the top, select Restore, or select Compare to see what changed.
Result: Word opens the AutoRecover copy so you can check it before you restore it or compare it with the saved file.
These steps come from Microsoft’s guide to recovering an earlier version of a Word file. If you never saved the document, see how to recover an unsaved Word document.
Restore a version from OneDrive in a browser
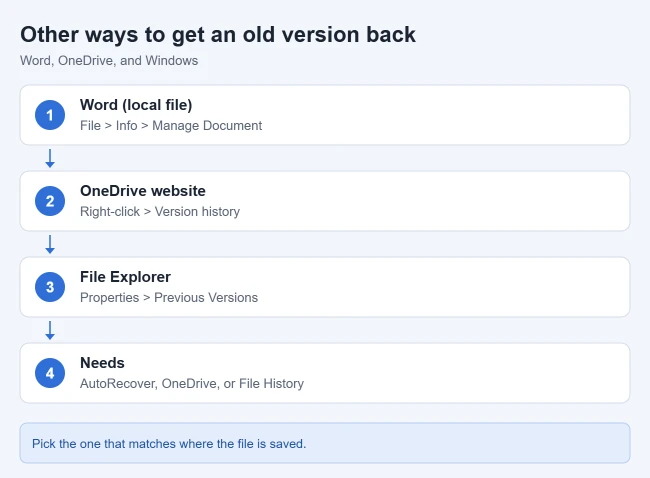
You can also restore an older version without opening Word. On the OneDrive website, right-click the file, select Version history, select the three dots next to the version you want, and select Restore. If the OneDrive app is on your PC, you can do the same thing by right-clicking the file in File Explorer. Microsoft’s OneDrive version guide has the full steps.
Use Windows Previous Versions
If File History or System Protection is turned on for the drive, Windows may keep its own copies of the file.
- In File Explorer, right-click the Word file and select Properties.
- Open the Previous Versions tab.
- Select a version and choose Open to check it, or Restore to replace the current file.
Result: The older copy opens or replaces the current file, depending on the button you chose.
If the list is empty, Windows hasn’t saved any copies of that file. When you use Compare in Word, the differences show as markup; to print without it, see how to print without comments in Word.
Frequently asked questions
Why don’t I see Version history in Word?
The file is probably saved on your PC instead of OneDrive or SharePoint. Save it to OneDrive to start keeping versions from now on. Older versions from before that won’t be available.
Does restoring a version delete the newer one?
No. Microsoft says the version you restore becomes the current one, and the version that was current moves into the list of previous versions. You can switch back if you need to.
Sharing a file with others? First see how to remove personal information from a Word document.

Matthew Burleigh is the founder, head writer, and editor of Solve Your Tech, which he launched in 2012. He has written technology tutorials since 2008 and worked in IT since 2003, including small-business support, IT management, and consulting. He holds Bachelor’s and Master’s degrees in Computer Science from Arizona State University.
Matthew writes practical guides for Windows, iPhone and iPad, Microsoft Office, Outlook, Google apps, and Android. Solve Your Tech’s guides are tested on current devices or checked against official product documentation, with clear steps, sources, and update dates.
Read more about Matthew and how Solve Your Tech writes and updates its guides, or report a correction.