To restore a deleted worksheet in Excel, find a workbook version or backup that still contains the sheet. Open that copy and recover the needed sheet, or restore the entire earlier workbook if you can discard subsequent changes. Recovery depends on having an intact earlier copy; Excel does not provide a guaranteed undelete command for a removed worksheet.
A worksheet is one tab inside an Excel workbook. Deleting that tab differs from deleting the whole .xlsx file or clearing a few cells. The methods below focus on recovering the missing tab.
Preserve your current work first
Before replacing or closing anything, save the current workbook under a different filename using Save As or Save a Copy, as offered by your version. For example, keep Budget-current-copy.xlsx separate from the original. Confirm that the copy opens and retains the newer edits you need.
For a shared workbook, coordinate with the other editors before restoring an older version. Restoration can replace their newer changes too. Keep both the current and recovered files until you have compared them.
If a tab disappeared but you did not deliberately delete it, right-click any visible sheet tab and choose Unhide. Select the missing sheet if listed, then choose OK. This reveals a hidden sheet; it does not reconstruct a deleted one.
Microsoft’s hiding guide notes that sheets marked VeryHidden by VBA do not appear in that dialog. Contact the workbook owner if that might explain the missing tab.
Microsoft 365 Version History requires a workbook stored in OneDrive or SharePoint in Microsoft 365. Uploading the file after the deletion cannot create versions of its earlier contents.
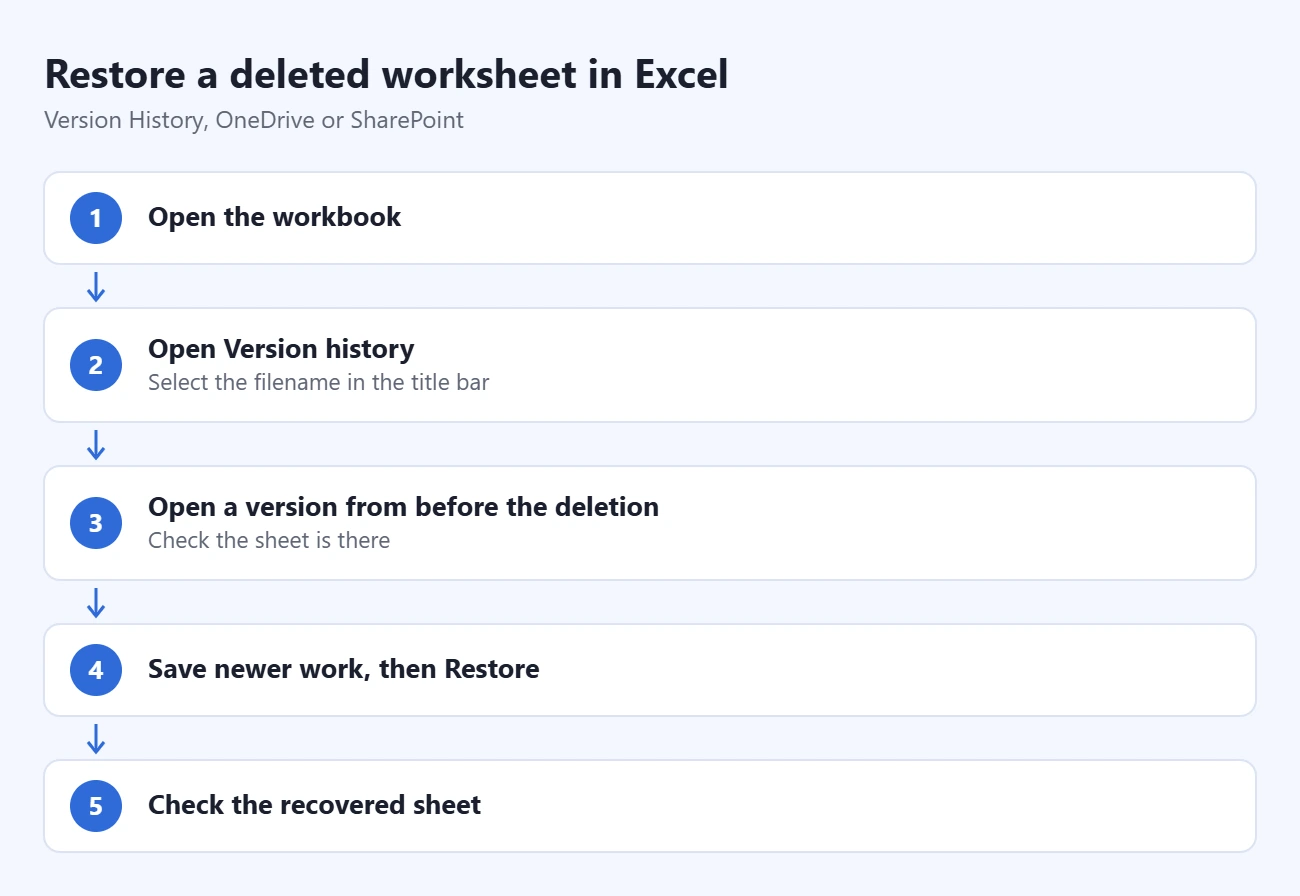
- Open the affected workbook. In current Microsoft 365 desktop Excel, select its filename in the title bar, then Version history.
- In Excel for the web, use File > Version History. On Microsoft 365 for Mac, select the filename and Browse Version History.
- Choose a version dated before the deletion and open it. Inspect the sheet and its data before deciding to restore.
- For whole-workbook recovery, preserve newer work first, then choose Restore in the earlier version.
- Check the recovered tab, important totals, and later changes against your saved current copy.
Restore replaces the whole workbook version, not just one worksheet. If you need to keep subsequent edits, recover the sheet from an intact older copy using the desktop method below instead.
If the workbook will not open, Microsoft’s folder-based recovery instructions use right-click the filename > Version history. Select the older entry’s three-dot menu or dropdown, then Restore. This also replaces the current file.
Copy the recovered sheet into your current workbook
Use an intact workbook backup, or a separately saved copy of an earlier version. Open that file and your preserved current workbook in desktop Excel. Microsoft’s worksheet copying guide describes moving or copying entire sheets between workbooks.
- In the older copy, select the sheet you need. On Windows, right-click its tab and choose Move or Copy. On Mac, use Edit > Sheet > Move or Copy Sheet.
- In To book, select your preserved current workbook. Choose the destination position under Before sheet.
- Select Create a copy so the backup retains its sheet, then choose OK.
- Inspect the copied sheet and the surrounding workbook before saving the recovered result.
Check formulas, chart sources, and external links carefully. Copying a sheet back does not guarantee that existing #REF! errors will repair themselves. Compare affected formulas with those in the intact backup.
The browser edition does not offer the same whole-sheet transfer command between workbooks. Copying cell data into a blank sheet can lose conditional formatting or other worksheet features; use desktop Excel when preserving the complete sheet matters.
To keep a recovered worksheet as its own file, see how to save one Excel sheet as a separate workbook. Choose a new book and Create a copy, then review the formulas before saving.
What if you have not saved the deletion?
If a local workbook’s last saved copy still contains the sheet, preserve the current changes under a different filename, then reopen the original saved file. Confirm that it contains the missing sheet and use the copying steps above. Avoid saving over that intact original.
This only helps if the earlier saved file survived. AutoSave or an explicit save may already have written the deletion to the original. Closing a cloud workbook does not reliably discard the change.
When AutoRecover can help
In desktop Excel for Windows, Microsoft’s recovery instructions use File > Info > Manage Workbook to check an available version labeled (when I closed without saving). For a never-saved workbook, look for Recover Unsaved Workbooks, open a candidate, and use Save As.
Inspect each candidate: it must actually contain the missing sheet. These features recover available workbook files, not individual deleted tabs, and depend on AutoRecover having been enabled. A candidate saved after deletion will not supply the lost data.
For future work, Windows Excel’s File > Options > Save offers AutoRecover timing and retention controls. Microsoft explains these in its crash-protection guide. Keep separate backups too.
What will not restore a deleted worksheet?
- Unhide: it only reveals sheets that still exist.
- Recycle Bin: deleting a tab inside a workbook does not place that tab there as a separate file.
- A blank sheet with the old name: it cannot recreate the deleted contents. Microsoft addresses missing-sheet references in its formula troubleshooting guide.
- File-recovery software: recovering a deleted workbook file is a different task; it is not a dependable way to undelete one tab from an overwritten workbook.
If no earlier version or backup contains the sheet, ask collaborators whether they have an intact copy. Otherwise the data may need to be reconstructed. Before your next cleanup, our guide to removing a worksheet in Excel Online covers backup and dependency checks.

Matthew Burleigh is the founder, head writer, and editor of Solve Your Tech, which he launched in 2012. He has written technology tutorials since 2008 and worked in IT since 2003, including small-business support, IT management, and consulting. He holds Bachelor’s and Master’s degrees in Computer Science from Arizona State University.
Matthew writes practical guides for Windows, iPhone and iPad, Microsoft Office, Outlook, Google apps, and Android. Solve Your Tech’s guides are tested on current devices or checked against official product documentation, with clear steps, sources, and update dates.
Read more about Matthew and how Solve Your Tech writes and updates its guides, or report a correction.