To connect an AirTag to your iPhone, pull the plastic tab out of the AirTag, hold it next to your unlocked iPhone, and tap Connect when the setup card appears. Pick a name, tap Agree or Continue to link it to your Apple Account, then tap Done, and the AirTag shows up in the Find My app under Items.
These steps are written for iOS 27 and work the same way on earlier versions that support AirTag. The original AirTag needs iOS or iPadOS 14.5 or later, and the AirTag (2nd generation) needs iOS or iPadOS 26.2.1 or later. You can use an iPad with the same steps. The details follow Apple’s How to add an AirTag to Find My article and its Add an AirTag in Find My guide.
What You Need Before You Start
- An iPhone or iPad on a supported version. Check Settings > General > About for your iOS version, and update in Settings > General > Software Update if it’s older than the version listed above. An AirTag can’t be set up from an Android phone or a Mac.
- Your Apple Account signed in. Your name should appear at the top of Settings. The AirTag is registered to that account.
- Bluetooth turned on. Setup happens over Bluetooth, so the AirTag can’t be found with it off. If it’s off, turn Bluetooth on from your iPhone or iPad before you start.
- Location Services on for Find My. Without it, the AirTag connects but can’t be placed on a map. Turn Location Services on under Privacy & Security in Settings.
- An AirTag that isn’t registered to anyone else. A new AirTag from the box is ready. A used one has to be removed from the previous owner’s account first.
How to Connect an AirTag to Your iPhone
- Take the AirTag out of its wrapping and pull out the plastic battery tab. The AirTag plays a short sound, which means the battery is connected.
- Unlock your iPhone and go to the Home Screen.
- Hold the AirTag right next to the iPhone. A setup card slides up from the bottom of the screen.
- Tap Connect. The iPhone pairs with the AirTag, which can take a few seconds.
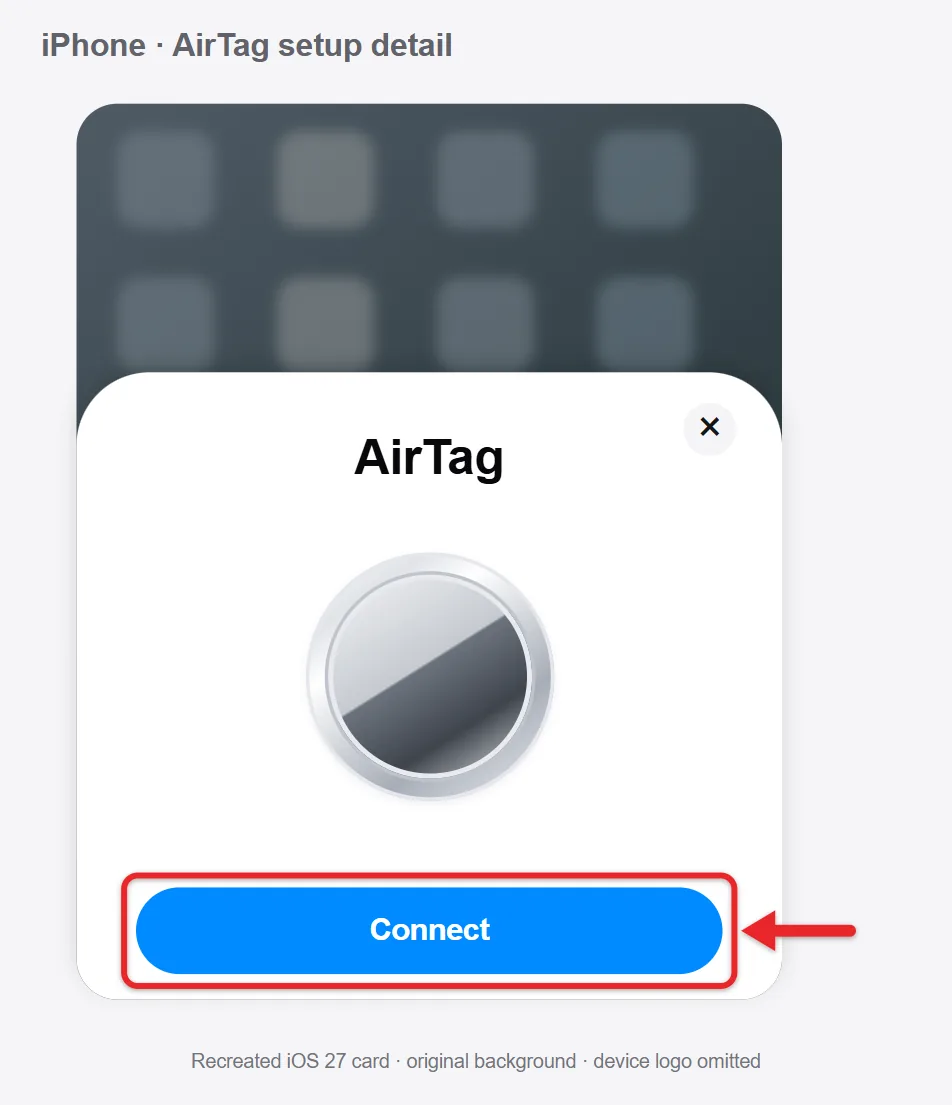
- Choose a name from the list, such as Keys or Backpack, or tap Custom Name to type your own and pick an emoji. Tap Continue.
- Review the Apple Account details shown, then tap Agree or Continue to register the AirTag to your account.
- Tap Done. You can also choose to view the AirTag in Find My.
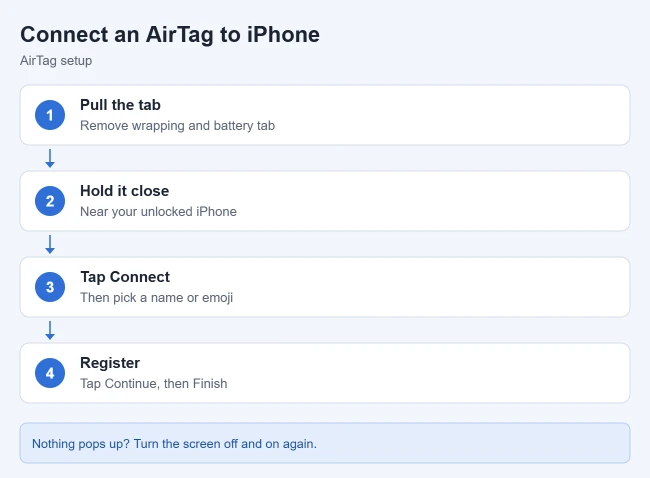
The AirTag is now linked to your Apple Account and listed in Find My under Items. From there you can see it on a map, play a sound on it, and turn on Lost Mode if it goes missing.
How to Add an AirTag From the Find My App
Use this route if the setup card doesn’t appear when you hold the AirTag near your iPhone.
- Open the Find My app.
- Tap Items at the bottom of the screen.
- Tap the Add button (the plus sign).
- Tap AirTag or Other Item. Find My starts looking for nearby items.
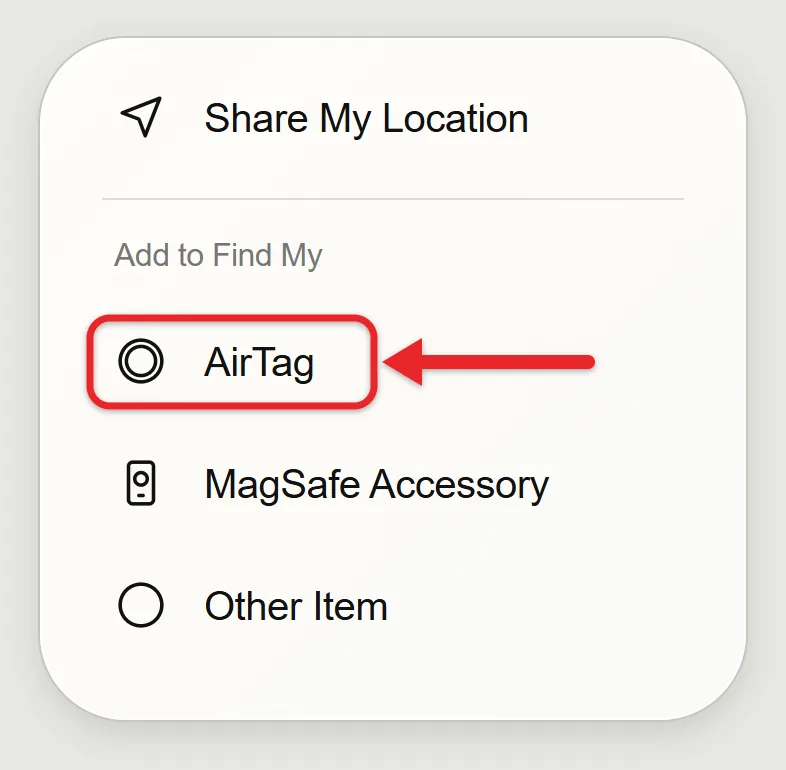
- Follow the onscreen steps to name the AirTag and register it.
The AirTag is added to your Items list, the same as with the setup card.
How to Check That It Worked
- Open Find My and tap Items.
- Tap your AirTag. Its location appears on the map with the time it was last seen.
- Tap Play Sound. The AirTag chimes so you know you’re looking at the right one.
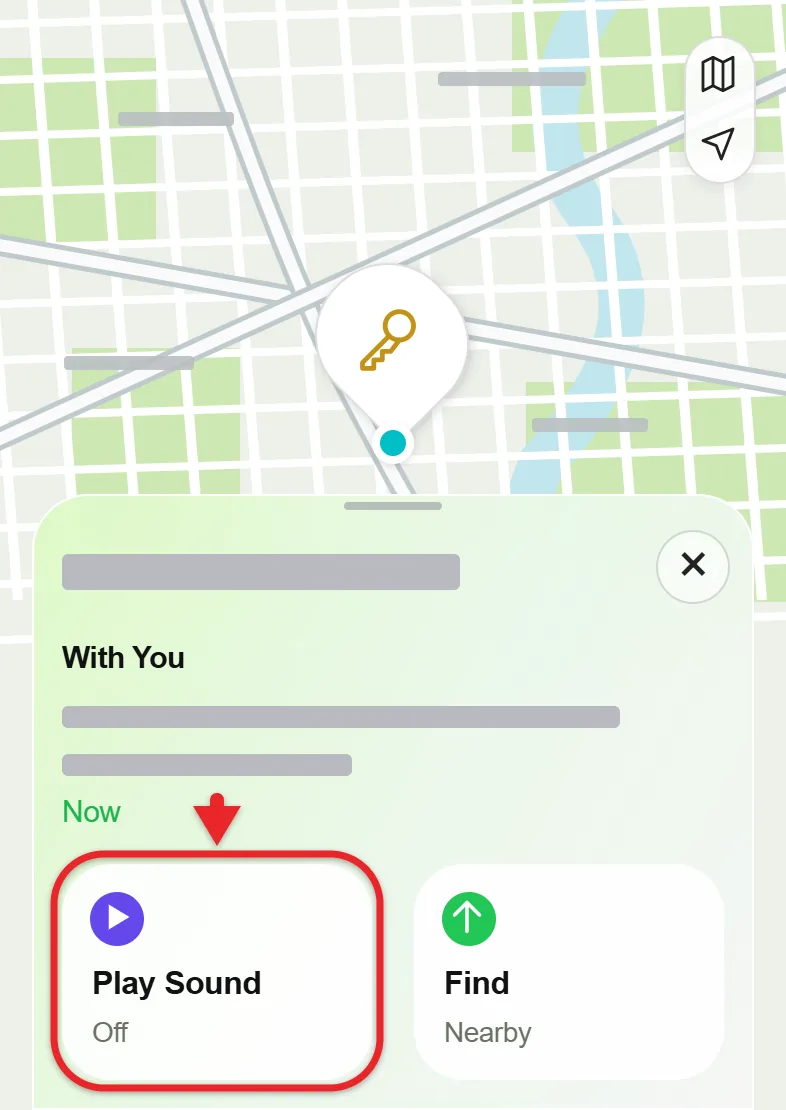
If your iPhone has an Ultra Wideband chip, you’ll also see a Find option. That’s Precision Finding, which shows an arrow and distance to the AirTag when it’s nearby. The improved, longer-range Precision Finding for AirTag (2nd generation) works with iPhone Air and iPhone 15 or later, excluding iPhone 16e. For the most accurate location, open Settings > Privacy & Security > Location Services > Find My and make sure Precise Location is on.
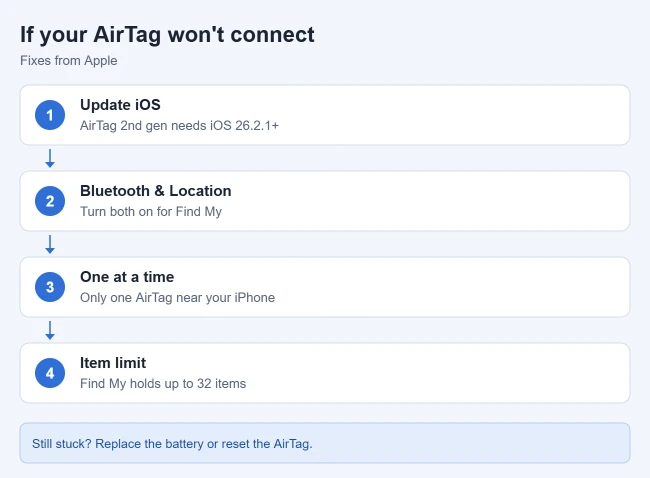
If Your AirTag Won’t Connect
Check these settings, then try again:
- Update your iPhone to the latest iOS. An AirTag (2nd generation) won’t set up on anything older than iOS 26.2.1.
- Turn on Bluetooth in Settings.
- Go to Settings > Privacy & Security > Location Services, make sure Location Services is on, then tap Find My and choose an access level. Turn on Precise Location too.
- Turn on the Find My network for your iPhone (Settings > [your name] > Find My > Find My iPhone), and turn on iCloud Keychain. The same screen also has the low-battery switch for Send Last Location in Find My iPhone.
- Tap your name in Settings and look for an alert to Update Apple Account Settings. If you see “Some iCloud data isn’t syncing,” tap Resume data sync.
- Use a strong Wi-Fi or cellular connection, then restart your iPhone.
If the setup card disappeared, press the side button to put the iPhone to sleep, wake and unlock it, and wait about 15 seconds for the card to come back. Set up one AirTag at a time. If more than one is nearby, Apple shows a “More than one AirTag detected” alert, so move the others out of range.
Replace the battery
An AirTag that’s silent when you open it may have a dead battery. Press down on the stainless steel cover, turn it counterclockwise, and lift it off. Put in a new CR2032 coin battery with the positive side up; you’ll hear a sound when it connects. Line up the three tabs on the cover with the three slots and turn it clockwise until it stops.
Coin batteries are dangerous if swallowed, so keep them away from children. Bitter-coated batteries add protection, but some don’t work with AirTag, so look for packaging marked as compatible with AirTag.
Reset the AirTag
If it still won’t connect, Apple’s How to reset your AirTag steps put it back into setup mode:
- Remove the cover and battery as described above.
- Put the battery back and press down on it until you hear a sound. On an AirTag (2nd generation), keep pressing for about 2 more seconds after the sound starts.
- Remove the battery and put it back again, pressing until you hear a sound. On an AirTag (2nd generation), wait about 12 seconds each time the battery is out.
- Repeat until you’ve heard five sounds. The fifth sound is different from the first four, which means the AirTag is ready to pair.
- Put the cover back on, restart your iPhone, and try the setup steps again.
If It Says the AirTag Belongs to Someone Else
An AirTag can be paired with only one Apple Account. If it’s registered to someone else, they have to remove it before you can add it. The owner opens Find My, taps Items, taps the AirTag, then taps Remove Item (on some versions it’s under the More button) and confirms with Remove. Removal can go faster when the AirTag is within Bluetooth range of the owner’s iPhone.
If the previous owner can’t be reached, resetting the AirTag stops it from sharing your location with them. According to Apple’s article on items connected to another Apple Account, a reset doesn’t let you pair it with your own account, and Apple can’t remove the owner’s lock for you.
If you only want to use a friend’s or family member’s AirTag, the owner can share it with you instead. Apple’s Share an AirTag guide says an AirTag can be shared with up to five people, and people it’s shared with don’t get tracking notifications while it travels with them. Everyone needs iOS 17 or later and iCloud Keychain turned on.
If Find My Says You Can’t Add More Items
Find My holds up to 32 items, including shared items and accessories. Each AirTag counts as one. AirPods in the Devices tab count too: AirPods Max count as one item, AirPods and AirPods Pro (1st generation) as two, and AirPods Pro 2 and later as three. Remove an item you no longer use to make room. AirPods also have their own alerts in Find My, such as the left behind notification, which you can turn off.
How to Rename or Remove an AirTag Later
To rename it:
- Open Find My and tap Items.
- Tap the AirTag, then tap the More button.
- Tap Change Name and Emoji, choose a new name, and tap Done.
The new name shows in your Items list. From the same screen, you can tap the AirTag’s address to see its model, serial number and firmware version.
To remove it before you give it away or sell it, open the AirTag in Items, tap Remove Item, and confirm. Keep it near your iPhone while you do this. The next owner can then set it up as new.
Frequently Asked Questions
How do I know if my AirTag battery is low?
Your iPhone shows a notification when the battery is low. You can also open Find My, tap Items, and tap the AirTag. If the battery is low, Low Battery appears under its name.
Can I set up several AirTags at once?
No. Set them up one at a time and keep only the AirTag you’re adding near your iPhone, so the right one connects. Give each one a different name so you can tell them apart.
Can I connect an AirTag to an Android phone?
No. Apple’s setup steps require an iPhone or iPad signed in to an Apple Account, and the AirTag is tracked in the Find My app. If you use Android, you’ll need a tracker made for Android instead.
Does an AirTag (2nd generation) work with an older iPhone?
It works with any iPhone that runs iOS 26.2.1 or later. The longer-range Precision Finding needs iPhone Air or iPhone 15 or later (not iPhone 16e). On other iPhones, you still get the map, Play Sound and Lost Mode, plus Precision Finding at the shorter, original range if your iPhone supports it.
Do I need Wi-Fi to set up an AirTag?
You need an internet connection, either Wi-Fi or cellular, so the AirTag can be registered to your Apple Account. If setup fails, make sure that connection is strong.
Related: How to Share Your Location on an iPhone.

Matthew Burleigh is the founder, head writer, and editor of Solve Your Tech, which he launched in 2012. He has written technology tutorials since 2008 and worked in IT since 2003, including small-business support, IT management, and consulting. He holds Bachelor’s and Master’s degrees in Computer Science from Arizona State University.
Matthew writes practical guides for Windows, iPhone and iPad, Microsoft Office, Outlook, Google apps, and Android. Solve Your Tech’s guides are checked step by step against the device or app maker’s own documentation and tested on his own devices whenever he has the hardware or software, with clear steps, sources, and update dates.
Read more about Matthew and how Solve Your Tech writes and updates its guides, or report a correction.