While it may seem like the cells in your Excel spreadsheets are fixed in place, you actually have some options available to you for changing the layout. This means that you can learn how to add a column in Excel for Office 365.
Our tutorial below is going to show you a simple method to position your cursor at the point in your spreadsheet where you wish to include an entire column of blank cells, then use one of the options on the shortcut menu to quickly add that new column and move your existing data accordingly.
Adding Columns in Excel 365
- Open your spreadsheet.
- Select the column letter to the right of where you want the new column.
- Right-click the column and choose Insert.
Our guide continues below with additional information on how to add a column in Excel for Office 365, including pictures of these steps.
Microsoft Excel has a table feature that is really helpful in sorting data. You can read more about it here if it’s something you would like to try.
When you are planning the layout of your spreadsheet, a helpful way to start is by creating headings in the first row that describe the data that will be going into those columns. This makes your data easy to identify, and can also help later if you need to sort or print your data.
But sometimes your initial plans for the spreadsheet might change and you need to add another column between some of your already-existing columns. Luckily Excel provides you with the means to add a column at any location in your spreadsheet so that you can include this new data in the desired location.
You can check out our guide on how to add columns in Excel if you want more information on using various sum formulas and functions to get totals for ranges of data.
Adding a Column in Excel for Office 365 (Guide with Pictures)
The steps in this article were performed in the desktop version of Microsoft Excel for Office 365. However, these steps will also work in most other recent versions of Excel as well.
Step 1: Open your file in Excel.
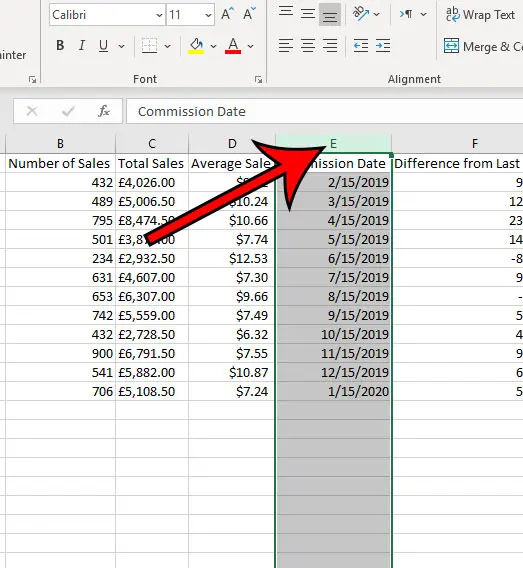
Step 2: Click the column letter to the right of where you wish to add the new column.
Step 3: Right-click on the selected column, then choose the Insert option.
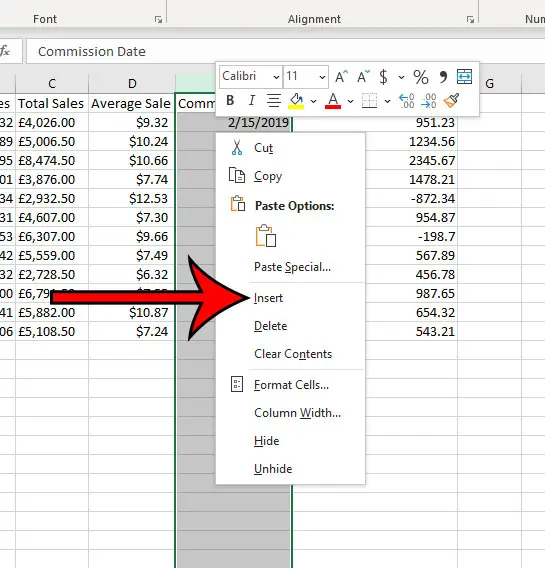
The existing data should have shifted to the right, leaving you a blank new column.
Now that you know how to add a column in Excel for Office 365 you will easily be able to add more cells of data without wasting a lot of time copying and pasting things to other cells.
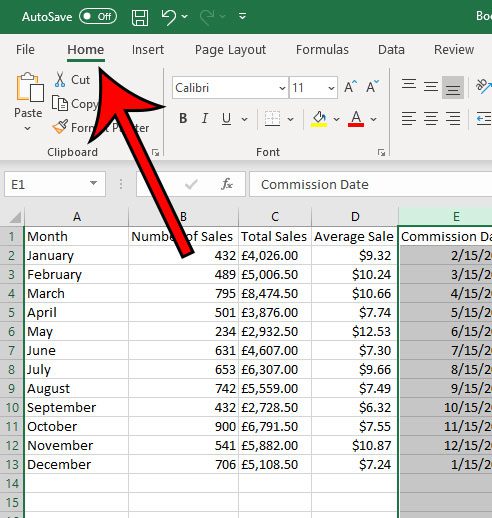
Alternatively, with a column selected, you can add a column by clicking a column letter, then clicking the Home tab at the top of the window.
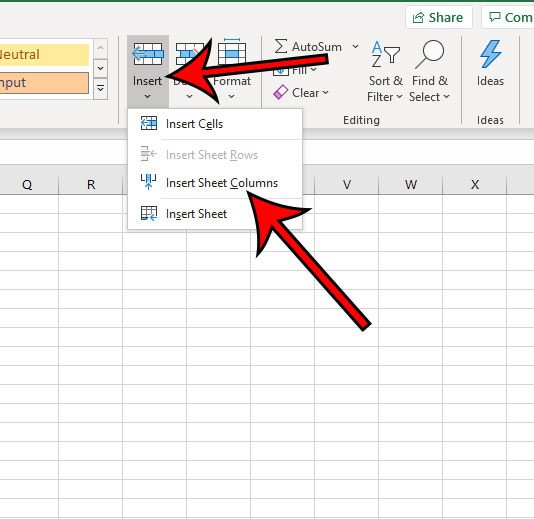
You can then click the Insert button in the Cells section of the ribbon, then select the Insert Sheet Columns option.
Since the phrase “add a column” is a little ambiguous, the section below will show you how to use a formula in Excel to add the values contained with the cells in a column.
How to Add the Values in a Column in Excel
If you aren’t interested in adding a new column to your spreadsheet, but would rather add the values contained within the cells of a column, then you are able to do that as well.
Step 1: Click in the cell where you wish to display the sum of your column values.
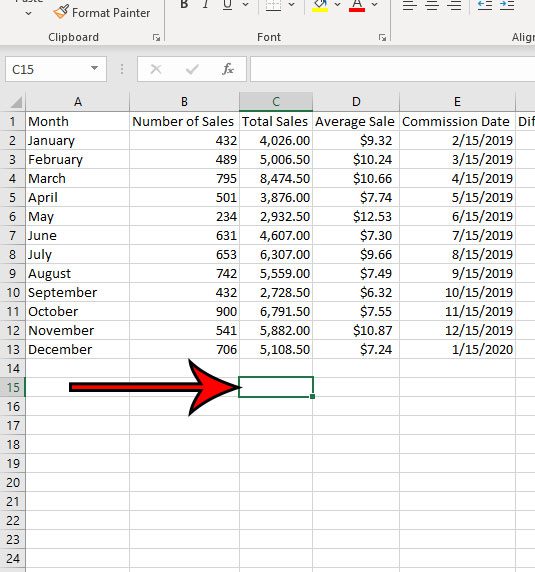
Step 2: Type the formula =SUM(XX:YY) but replace the XX with the cell location containing the first value to add, and replace YY with the cell location containing the last value to add.
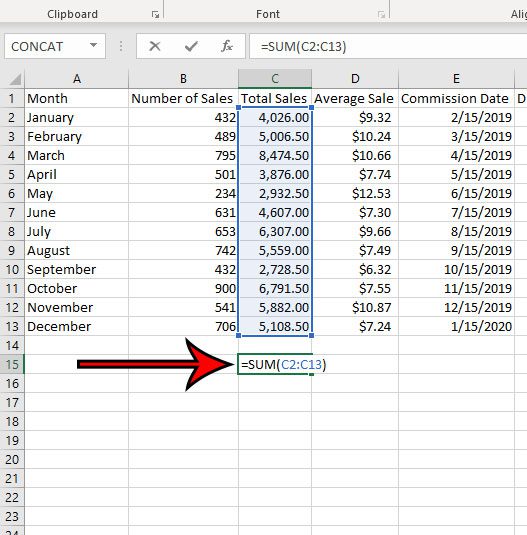
Note that I want to add the values in column C in the image above, so my formula is =SUM(C2:C13).
Step 3: Press Enter on your keyboard to execute the formula and display the sum of the specified cells.
Would you like to be able to manipulate and sort your cell data in a number of different ways? Find out how to create a table in Excel and give yourself the ability to change the order of your data, hide certain values, and generally perform many of the functions that you might need when working with data in Excel.

Matthew Burleigh has been writing tech tutorials since 2008. His writing has appeared on dozens of different websites and been read over 50 million times.
After receiving his Bachelor’s and Master’s degrees in Computer Science he spent several years working in IT management for small businesses. However, he now works full time writing content online and creating websites.
His main writing topics include iPhones, Microsoft Office, Google Apps, Android, and Photoshop, but he has also written about many other tech topics as well.