You probably have a lot of video on DVD discs because it is a great way to transport that information.
The proliferation of software that is able to create DVD videos form your home movies has made it so that just about anyone can easily produce a DVD video, but not a lot of people give a thought to a DVD backup system.
This is particularly troublesome because we tend to think of a DVD as a backup itself, and are likely to delete the original file from our hard drives when we are running out of space, because large video files take up a lot of room.
And if that DVD is the only copy of a precious family memory, then you will be pretty upset if you end up losing that footage because you did not have a DVD backup system in place.
Using DVDFab for a DVD Backup
DVDFab is a simple, one-click option for creating a DVD backup. All you need is a DVD drive on your computer, and DVDFab will take care of the rest. It can even recognize region encoding if you applied that type of information to the DVD when you were creating it. Additionally, DVDFab is a free program, although there is a paid upgraded version if you want to use some of the more advanced features of the program.
Step 1 – Navigate to the DVDFab download page, click the green Download Now button, then save the file to your computer. The downloaded installation file is approximately 20 MB in size, so take that into consideration if you want to use a computer with a slow Internet connection to create your DVD backups.
Step 2 – Double-click the downloaded file, then follow the on-screen prompts to complete the installation. During the installation, you will be given the option to create Desktop and Quick Launch icons if you want to. You will need to restart your computer to complete the installation.
Step 3 – Insert the DVD from which you want to create a DVD backup into the DVD drive of your computer.
Step 4 – Click the Start button at the bottom-left corner of your computer screen, click All Programs, click the DVDFab folder, then click the DVDFab option. DVDFab releases new version constantly, so the exact folder name and program icon that you are clicking might vary. For example, at the time this article was written, DVDFab was on version 8.
Step 5 – Click the Start DVDFab Now button at the bottom-right corner of the Welcome to DVDFab window. You can also check the Do not show again box at the bottom-left corner of the window to avoid seeing this window again in the future.
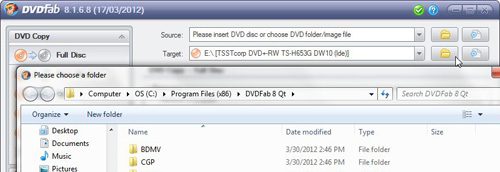
Step 6 – Click the folder icon to the right of the Target drop-down menu at the top of the window, then select the location on your computer where you would like to store your DVD backup.
Step 7 – Click the Quality drop-down menu at the bottom of the window and select the video quality that you want for the DVD backup file. For example, if you want to be able to fit the file on a standard DVD disc, then you would need to select the DVD5 option, which will reduce the file size so that it fits on a single-layer disc. If you do not need to do this, select the DVD9 option, as the quality will be higher.
Step 8 – Click the Start button to execute the DVD backup.

Matthew Burleigh has been writing tech tutorials since 2008. His writing has appeared on dozens of different websites and been read over 50 million times.
After receiving his Bachelor’s and Master’s degrees in Computer Science he spent several years working in IT management for small businesses. However, he now works full time writing content online and creating websites.
His main writing topics include iPhones, Microsoft Office, Google Apps, Android, and Photoshop, but he has also written about many other tech topics as well.

