The navigation within the Microsoft Excel 2013 program is centered around a series of tabs at the top of the window.
Each of these tabs includes a number of tools and settings that you can use to interact with the data in your spreadsheet.
There are some tabs that are displayed on every default installation of Excel 2013, and there are some tabs that are added when you have a program on your computer that is able to interact directly with Excel.
Quickbooks is one such program, and you may have noticed that you have a separate Quickbooks tab at the top of your window.
However, if you do not use this tab, then you may wish to remove it from the navigation menu. Our guide below will show you how to remove the Quickbooks tab in Excel 2013.
Delete the Quickbooks Tab in Excel 2013
The steps in this article will assume that you currently have a Quickbooks tab at the top of your Excel 2013 window and that you would like to remove it.
Step 1: Open Excel 2013.
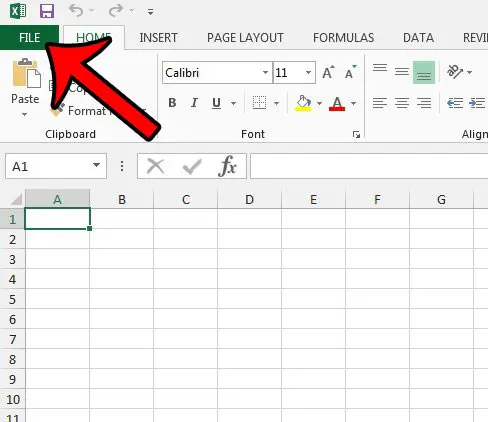
Step 2: Click the File tab at the top-left corner of the window.

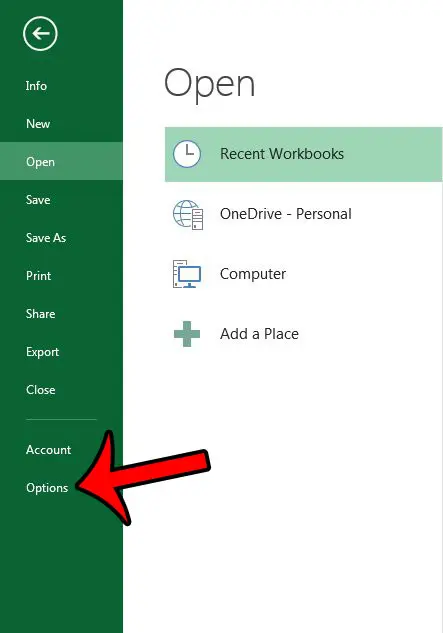
Step 3: Click the Options button at the bottom of the column on the left side of the window.

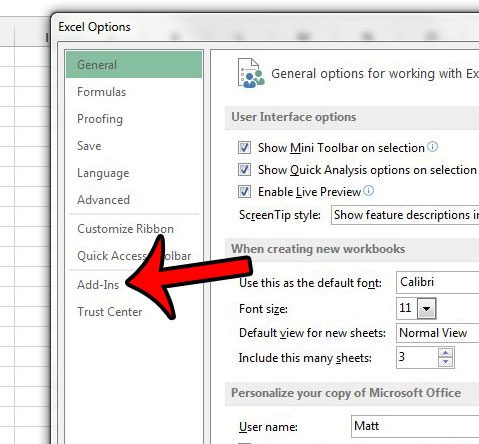
Step 4: Click the Customize Ribbon tab at the left side of the Excel Options window.

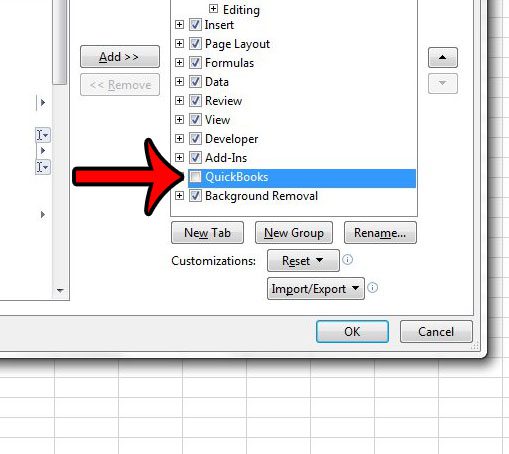
Step 5: Click the box to the left of Quickbooks in the column at the right side of the window to remove the check mark. You can then click the OK button at the bottom of the window to save your changes and close the Excel Options window.

Now that you know how to remove the Quickbooks tab from the ribbon in Excel 2010, you can use this technique to further customize the taps that appear in the application’s ribbon menu.
The Quickbooks tab should then be gone from the top of the window. Note that this will only remove the ribbon tab from within the Excel user interface. The add-in that caused this tab to appear is still active. If you wish to disable the add-in as well, then you will need to follow a slightly different process. Learn how to disable an add-in in Excel if you are not using any of the features that it offers.

Matthew Burleigh has been writing tech tutorials since 2008. His writing has appeared on dozens of different websites and been read over 50 million times.
After receiving his Bachelor’s and Master’s degrees in Computer Science he spent several years working in IT management for small businesses. However, he now works full time writing content online and creating websites.
His main writing topics include iPhones, Microsoft Office, Google Apps, Android, and Photoshop, but he has also written about many other tech topics as well.