To remove a printer from Windows 11, open Settings > Bluetooth & devices > Printers & scanners, select the printer, and select Remove, then Yes. The printer disappears from your list and from print dialogs.
This guide covers the Settings method, removing the printer’s driver and software too, Device Manager and PowerShell alternatives, and what to do when the Remove button is missing or the printer keeps coming back.
Remove a Printer in Settings
- Press Windows key + I to open Settings. You can also type Printers & scanners in the Start menu.
- Select Bluetooth & devices, then Printers & scanners. Expected result: a list of installed printers, including virtual ones like Microsoft Print to PDF.
- Select the printer you want to remove.
- Select Remove in the top-right corner, then Yes. Expected result: the printer disappears from the list.

These are the same steps as Microsoft’s printer guide. This removes the printer’s connection but leaves its driver installed.
Remove the Driver and Printer Software Too
If you’re getting rid of the printer for good, or reinstalling it to fix problems, clean up the rest:
- Printer app: go to Settings > Apps > Installed apps, select the three dots next to the printer maker’s app, and choose Uninstall. See how to uninstall a program on Windows 11.
- Driver: on the Printers & scanners page, scroll down and select Print server properties. Open the Drivers tab, select the driver, and select Remove.
- When asked, choose Remove driver and driver package to delete the files too. Removing only the driver leaves the driver files on the PC. Expected result: the driver disappears from the list.
If Windows says the driver is in use, restart the PC and try again. Brother printers also have their own uninstaller, covered in how to uninstall a Brother HL-2270DW printer.
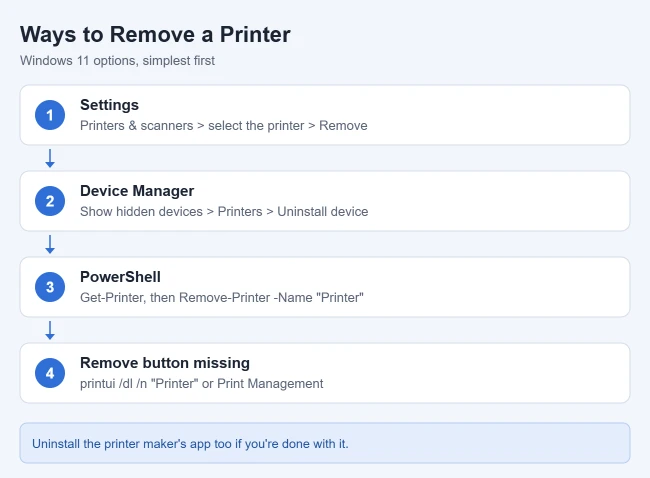
Other Ways to Remove a Printer
Device Manager
- Right-click Start and select Device Manager (see how to open Device Manager).
- Select View > Show hidden devices, then expand Printers or Print queues.
- Right-click the printer, select Uninstall device, check Attempt to remove the driver for this device, and select Uninstall. Restart afterward.
PowerShell
Open Terminal (Admin), type Get-Printer to list printer names, then run the command below with your printer’s exact name.
Remove-Printer -Name "Printer Name"If the Remove Button Is Missing
Printers added by your organization through Group Policy may not show a Remove button, as reported on Microsoft Q&A. On a work PC, ask your IT department. On your own PC, answers there suggest:
- Running
printui.exe /dl /n "Printer Name"in Command Prompt. - Opening Print Management (type
printmanagement.mscin Start) and deleting the printer there. It’s included in Pro and higher editions. - Using the Device Manager or PowerShell method above.
If the Printer Comes Back or Won’t Remove
- Cancel any jobs in its print queue first. If you need a record of what it printed, check your print history before removing it. See how to clear the printer queue.
- Unplug the printer or turn it off, so Windows doesn’t add it again automatically. Network printers can be re-added while they’re on the same network.
- Restart the PC, then check the list again.
Frequently Asked Questions
Does removing a printer delete its driver?
Not with the Settings method. The driver stays installed, which is harmless. Use Print server properties or Device Manager, above, to remove it. If you’re removing the printer because of driver trouble, you may only need to update the printer driver in Windows 11.
Why is Microsoft Print to PDF listed?
It’s a built-in virtual printer that saves documents as PDFs. You can remove it, but it’s often useful.
How do I remove a printer in Windows 10?
Go to Settings > Devices > Printers & scanners, select the printer, and select Remove device. To add one again later, see how to add a printer in Windows 11.
If you’re removing an HP Officejet because it stopped working, try a reset first. Here’s how to reset the Officejet 6600.

Matthew Burleigh is the founder, head writer, and editor of Solve Your Tech, which he launched in 2012. He has written technology tutorials since 2008 and worked in IT since 2003, including small-business support, IT management, and consulting. He holds Bachelor’s and Master’s degrees in Computer Science from Arizona State University.
Matthew writes practical guides for Windows, iPhone and iPad, Microsoft Office, Outlook, Google apps, and Android. Solve Your Tech’s guides are tested on current devices or checked against official product documentation, with clear steps, sources, and update dates.
Read more about Matthew and how Solve Your Tech writes and updates its guides, or report a correction.