To change how text looks on an iPad, open Settings, tap Display & Brightness, then Text Size, and drag the slider. Turn on Bold Text for heavier letters, change the Lock Screen clock font while editing the Lock Screen, and pick fonts inside apps such as Pages. iPadOS has no setting to replace the system font itself.
Text on the iPad looks a little too small at arm’s length, or a note you’re writing just doesn’t look the way you want it to. Each has its own fix.
What You Can and Can’t Change on an iPad
“Change the font” can mean five different things on an iPad, and each one lives in its own spot. Knowing which one you want saves a lot of tapping around in Settings.
| What you want | Where to do it |
|---|---|
| Bigger or smaller text across apps | Settings > Display & Brightness > Text Size |
| Text larger than the normal maximum | Settings > Accessibility > Display & Text Size > Larger Text |
| Thicker, heavier letters | Settings > Accessibility > Display & Text Size > Bold Text |
| A different size in just one app | Text Size control in Control Center, or Accessibility > Per-App Settings |
| A new look for the Lock Screen clock | The Lock Screen editor |
| A different typeface in a document or email | The formatting tools inside Pages, Notes or Mail |
| More typefaces to choose from | Font apps from the App Store, managed in Settings > General > Fonts |
What isn’t on that list is the font used for menus, labels and app icons across the whole system. iPadOS has no setting to replace the system font, so anything that promises to swap it for a different typeface everywhere is working outside what Apple supports. The size and weight of that font are adjustable, though, and for most readability problems that’s what actually helps.
The settings below come from Apple’s iPad User Guide, which currently offers pages for iPadOS 27, iPadOS 26 and earlier versions. Labels can move slightly between versions, so if a name doesn’t match exactly, use the search field at the top of Settings.
Change the Text Size for the Whole iPad
This is the fastest fix when everything feels too small (or too big). It affects Mail, Contacts, Calendar, Notes and other apps that support Dynamic Type, which is Apple’s name for text that resizes to match your setting.
- Open the Settings app.
- Tap Display & Brightness.
- Tap Text Size.
- Drag the slider to the right for larger text or to the left for smaller text. The sample text on the screen changes as you drag, so you can stop when it reads comfortably.
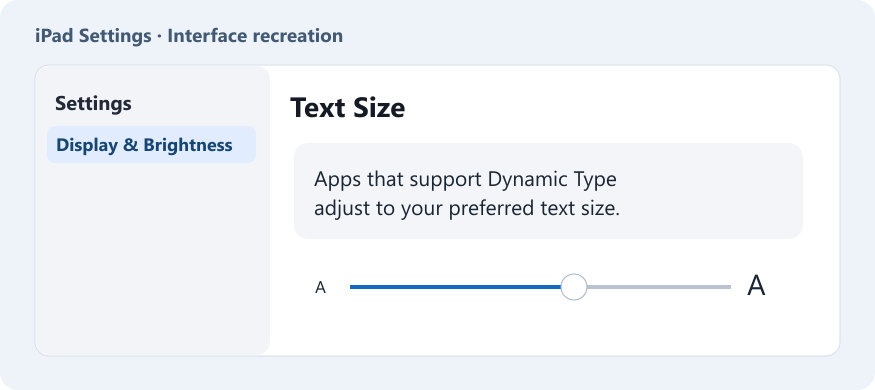
Apple’s article on changing the font size on iPhone and iPad lists both this slider and the larger accessibility sizes described next.
Go Beyond the Normal Maximum With Larger Text
If the Text Size slider is already all the way to the right and text is still hard to read, the Accessibility version of the setting has more room.
- Open Settings and tap Accessibility.
- Tap Display & Text Size, then tap Larger Text.
- Turn on Larger Accessibility Sizes to add extra steps at the top of the slider.
- Drag the slider until the text is the size you want.
One caution before you push it to the top: Apple warns that very large text can make some buttons hard to tap, because the labels grow while the space around them doesn’t. If a button gets cut off or crowded, step the slider back one or two notches.
Make Text Heavier With Bold Text
Sometimes the size is fine and the problem is that thin letters fade into the background, especially in bright light. Bold Text makes the system font thicker everywhere.
- Open Settings and tap Accessibility.
- Tap Display & Text Size.
- Turn on Bold Text.
The same Display & Text Size screen also holds options such as Increase Contrast and Button Shapes, which can help if the issue is contrast rather than size. Apple’s page on display and text size preferences lists these alongside Bold Text and Larger Text. Apple’s page on making text easier to read on iPad also mentions Display Zoom, which enlarges text and other parts of the interface at the same time; on models that offer it, look for it in Settings if you want everything bigger, not just the words.
Change Text Size for One App
A system-wide change isn’t always what you want. Picture a recipe app propped on the kitchen counter: you’d like big text there, but not in Mail, where it would push half the inbox off the screen. iPadOS has two ways to handle this.
Use the Text Size Control in Control Center
This is the quick route for the app you’re looking at right now.
- Open the app whose text you want to change.
- Open Control Center by swiping down from the top-right corner of the screen.
- Tap the Text Size control and adjust the slider.
- If you don’t see the control, tap the plus button in the top-left corner of Control Center, tap Add a Control, then choose Text Size.
When you adjust the slider from inside an app, you may see a choice between applying the size to that app only or to all apps. Pick the app-only option to leave everything else alone.
Set It Permanently With Per-App Settings
Per-App Settings is the place to manage these exceptions in one list, and it can also change color and motion options for a single app.
- Open Settings and tap Accessibility.
- Tap Per-App Settings, then tap Add App.
- Choose the app from the list. You can also choose Home Screen & App Library to change the text under app icons.
- Tap the app’s name in the Per-App Settings list and adjust its text size and other display options.
Apple’s page on customizing visual settings for individual apps shows the full set of options available there. This list is also the first place to check later if one app’s text looks different from everything else and you can’t remember why.
Change the Lock Screen Clock Font
The big clock on the Lock Screen has its own font choices, separate from every setting above. You change it in the Lock Screen editor.
- Press the top button to show the Lock Screen, then touch and hold an empty part of it.
- Tap Customize to edit the current Lock Screen, or tap the plus button to make a new one. Enter your passcode if the iPad asks for it.
- Tap the time. A panel opens with font options for the clock, plus other choices such as a more transparent look.
- Pick a font. On versions that support it, you can also drag the bottom-right corner of the clock to make it taller.
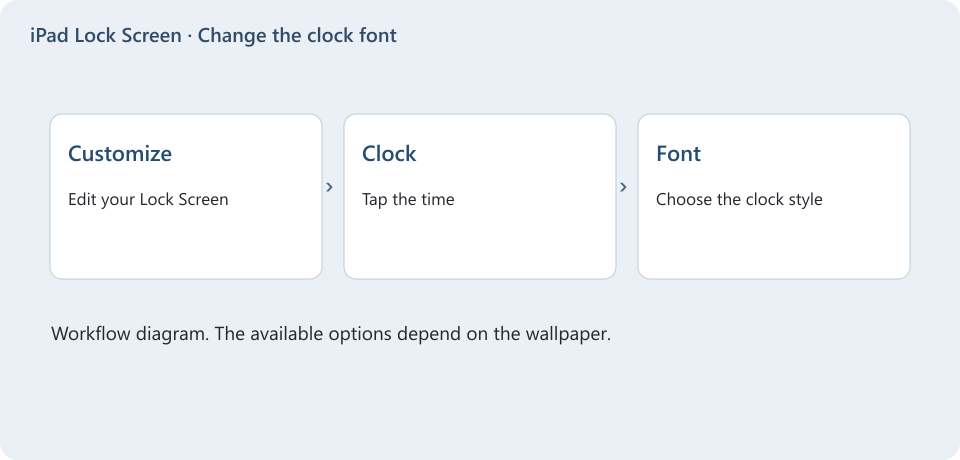
- Save your changes. For a new Lock Screen, tap Add; when editing an existing one, look for a Done or Add button in the corner.
The clock options you see depend on the wallpaper you chose, so a photo Lock Screen may offer different looks than a color or emoji one. Swiping left or right in the editor tries different color filters on the wallpaper, which also changes how the clock stands out. Apple’s page on creating a custom Lock Screen on iPad covers widgets, photos and the other parts of the editor. The iPhone version of this editor works much the same way, and changing the Lock Screen on an iPhone walks through it if you use both devices.
Change Fonts Inside Apps
For the text you write yourself, the font is a formatting choice inside each app, not a system setting. How much control you get depends on the app.
Pages: Full Font Control
Pages has a real font picker, and it’s where installed fonts are most useful. Say you’re making a flyer for a garage sale and want the headline in something bolder than the body text.
- Select the text you want to change (or tap where you’re about to type).
- Tap the brush button to open the Format controls.
- Tap Font, then tap the font you want.
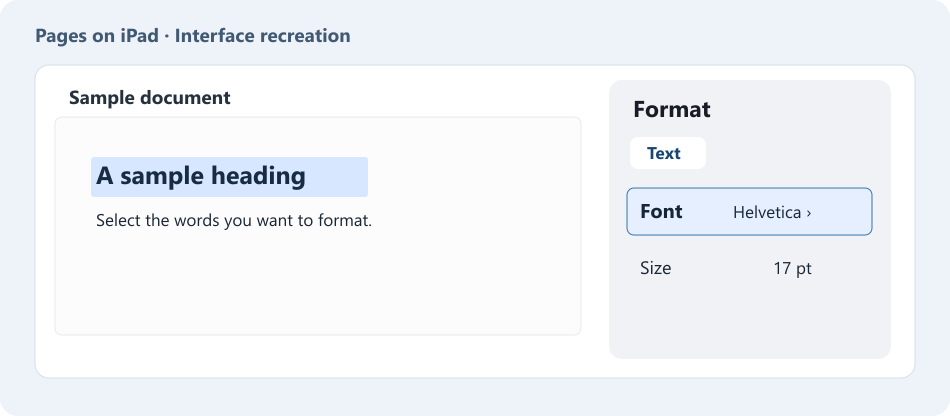
- To pick a style such as bold or light, tap the arrow next to the font’s name. Change the size with the controls next to Size, and use Text Color for color.
While you type, Pages also shows formatting shortcuts in the bar above the onscreen keyboard. If that bar is missing, Apple’s note says to go to Settings > General > Keyboards and turn on Shortcuts. Apple’s page on changing the look of text in Pages for iPad covers the rest of the text options.
Notes: Text Styles Instead of Fonts
Notes doesn’t offer a font list. Instead, it gives you text styles that change how your writing looks.
- In a note, select the text or tap where you want to start typing.
- Tap the format button.
- Choose a style, such as Heading, or apply bold, italic or highlighting.
For a packing list, a Heading for each bag and plain body text under it does most of what a font change would. Apple’s page on creating and formatting notes on iPad describes the formatting options. If you need a specific typeface, write the document in Pages instead.
Mail: Font Style and Color in a Message
- Start a new email or a reply and select the text you want to change.
- Tap the format button above the keyboard.
- Change the font style and color, apply bold or italic, or turn lines into a bulleted or numbered list.
These options are described in Apple’s page on writing and sending email on iPad. How the formatting looks on the other end may depend on the recipient’s email app. The iPhone steps for the same task are in bolding text in iPhone emails.
Install More Fonts From the App Store
If the fonts in Pages aren’t enough, you can add more. Apple’s method uses apps from the App Store that contain fonts.
- Open the App Store and get an app that contains fonts. Read the description first so you know whether the fonts are free or part of a purchase.
- Open the app and follow its prompts to install the fonts.
- To see and manage what you’ve installed, open Settings, tap General, then tap Fonts.
Here’s the part that trips people up: Apple describes installed fonts as fonts for documents you create on the iPad. Expect to see them in apps that support installed fonts, such as Pages; they don’t replace the system font used in menus and Settings. Apple’s page on installing and managing fonts on iPad has the official steps.
To remove a font you no longer want, start in Settings > General > Fonts. On most versions you can tap a font there and look for an option to remove it. If you don’t see one, check the app that installed it, since the font came from that app.
Go Back to the Default Look
Every change here is a slider or a switch, so undoing it means reversing the same step. Apple doesn’t mark a “default” position on the sliders, so aim for the middle of the Text Size slider if you want something close to how the iPad looked out of the box.
- Text size: drag the slider in Display & Brightness > Text Size back toward the middle.
- Larger Text: turn off Larger Accessibility Sizes in Accessibility > Display & Text Size > Larger Text.
- Bold Text: turn the switch off in Accessibility > Display & Text Size.
- One app: open Accessibility > Per-App Settings, tap that app and set its text size back to the system default (or remove the entry if your version offers that).
- Lock Screen clock: open the editor again and pick a different font, or switch to another Lock Screen.
- Text in a document: select it and choose the original font or style again in the app.
If Text Still Looks Wrong
One app ignores the text size. The Text Size setting only reaches apps that support Dynamic Type. Some third-party apps have their own text size option in their settings, so check there. A Per-App Settings entry or the Control Center control may also be overriding the system size for that app.
Buttons are cut off or overlapping. The text is too large for that screen’s layout. Lower the Larger Text slider a step or two, or set a smaller size just for that app.
A new font doesn’t appear in an app. Check that it’s listed under Settings > General > Fonts. If it is, the app you’re using probably doesn’t support installed fonts. Try the same text in Pages to confirm the font works.
You can’t find the clock font options. Make sure you tapped Customize and then tapped the time itself, not the date or a widget.
iPad Font Questions
Can I make the iPad use a different system font?
No. iPadOS has no setting to replace the font used in menus, Settings and the Home Screen. You can change its size and weight, and you can choose different fonts in documents.
Does the text size setting carry over to my iPhone?
Treat each device as separate and set text size on each one. The iPhone has the same Text Size, Larger Text and Bold Text settings, and changing the font on an iPhone covers that device, including its Lock Screen clock.
Can I make only the Home Screen labels bigger?
Yes. In Accessibility > Per-App Settings, tap Add App and choose Home Screen & App Library, then set a text size for that entry. Your apps keep the system size.
Do font apps cost money?
Some are free and some charge for their fonts, either up front or as an in-app purchase. The App Store listing shows the price and in-app purchases before you get the app, so check it before installing.
What else can I change on the Lock Screen?
The same editor handles the wallpaper, widgets and color filters. Whether message previews appear there is a notification setting rather than a Lock Screen design choice, which showing text messages on the iPad Lock Screen explains.
Start with the Text Size slider, since it fixes most “the font looks wrong” complaints in a few seconds, then move on to Bold Text or a per-app size only if you need more.

Matthew Burleigh is the founder, head writer, and editor of Solve Your Tech, which he launched in 2012. He has written technology tutorials since 2008 and worked in IT since 2003, including small-business support, IT management, and consulting. He holds Bachelor’s and Master’s degrees in Computer Science from Arizona State University.
Matthew writes practical guides for Windows, iPhone and iPad, Microsoft Office, Outlook, Google apps, and Android. Solve Your Tech’s guides are checked step by step against the device or app maker’s own documentation and tested on his own devices whenever he has the hardware or software, with clear steps, sources, and update dates.
Read more about Matthew and how Solve Your Tech writes and updates its guides, or report a correction.