To add a device to your Amazon account, register it during that device’s setup or sign in inside the Amazon service app you want to use. Kindle, Fire TV, Fire tablet and Echo use different setup flows. There is no single Amazon shopping-app button that registers every kind of device.
Use the account that owns the books, purchases or membership you need. After setup, confirm that the correct device or app appears in Amazon’s device management. Registration and access to paid content are separate: signing in does not give you every subscription.
Before You Start
- Charge or power the device and have a working internet connection.
- Have your Amazon sign-in information and access to any email or phone used for verification.
- Have your Wi-Fi name and password for a device that needs to join your network.
- Check which account should be used, especially if family members have separate accounts. If you only want a relative to read your books, you can share a Kindle book through Amazon Family Library without registering their device to your account.
If it is already registered to another account, read the account-switching section below first. Deregistration removes access to that account’s digital content and services. Do not factory-reset a device simply because a library looks empty. For a streaming stick, our guide on how to deregister a Fire TV Stick from an Amazon account covers the steps.
Register a Kindle E-Reader
Amazon’s Kindle Paperwhite setup guide offers setup on the Kindle or, on supported models, setup with a phone. Other Kindle models can have different screens.
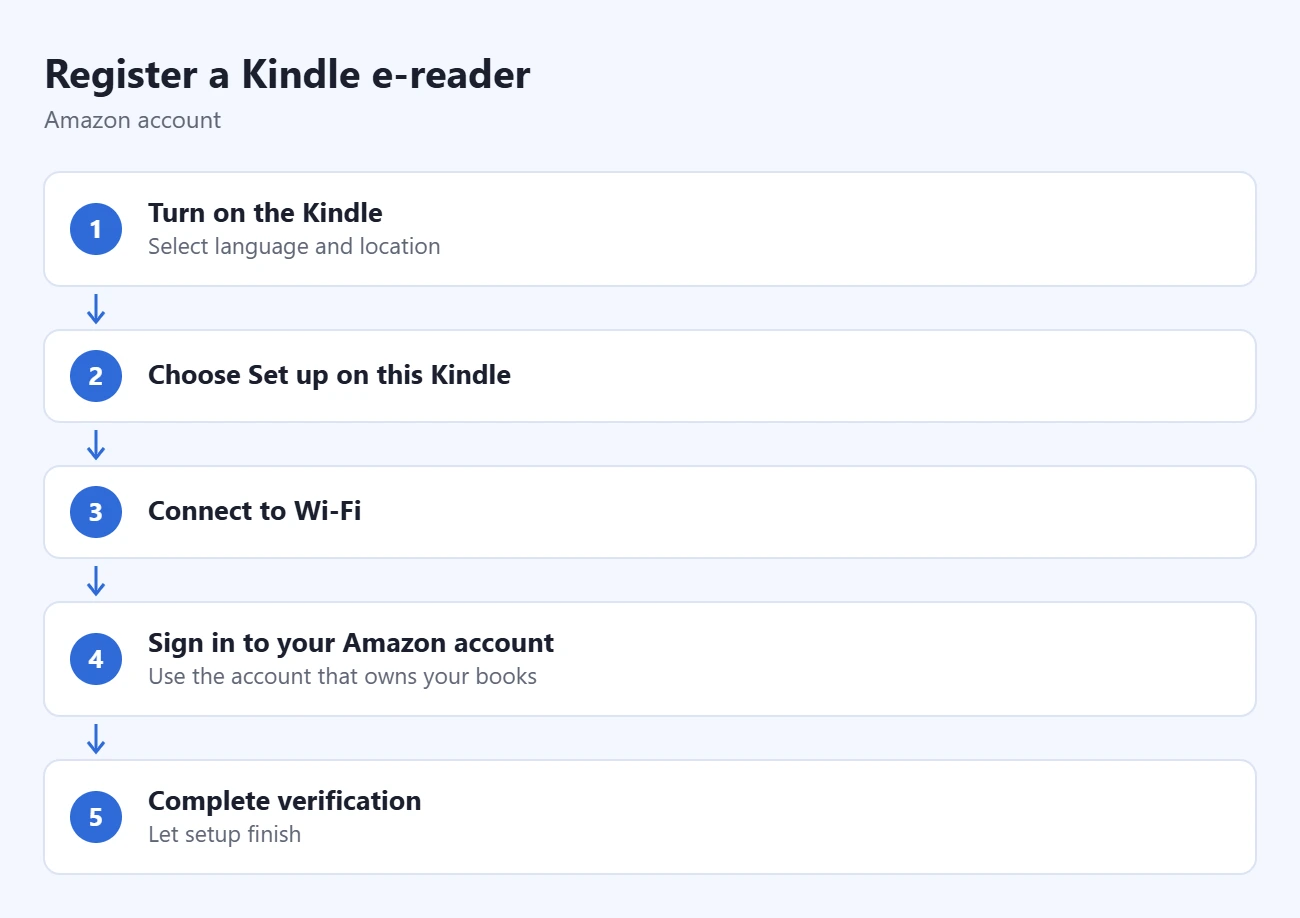
- Turn on the Kindle and select the language and location requested during setup.
- Choose Set up on this Kindle if you want to complete registration on the reader.
- Choose your Wi-Fi network and enter its password.
- Follow the Amazon-account registration prompt, entering the account that owns the books you want.
- Complete any verification shown and let setup finish. Check the account and library before downloading books.
For supported phone setup, choose Set up with your phone. The Kindle app must be installed and have Amazon Device Simple Setup enabled. Amazon lists Bluetooth on the phone and Location Services on Android among its requirements. Follow your model’s instructions rather than assuming an older Kindle offers this method.
Register a Fire TV or Fire TV Stick
Insert the remote’s batteries and keep it close to the Fire TV during setup. It should pair automatically; if it does not, hold Home for about 10 seconds and follow the on-screen prompt. Select the television’s matching HDMI input before following the Wi-Fi and account steps below. Amazon’s standard Fire TV Stick setup instructions cover remote pairing and models supplied with a wall power adapter.
Power requirements depend on the model. For Sticks supplied with a power adapter, use that adapter and a wall outlet. The Fire TV Stick HD (2nd Generation) instead supports Direct Power using its included USB-C cable connected to the television’s USB-A port. Amazon’s HD (2nd Generation) setup guide describes that connection and a 5V/1A wall-adapter alternative when the USB port is too far away or provides insufficient power. Follow your particular model’s instructions rather than assuming every Stick uses the same power connection.
Once the home screen loads, open an app and play content you are entitled to watch to confirm the remote, internet connection, and video output work. Complete TV volume or power-control setup if your remote and television support it. A streaming app may need its own sign-in or subscription; registering the Fire TV does not subscribe you to every service.
Use the Amazon account prompt in Fire TV setup. This is different from signing into the separate Prime Video app on a Roku or another smart TV. If that app is on the wrong account, see how to sign out of Prime Video on a Roku.
- Power the Fire TV and select its input on the television. Connect a Stick to HDMI and power it using the method specified for your model, as explained below.
- Follow the language and network prompts. Connect to Wi-Fi using the method offered on screen.
- At the Amazon sign-in stage, follow the displayed option. Amazon’s Fire TV Stick setup guide supports scanning the on-screen QR code or visiting the displayed Amazon web address and entering its activation code.
- On your phone or computer, check that the account you are using is the intended one before approving registration.
- Return to the TV and finish the remaining setup questions. Confirm that the home screen loads under the correct account.
If you only want to link the Prime Video app on another TV or streaming player, use our Prime Video TV sign-in guide. Use the web address and current code shown by that app; do not substitute a Fire TV activation route for a different service.
Register an Echo in the Alexa App
For Echo, Echo Dot and related models covered by Amazon’s Echo setup instructions:
- Install or update the Alexa app on your phone and sign in to the intended Amazon account.
- Plug in the Echo.
- Open Alexa and select Devices.
- Open the add-device control and choose Add Device, then Amazon Echo.
- Choose Echo, Echo Dot, Echo Pop and more when that option matches your device, and follow the connection instructions.
- Check that the newly configured Echo is available in the Alexa app.
Other Echo models can require their own setup instructions. Adding a third-party smart light to Alexa is also a different task from registering an Echo to your Amazon account.
Register a Fire Tablet
During the tablet’s setup, connect to Wi-Fi and complete its Amazon-account registration prompt. Confirm the account before proceeding, then finish setup and check the available library.
If registration fails, Amazon’s Fire tablet registration help says to check the displayed time, network connection, software and login information. For its documented update route, open All Settings > Device Options > System Updates and install an available update. Labels may vary by model and software.
Register an App on a Phone, Tablet or Computer
Install the particular service’s supported app, open it and use its Amazon sign-in or registration prompt. For reading, start with Amazon’s Kindle app setup and registration help, which links to the current installation instructions for each platform.
Signing into Amazon Shopping does not replace signing into Kindle or Prime Video. If the service opens an empty library, check its signed-in account before assuming your purchases disappeared. Once the Kindle app and your Kindle e-reader share one account, you can sync Kindle books with your iPhone.
Confirm Registration and Handle Errors
Visit Amazon’s Devices management page while signed into the same account. Amazon’s registration troubleshooting guide links directly to it and recommends confirming the device or app there. Choose the relevant device category if the list is grouped.
- No device or the wrong library: check the account used on the device and on the website.
- Registration fails: verify connectivity, current software and correct login information.
- Verification email or text missing: check spam and blocked-message settings. Amazon says registration verification codes described in its help are valid for ten minutes; follow the expiry and instructions on your own screen.
- No password set, but a password required: Amazon documents a temporary-password method in its shopping app under Account Settings, Login & Security, then Password > Create. Use it only for the stated passwordless-account situation. Do not share the password or verification code.
If the Device Is Registered to the Wrong Account
Before deregistering: it will disconnect the device from that account’s digital content and Amazon services. Confirm that you can sign into the replacement account and understand which library you will use.
Amazon’s deregistration instructions say to sign in, visit Devices, choose the specific device and select Deregister. Then register it again through its setup or app sign-in process using the intended account. Deregistration does not transfer purchases into the replacement account.
For a used device that is still associated with someone else’s account, ask its owner or seller to remove it from their account, or contact Amazon through its official help. Do not use someone else’s credentials.
Common Questions
Do I have to enter the serial number on Amazon’s website?
Do not assume there is a universal serial-number registration form. Use your device’s documented setup or the app’s sign-in process. A serial number can help identify a device during support, but it is not a substitute for account authentication.
Is every account limited to ten devices?
Do not use a blanket ten-device limit. Device registration, simultaneous streams, downloads and content licenses can have different service-specific rules. Follow the message and current help for the service that reports a limit.
Once registration is confirmed, test the particular library or service you intended to use. If it still fails, note the device model, exact message and last completed step before contacting Amazon support.

Matthew Burleigh is the founder, head writer, and editor of Solve Your Tech, which he launched in 2012. He has written technology tutorials since 2008 and worked in IT since 2003, including small-business support, IT management, and consulting. He holds Bachelor’s and Master’s degrees in Computer Science from Arizona State University.
Matthew writes practical guides for Windows, iPhone and iPad, Microsoft Office, Outlook, Google apps, and Android. Solve Your Tech’s guides are tested on current devices or checked against official product documentation, with clear steps, sources, and update dates.
Read more about Matthew and how Solve Your Tech writes and updates its guides, or report a correction.