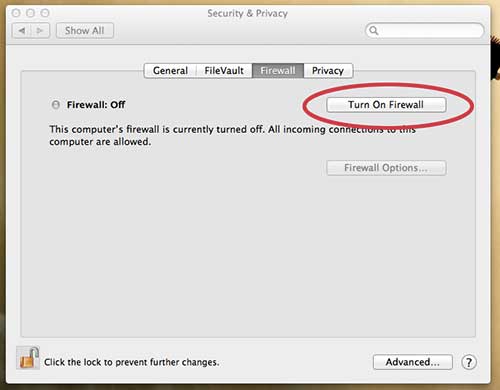
To turn on the firewall in OS X Mountain Lion, open System Preferences, click Security & Privacy, click the Firewall tab, click the lock and enter your password, then click Turn On Firewall. On current versions of macOS, the setting has moved to System Settings > Network > Firewall.
Apple explains that a firewall protects your Mac from unwanted contact started by other computers on the internet or a network. Its macOS High Sierra firewall guide uses the same System Preferences steps as Mountain Lion, and Block connections to your Mac with a firewall covers current macOS.
In this article:
- Turn on the firewall in Mountain Lion
- Step-by-step with pictures
- Turn on the firewall in current macOS
- Firewall options explained
- FAQs
How to Turn On the Firewall in OS X Mountain Lion
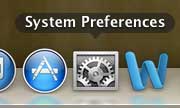
- Choose Apple menu > System Preferences.
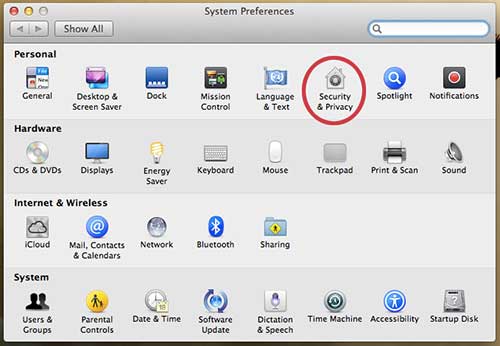
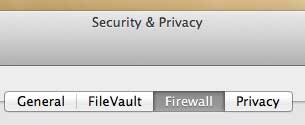
- Click Security & Privacy, then click the Firewall tab.
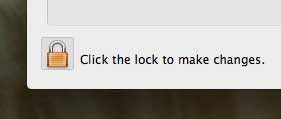
- Click the lock icon and enter an administrator name and password.
- Click Turn On Firewall.
- Click the lock icon again to prevent further changes.

Result: The Firewall tab shows the firewall is on. Click Firewall Options if you want to control which apps can accept incoming connections.
Enable the Mac Firewall in Mountain Lion (Guide with Pictures)
Step 1: Click the System Preferences icon in the Dock.
Step 2: Click Security & Privacy in the Personal section.
Step 3: Click the Firewall tab.
Step 4: Click the lock icon at the bottom-left corner and type your password.
Step 5: Click Turn On Firewall, then click the lock again.
How to Turn On the Firewall in Current Versions of macOS
- Choose Apple menu > System Settings.
- Click Network in the sidebar.
- Click Firewall. You may need to scroll down.
- Turn on Firewall.

Result: The firewall is on. Click Options to fine-tune it; Apple notes the Options button is disabled until the firewall is turned on.
Firewall Options Explained
Apple’s Change Firewall settings on Mac page describes each option:
- Block all incoming connections – blocks connections to nonessential services and apps, including sharing services, while keeping basic internet services working.
- Add or remove apps – choose specific apps or services and set each to allow or block incoming connections.
- Automatically allow built-in software – lets built-in apps signed by a valid certificate authority receive connections without asking you.
- Automatically allow downloaded signed software – does the same for downloaded apps signed by a valid certificate authority.
- Enable stealth mode – your Mac ignores probing requests such as ping, so it’s harder to discover on a network.
Apple also points out that turning on a sharing service, such as file sharing, opens a port through the firewall. For extra protection, turn off sharing services you don’t use.
You may also want to password-protect a folder on your Mac.
Frequently Asked Questions
Is the Mac firewall on by default?
Not necessarily. Open the Firewall setting on your Mac to see whether it’s on, and turn it on if it isn’t.
Will the firewall slow down my internet?
The firewall controls incoming connections, not your normal browsing. Apple warns that blocking a specific app could affect that app’s performance.
Should I turn on stealth mode?
It’s optional. Apple says stealth mode stops your Mac from answering unauthorized requests such as ping, while authorized apps still get responses.
Why is the Options button grayed out?
Turn on the firewall first. Apple says Options is disabled while the firewall is off.

Matthew Burleigh is the founder, head writer, and editor of Solve Your Tech, which he launched in 2012. He has written technology tutorials since 2008 and worked in IT since 2003, including small-business support, IT management, and consulting. He holds Bachelor’s and Master’s degrees in Computer Science from Arizona State University.
Matthew writes practical guides for Windows, iPhone and iPad, Microsoft Office, Outlook, Google apps, and Android. Solve Your Tech’s guides are tested on current devices or checked against official product documentation, with clear steps, sources, and update dates.
Read more about Matthew and how Solve Your Tech writes and updates its guides, or report a correction.