To save all your photos from Facebook at once, export your information. On a computer, click your profile picture, go to Settings & privacy > Settings, open Meta Account (or Accounts Center), then Your information and permissions > Export your information. Click Create export, choose Export to device, pick only the information that holds your photos, and click Start export. Facebook emails you when the file is ready, and you have 4 days to download it.
These steps follow Facebook’s Export a copy of your Facebook information help page as it read in October 2026. This guide covers Facebook in a web browser on a computer and the Facebook app on iPhone and Android.
In this guide
- What you need, and what the export leaves out
- Export all your photos on a computer
- Export all your photos in the iPhone or Android app
- Download the file and find your photos
- Send photos to another service, save one photo, or save a Page’s photos
- Troubleshooting and common questions
Before you start
You don’t need any extra software. Facebook builds the file for you and delivers it as a ZIP file, which is a single compressed file that holds many folders and files. Check these points first:
- Your password. Facebook asks for it before an export begins and may ask for extra verification.
- Access to your email. The “ready” notice goes to the notification email you choose and also appears as a Facebook notification.
- Free storage space. Facebook says you need enough space on the device for the export. High media quality and more categories make the file larger. A computer is usually the easier place to store a big file.
- An active profile. Facebook says you may not be able to export from a profile that is deactivated or scheduled for deletion. Reactivate it, or cancel the deletion, first.
What the export does not include
The export covers what you shared from the profile you select. Facebook’s list of export categories says it won’t include information that someone else shared, such as another person’s photos that you’re tagged in. It also won’t include photos you already deleted, because Facebook removes deleted content from its servers. To keep a friend’s photo, save it one at a time using the single-photo steps below.
If you have additional Facebook profiles, each one is exported separately. Run the export once for every profile whose photos you want.
How to save all your Facebook photos on a computer
Facebook is moving accounts from Accounts Center to Meta Account settings. You may see either name in step 3. Both lead to the same export tool.
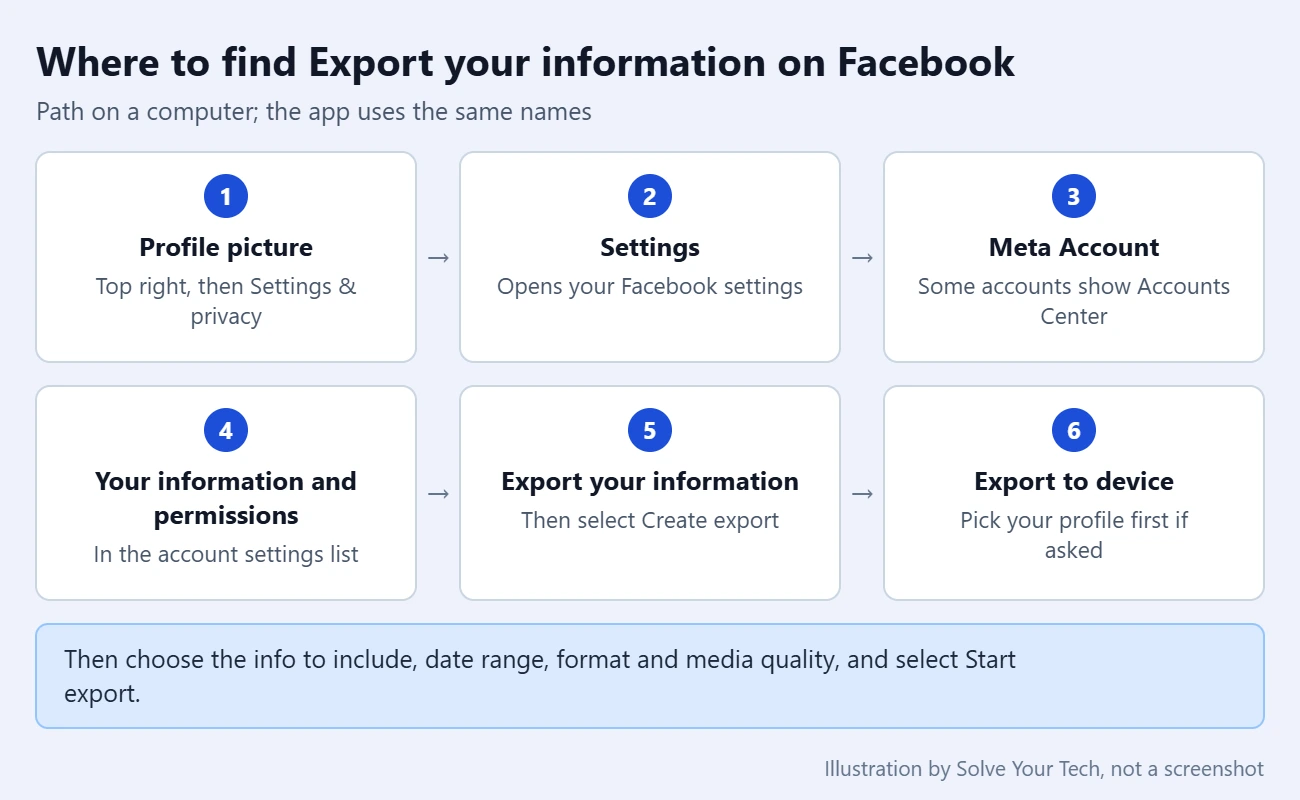
- Go to facebook.com and click your profile picture in the top right, then click Settings & privacy.
- Click Settings.
- Click Meta Account (some accounts show Accounts Center), then click Your information and permissions.
- Click Export your information, then Create export.
- Select the profile you want to export from. If you see Next, click it.
- Select Export to device.
- Choose the specific info to export. For photos only, clear the other categories and keep the ones that hold your pictures. That is normally Posts, plus Stories if you want those. The exact category names can change, so read the short description under each one.
- Set the date range. Pick the widest range offered to get every photo, or a narrower one for a single year or trip.
- Set the format. Choose HTML unless you plan to import the data into another service.
- Set the media quality. Choose the highest quality for the best copies of your photos, as long as you have the storage space.
- Check the notification email, then click Start export. Enter your password if asked.
The request now appears in the Export your information tool as in progress. You can close the page. Facebook does not publish a preparation time. It depends on how much you asked for, so a small request can finish quickly and many years of photos and videos can take much longer.
Which settings to pick
| Setting | Choice for saving photos | Why |
|---|---|---|
| Information | Only the categories with your photos | One type of information makes a smaller file that is easier to search. |
| Date range | The widest range offered | A shorter range skips older photos. |
| Format | HTML | Opens like a web page. JSON is a machine-readable format meant for moving data to another service. |
| Media quality | Highest available | Better copies, but a larger file. Lower it if storage is tight. |
| Destination | Export to device | Gives you a ZIP file you keep yourself. |
How to save all your Facebook photos on iPhone or Android
The Facebook app uses the same export tool. Facebook’s help page lists the same steps for the iPhone app and the Android app.
- Open the Facebook app and tap Menu (the three-line icon or your small profile picture). Facebook’s help page places it in the top left. In some versions of the app it sits in a different corner.
- Tap Settings & privacy, then tap Settings.
- Tap Meta Account (or Accounts Center), then tap Your information and permissions.
- Tap Export your information, then Create export.
- Select the profile, then tap Next.
- Select Export to device.
- Choose the specific info, date range, format, notification email and media quality, using the table above.
- Tap Start export.
You can request the export on your phone and download the finished file later on a computer. The request belongs to your account, not to the device you used.
Download the file and find your photos
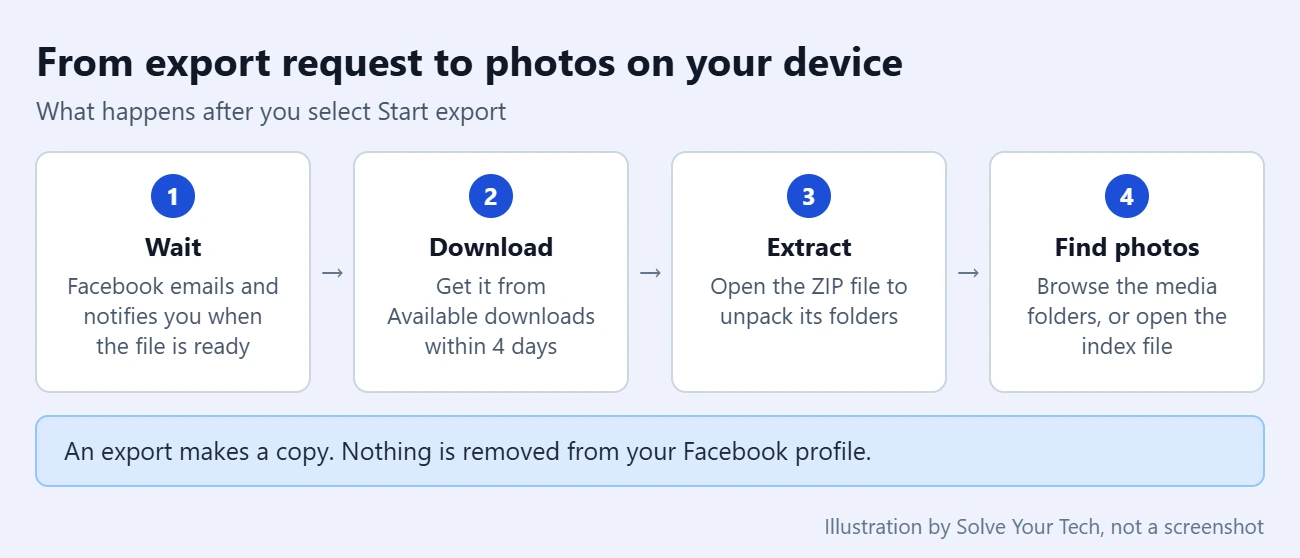
Download within 4 days. Facebook says a finished export is available for 4 days. After that the request expires and you have to create a new one.
- Wait for the email and the Facebook notification that say your export is ready.
- Go back to Export your information using the same path as before.
- Find the export under Available downloads and download it. Enter your Facebook password when asked. A large export can be split into more than one file, so download each one listed.
- Extract the ZIP file. In Windows 11, right-click the file in File Explorer and choose Extract All. On a Mac, double-click it. On iPhone, tap it in the Files app. On Android, open it in your file manager app.
- Open the extracted folder. If you chose HTML, Facebook says the folder contains an HTML file named index that opens in your web browser like a web page, along with folders that hold your images and videos.
To get the picture files themselves, browse the folders instead of the index page. Photos from posts are normally in a media folder inside the posts folder, grouped by album. Folder names have changed over time, so if you don’t see them, search the extracted folder for .jpg to list every photo.
Confirm it worked
Open several photos from different years and compare the number of albums with what you see on your Facebook profile under Photos. Do this before you delete anything from Facebook or close the account. If photos are missing, create a new export with a wider date range or more categories.
Cancel or remove an export
An export doesn’t change or remove anything on your profile. If you no longer want the file sitting in your account, open Export your information and delete the export. Facebook also lists earlier requests in a past requests section. The copy you already downloaded stays on your device until you delete it yourself.
Keep the file private. Facebook notes that an export can contain private information. Store it somewhere only you can reach, and be careful about emailing it or uploading it to a shared folder.
Send photos straight to another service
If you’d rather not handle a ZIP file, Facebook can copy your original photos and videos to a cloud storage service. Follow the same steps, but select Export to external service instead of Export to device. Then:
- Choose one of the services Facebook lists, then select Next.
- Choose how often to export. A repeating export keeps the copy up to date.
- Select Connect and sign in to the other service. Read what access you are granting before you approve it.
- Enter your Facebook password if asked, customize the export, and select Start export.
The list of services can change, so use only what appears on that screen. Facebook says devices and external services support different types of information, so some categories may not be offered for a transfer.
Just need one photo?
A full export is more than you need for a single picture. Facebook covers these steps in Save a photo on Facebook to your phone or computer.
- Computer: Click the photo, click Options (the three dots), and select Download.
- iPhone: Tap the photo to expand it, tap Options, then tap Save Photo.
- Android: Tap the photo to expand it, tap Options, then tap Save to phone.
Some albums also show a Download album choice in the album’s three-dot menu on a computer. Facebook’s help pages don’t document it, so treat it as a shortcut that may or may not appear for you.
Save photos from a Facebook Page you manage
A Page has its own download tool, and you need Facebook access with full control of the Page. On a computer, click your profile photo, click See all profiles, and switch into the Page. Click the Page’s profile photo, then Settings & privacy > Settings, and click Download your information in the left column. Choose the format, media quality, date range and categories, then click Request a download. The link expires after 4 days. See Facebook’s Download a copy of your Facebook Page for details.
Troubleshooting
- You can’t find Meta Account. Look for Accounts Center or See more in Accounts Center at the top of Settings. Older guides call the tool Download your information. You can also type “export” in the search box at the top of Settings.
- The profile can’t be selected. A deactivated profile, or one scheduled for deletion, can’t be exported. Reactivate it or cancel the deletion, then try again.
- No email arrived. Check the spam folder and confirm which notification email you chose. You don’t need the email. Open Export your information and look under Available downloads.
- The download expired. Create a new export. Requests expire after a few days as a security measure.
- The download fails or the device runs out of space. Download on a computer over Wi-Fi, free up storage, or create a new export with a lower media quality or a shorter date range.
- Photos are missing. Check the date range and the categories you selected. Photos that other people posted, and photos you deleted, are not part of an export.
- Facebook asks for extra verification. This is expected. Complete it on a device where you normally use Facebook.
Frequently asked questions
Can I download all my Facebook photos at once?
Yes. The Export your information tool packages the photos and videos you shared from a profile into a file you download. You can’t select all the photos on your profile page and download them from there. The export tool is Facebook’s method for a bulk copy.
Does exporting delete my photos from Facebook?
No. An export makes a copy. Your photos, albums and posts stay on Facebook exactly as they were until you remove them yourself.
Should I choose HTML or JSON?
Choose HTML if you want to look through your photos and posts yourself. Facebook describes it as the easy-to-view format. JSON is a machine-readable format that helps when you upload the data to another service. Both come as a ZIP file that includes your image and video files.
Will the export include photos I’m tagged in?
Not the photos themselves if someone else posted them. Facebook says an export won’t include information another person shared, such as their photos that you’re tagged in. Save those one at a time, or ask the person who posted them for the originals.
Can I save my photos after deleting my Facebook account?
No. Facebook says you can’t access your profile information once the profile is deleted. Export first, download the file, and check it. Our guide to permanently deleting your Facebook account covers the rest. If you only plan to step away for a while, see how to deactivate Facebook but keep Messenger, and export before you deactivate.
Are third-party Facebook photo downloaders safe?
You don’t need one for your own photos. Browser extensions and apps that promise bulk downloads are not made by Facebook, and they can break when Facebook changes its site. Never give a third-party tool your Facebook password.
Next step
Once the photos are on your device, copy the extracted folder to a second place, such as an external drive or your cloud storage, so one failed device doesn’t cost you the only copy. To revisit old posts on Facebook itself, see how to see Memories on Facebook. Related: how to use Facebook Marketplace.

Matthew Burleigh is the founder, head writer, and editor of Solve Your Tech, which he launched in 2012. He has written technology tutorials since 2008 and worked in IT since 2003, including small-business support, IT management, and consulting. He holds Bachelor’s and Master’s degrees in Computer Science from Arizona State University.
Matthew writes practical guides for Windows, iPhone and iPad, Microsoft Office, Outlook, Google apps, and Android. Solve Your Tech’s guides are tested on current devices or checked against official product documentation, with clear steps, sources, and update dates.
Read more about Matthew and how Solve Your Tech writes and updates its guides, or report a correction.