When you click the Start menu at the bottom-left corner of your screen in Windows 10 you are able to access almost everything on your computer. Part of this access includes some shortcuts in the left column of the Start menu, such as Settings, Pictures, People, and more.
This section of shortcuts can be personalized, allowing you to add more icons to that list, or remove unwanted ones. Our tutorial below will show you how to make these customizations.
Adding or Removing Start Menu Folders in Windows 10
The steps in this article were performed on a Windows 10 laptop. Note that there are specific options for the items that can be placed in this location, and you will be able to add or remove them on an individual basis.
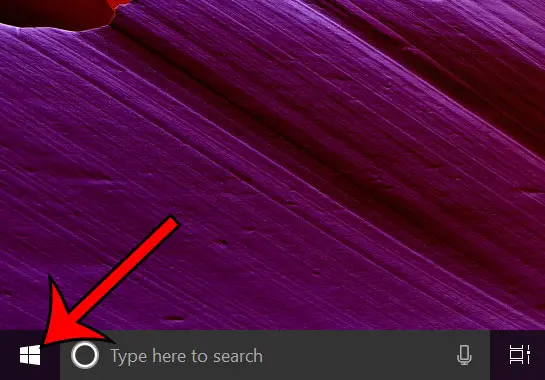
Step 1: Click the Start button at the bottom-left corner of the screen.

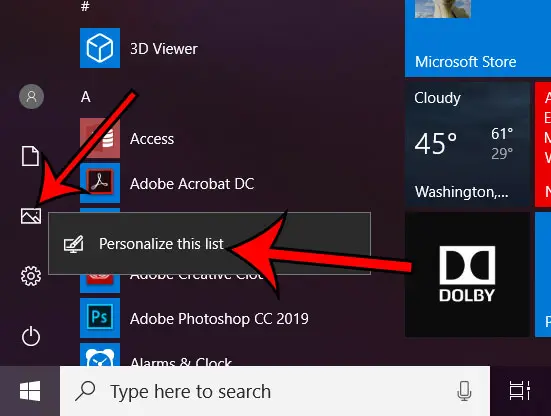
Step 2: Right-click on one of the icons in the left column, then choose the Personalize this list option.

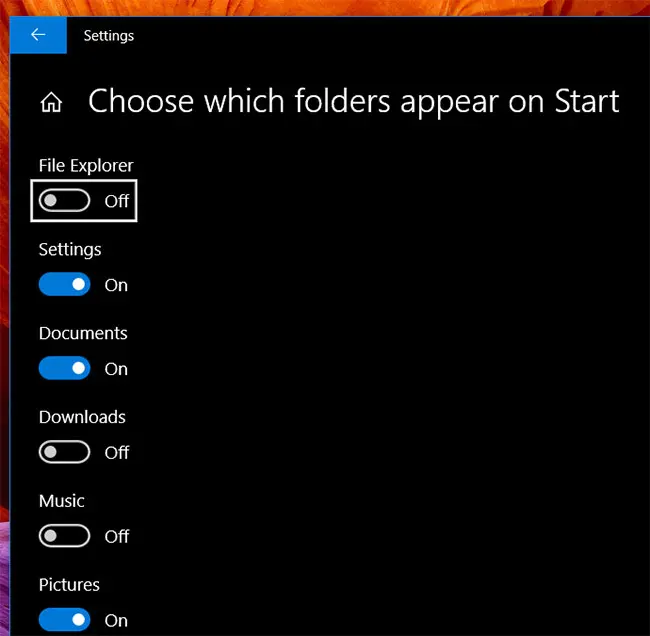
Step 3: Click the button under each setting to choose whether to add or remove it from the list.

Now that you know how to personalize Start folders in Windows 10, you can control whether or not different options like the following:
- File Explorer
- Settings
- Documents
- Downloads
- Music
- Pictures
Are things that you will be able to access when you are browsing in the Start folder on your computer.
Looking for an easier way to access the apps that you use the most? Find out how to add your most-used apps to the Start menu in Windows 10 so that you can launch them even faster.

Matthew Burleigh has been writing tech tutorials since 2008. His writing has appeared on dozens of different websites and been read over 50 million times.
After receiving his Bachelor’s and Master’s degrees in Computer Science he spent several years working in IT management for small businesses. However, he now works full time writing content online and creating websites.
His main writing topics include iPhones, Microsoft Office, Google Apps, Android, and Photoshop, but he has also written about many other tech topics as well.