To set up a Windows computer for remote access, open Settings > System > Remote Desktop, turn on Remote Desktop, and select Confirm. Write down the name shown under PC name, then connect from another device by entering that name in a Remote Desktop app. This built-in feature only works if the computer you want to reach runs a Pro edition of Windows.
If your computer runs Windows Home, or it is a Mac, you can still set it up for remote access with a free tool such as Chrome Remote Desktop or TeamViewer. This guide covers each option separately, along with how to confirm the setup works, how to turn it off again, and what to check when a connection fails.
Which Remote Access Method Should You Use?
Remote access means controlling one computer from a different device. You see the remote computer’s screen in a window and can open its files and programs as if you were sitting in front of it. The computer you want to reach is often called the host or remote PC, and the device you are holding is the client.
The right method depends mostly on which computer you want to reach and where you will connect from.
| Method | Computer you want to reach | Best for | Cost |
|---|---|---|---|
| Windows Remote Desktop | Windows 11 or Windows 10 Pro | Connecting from another device on the same home or office network | Included with Windows Pro |
| Chrome Remote Desktop | Windows, Mac, or Linux | Reaching your own computer over the internet, including Windows Home PCs | Free |
| TeamViewer | Windows, Mac, or Linux | Reaching several personal computers from one account | Free for personal use; paid for work use |
| Mac Screen Sharing | Mac | Controlling a Mac from another computer on your network | Included with macOS |
Before You Start
A few things need to be true no matter which method you choose:
- You must set up remote access while you are physically at the computer. You cannot turn it on from somewhere else after the fact.
- The computer has to be powered on and connected to the network or internet when you want to reach it. A computer that is shut down cannot accept a connection.
- You need an administrator account on the computer to change these settings on Windows.
- Every account that can sign in remotely should have a strong, unique password.
- A work or school computer may block remote access by policy. Ask your IT department before you install anything on it.
Warning: Only set up remote access for yourself or for someone you know and trust. A person who connects can see your screen, open your files, and use your programs. Microsoft warns that tech support scammers use remote connections, so do not give access to anyone who contacts you unexpectedly by phone, email, or a pop-up message.
If you need help from Microsoft itself, start the contact yourself, for example by live chatting with Microsoft Support.
Method 1: Turn On Remote Desktop in Windows 11 or Windows 10
Remote Desktop is Microsoft’s built-in remote access feature. According to Microsoft, the remote PC must run a Pro edition of Windows (Enterprise and Education editions also qualify). Windows Home cannot accept incoming Remote Desktop connections, although a Home PC can still be used to connect to another computer.
Step 1: Check Your Windows Edition
- On the computer you want to reach, select Start > Settings.
- Select System > About.
- Under Windows specifications, look at Edition.
If it says Windows 11 Pro or Windows 10 Pro, continue to Step 2. If it says Home, skip to Method 2 or Method 3, or upgrade to Windows 11 Pro. Microsoft also explains the upgrade in Upgrade Windows Home to Windows Pro.
Step 2: Enable Remote Desktop
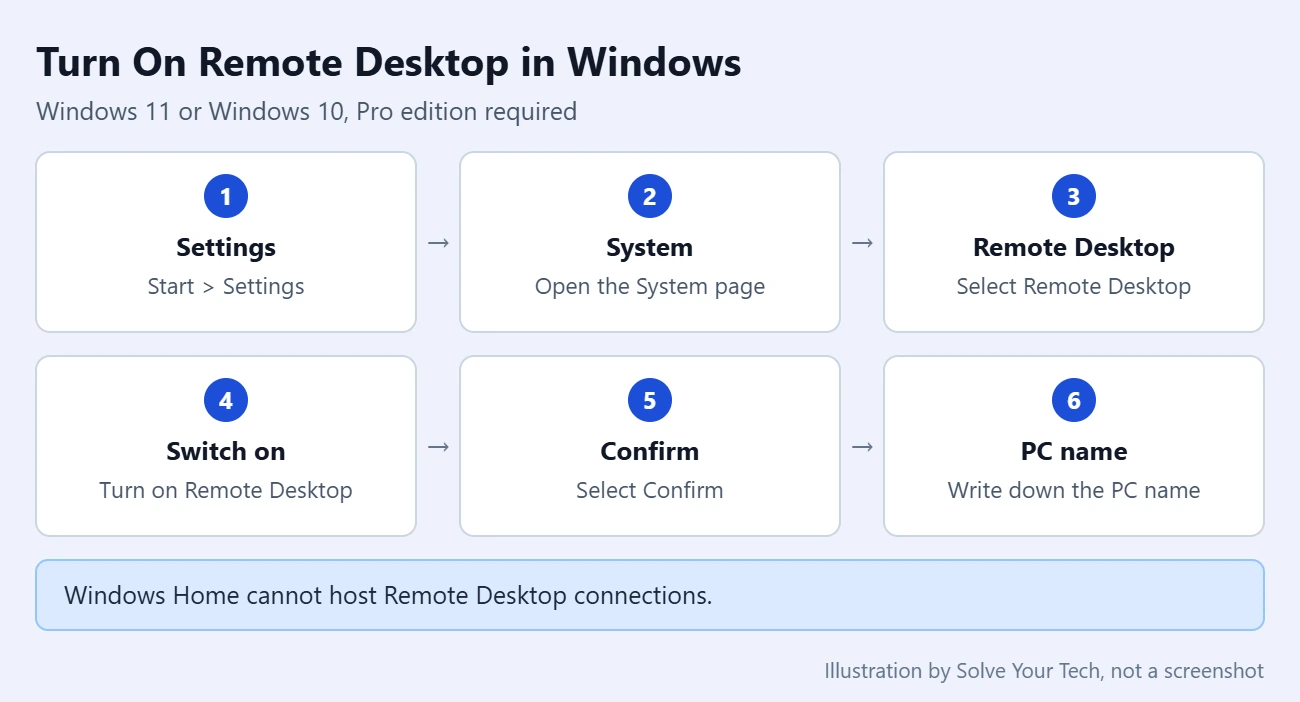
- Select Start > Settings > System > Remote Desktop.
- Turn on the Remote Desktop switch. A confirmation box appears.
- Select Confirm.
- Find the name listed under PC name and write it down. You will type this name when you connect.
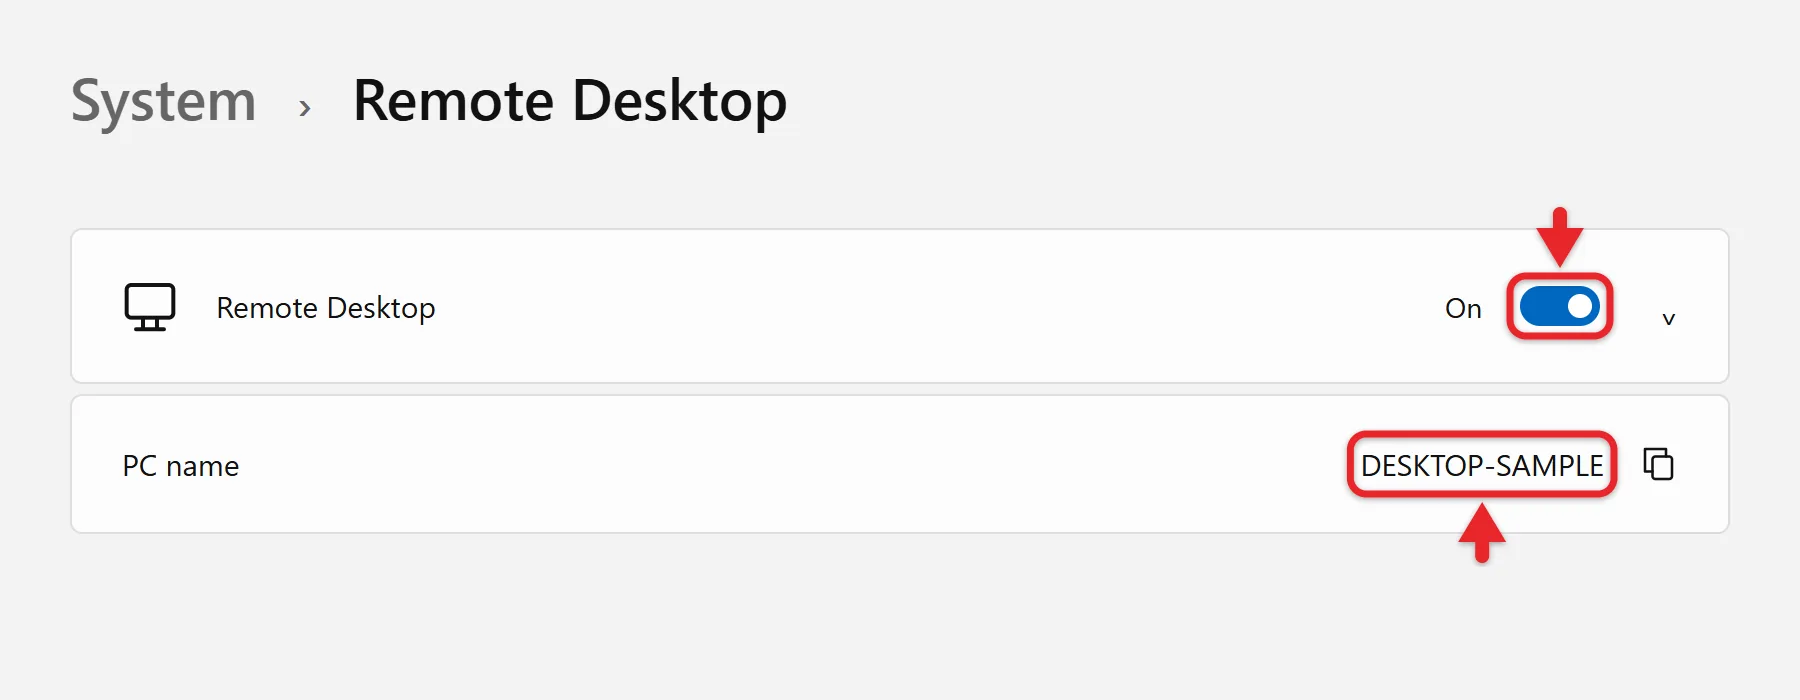
These are the steps in Microsoft’s How to use Remote Desktop article, which applies to Windows 11 and Windows 10. For a closer look at each option on this screen, read enabling Remote Desktop (RDP) on Windows 11.
Step 3: Choose Who Can Connect
Members of the Administrators group on the PC can connect as soon as Remote Desktop is on. To let a standard account connect, stay on the Remote Desktop settings screen and select Remote Desktop users (labeled Select users that can remotely access this PC on some versions), select Add, type the username, and select OK. The account must already exist on that PC.
Leave Network Level Authentication turned on. This setting makes a person prove who they are before a remote session starts, which helps keep out unauthorized users.
Step 4: Connect From Another Device
From another Windows PC:
- In the taskbar search box, type Remote Desktop Connection and open it.
- Enter the PC name you wrote down. You can also use the remote PC’s IP address.
- Select Connect, then sign in with an account that is allowed on the remote PC.
From a Mac, iPhone, iPad, or Android device, install Microsoft’s Windows App from the App Store or Google Play, add the PC name, and select the PC to start the connection. Windows App replaced the older Microsoft Remote Desktop app on these platforms.
Connecting From Outside Your Home Network
Remote Desktop makes a direct connection to the PC, so the steps above work when both devices are on the same network. To reach the PC from somewhere else, you have two options:
- Use a VPN. A VPN (virtual private network) makes your remote device behave as though it is on your home network, so the PC is never exposed to the public internet. This is the option Microsoft prefers.
- Use port forwarding. This is a router setting that sends incoming traffic on a certain port (3389 by default for Remote Desktop) to your PC. The exact steps depend on your router.
Warning: Port forwarding opens your PC to the internet and is not recommended by Microsoft. If you use it anyway, make sure the PC has a strong password. Details are in Microsoft’s article on allowing access to your PC from outside your network.
Port forwarding is set on the router’s admin page, so give that page its own strong password too; on a Netgear N600, you can change the router admin password.
If neither option appeals to you, Chrome Remote Desktop and TeamViewer both work over the internet without router changes, which is why many home users prefer them for access away from home.
Method 2: Set Up Chrome Remote Desktop
Chrome Remote Desktop is a free Google service that runs through the Chrome browser. You can set up remote access to a Mac, Windows, or Linux computer, and the Windows edition does not matter. This setup is also the simplest route to using Windows apps on a Chromebook.
- On the computer you want to reach, open Chrome.
- In the address bar, enter
remotedesktop.google.com/access. Sign in with your Google account if you are asked to. - Under Set up Remote Access, click Download.
- Follow the onscreen directions to download and install Chrome Remote Desktop. You may have to enter your computer password, and you may be prompted to change security settings.
- When prompted, give the computer a name and create a PIN. You will need this PIN every time you connect.
To connect later, open Chrome on another computer, go to remotedesktop.google.com/access, click Access to choose the computer, enter the PIN, and select the arrow. On a phone or tablet, use the Chrome Remote Desktop app instead. Google’s full instructions are in Access another computer with Chrome Remote Desktop.
Method 3: Set Up TeamViewer for Unattended Access
TeamViewer is a remote access program that links your computers to one TeamViewer account. Unattended access means you can connect without anyone at the remote computer accepting the request, which is what you need to reach your own PC when nobody is home.
TeamViewer says the free version is for personal use, such as connecting between your own devices at home or helping friends and family. It is not free if you use it for your job, and that includes connecting to a work computer or working from home.
- On the computer you want to reach, download the TeamViewer full client from TeamViewer’s download page and open the downloaded file.
- If Windows shows a security warning, check that the publisher is TeamViewer Germany GmbH, then click Run.
- Select Default Installation and click Accept – next.
- Check the box to accept the EULA and DPA (the license agreement and data processing agreement), then click Continue.
- Open TeamViewer and click Settings (the gear icon) at the top-right corner.
- On the General tab, scroll to the Manage this device section and click Manage this device.
- Sign in with your TeamViewer account. Create an account first if you do not have one.
To connect, sign in to the same account in the TeamViewer app on another device or at TeamViewer’s web client, open the Device list, select the computer, and click Connect. TeamViewer documents the installation in Download and install TeamViewer and the unattended setup in Provide unattended remote support.
TeamViewer also offers a smaller program called TeamViewer Host, which runs in the background and only accepts incoming connections. It is set up the same way: open it, click Manage this device, and sign in.
Set Up a Mac for Remote Access
A Mac has its own built-in feature called Screen Sharing. It lets users of other computers on your network view your desktop and control your Mac.
- Choose Apple menu > System Settings.
- Click General in the sidebar, then click Sharing. You may need to scroll down.
- If Remote Management is on, turn it off. Screen Sharing and Remote Management cannot be on at the same time.
- Turn on Screen Sharing.
- Click the info button next to Screen Sharing, then use Allow access for to choose All users or Only these users.
- Click Done.
Screen Sharing is designed for computers on the same network. See Apple’s guide to turning Mac screen sharing on or off for the full list of options. To reach a Mac over the internet, Chrome Remote Desktop and TeamViewer both support macOS.
How to Confirm Remote Access Works
Test the connection before you actually need it. While you are still near the computer, pick up a second device and connect using the method you set up. You should see the remote computer’s desktop appear in a window or app.
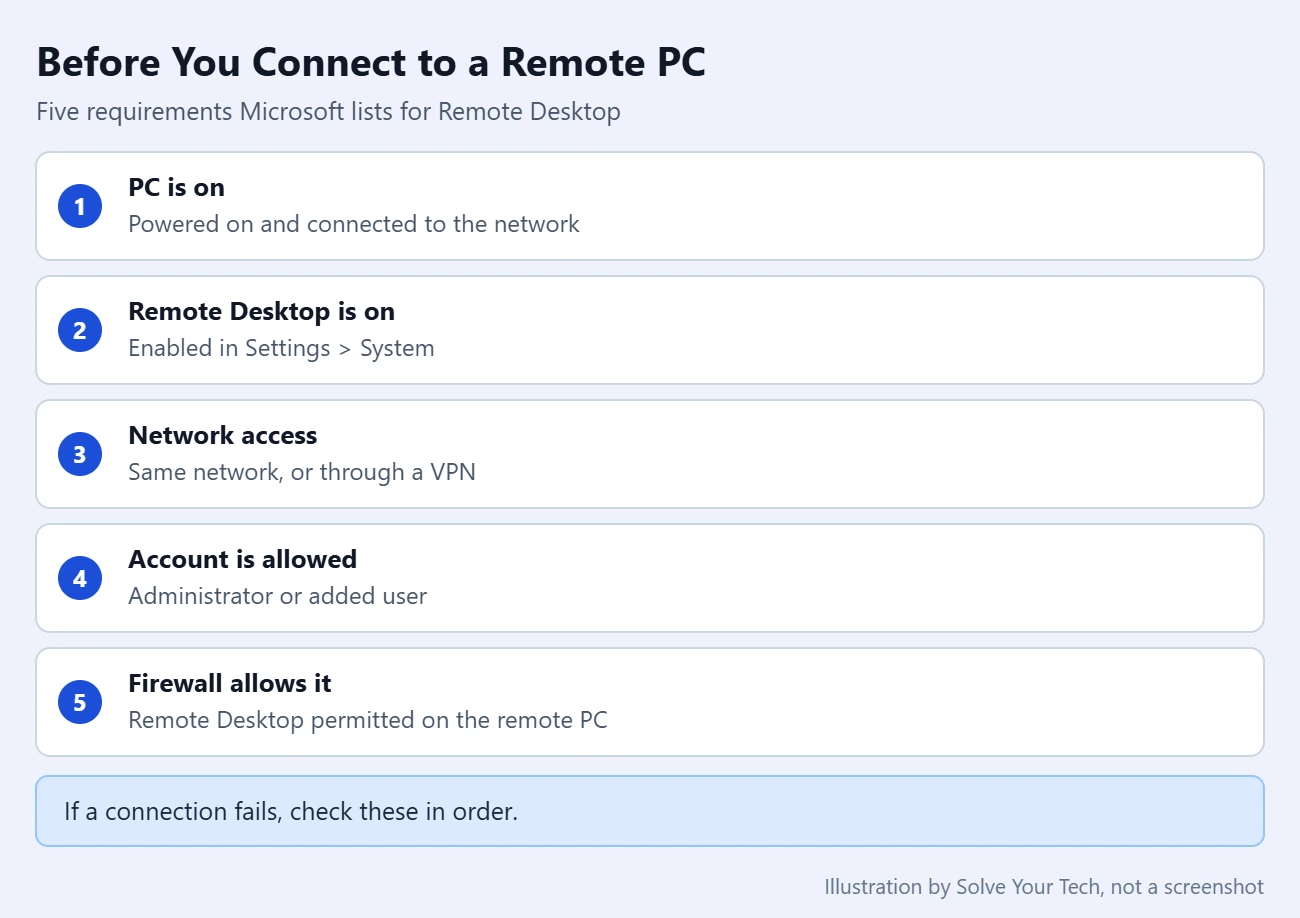
A Remote Desktop connection only succeeds when all five of these things are true. They make a useful checklist for any method.
- The remote PC is turned on and connected to the network.
- Remote Desktop is turned on for the remote PC.
- Your device can reach the remote PC over the network, either locally or through the internet.
- Your account is allowed to connect.
- The remote PC’s firewall allows Remote Desktop connections.
If you plan to connect from outside your home, run a second test from a different network, such as a phone using mobile data, before you rely on it.
How to Turn Off Remote Access
If you no longer need remote access, turn it off. There is no reason to leave Remote Desktop enabled on a PC you only use in person.
- Windows Remote Desktop: Go to Settings > System > Remote Desktop and turn the Remote Desktop switch off.
- Chrome Remote Desktop: Go to
remotedesktop.google.com/accessand click Disable remote connections next to the computer you want to remove. - TeamViewer: Uninstall TeamViewer from the computer, or remove the device from your account. Menu names for removing a device can vary by version.
- Mac: Go to System Settings > General > Sharing and turn off Screen Sharing.
If you set up port forwarding on your router for Remote Desktop, delete that rule as well so the port is no longer open.
Troubleshooting Remote Access Problems
The Remote Desktop Switch Is Missing or Says Your Edition Does Not Support It
The PC is running Windows Home. Home editions cannot host Remote Desktop connections. Use Chrome Remote Desktop or TeamViewer, or upgrade the PC to Windows Pro.
You Cannot Change the Remote Desktop Setting
You must be signed in with an administrator account to turn Remote Desktop on or off. On a work or school computer, the setting may also be controlled by your organization.
The Connection Fails or the PC Cannot Be Found
- Make sure the remote PC is powered on and connected to the network. If it turns off or loses its connection, you cannot reach it. One way to wake a sleeping PC over the network is to turn on Wake-on-LAN in Windows 11.
- Check that you typed the PC name exactly as it appears in the Remote Desktop settings.
- Try the PC’s IP address instead of its name. Not sure what it is? On the remote PC, find your IP address on Windows 11.
- Confirm that you are on the same network as the PC, or connected through your VPN.
- Make sure Remote Desktop is allowed through the firewall on the remote PC. Third-party security software may need its own exception.
Your Username or Password Is Rejected
Sign in with an account that exists on the remote PC, not the device you are using. If the account is not an administrator, add it under Remote Desktop users as described in Step 3.
Chrome Remote Desktop Will Not Connect
Both computers must be connected to the internet, and antivirus software can block the connection. Check that your security software allows outbound UDP traffic, inbound UDP responses, traffic on TCP port 443, and TCP and UDP traffic on port 3478. Also update Chrome to the latest version.
Frequently Asked Questions
Can I set up remote access on Windows 11 Home?
Not with the built-in Remote Desktop feature. Windows Home editions cannot act as Remote Desktop hosts. A Windows Home PC can be set up for remote access with Chrome Remote Desktop or TeamViewer instead, and it can use Remote Desktop Connection to connect to a different PC that runs Windows Pro.
Does the computer have to stay on?
Yes. Every method in this guide needs the remote computer to be powered on and connected to the network. If you are leaving for a trip, check the computer’s power settings so it does not shut down or go to sleep while you are away.
Is it safe to allow remote access to my computer?
It is reasonable for your own use if you take basic precautions. Use a strong, unique password on every account that can connect, keep Network Level Authentication on for Remote Desktop, avoid opening ports on your router when a VPN or an internet-based tool will do, and turn remote access off when you stop using it. Never grant access to someone who contacted you first.
How do I let someone else help me with my computer just once?
For one-time help on Windows, use Microsoft’s Quick Assist app instead of permanent remote access. The helper chooses Help someone and gives you a 6-digit code, you enter it under Code from assistant, and you select Allow to share your screen. They can only take control if you approve a separate request, and either of you can choose Leave to end the session. Microsoft covers this in Solve PC problems remotely using Quick Assist. Chrome Remote Desktop has a similar one-time code option under Get Support.
Can I control my computer from my phone?
Yes. Microsoft offers Windows App for iPhone, iPad, and Android, Google offers a Chrome Remote Desktop mobile app, and TeamViewer has mobile apps too. Set up the computer first using the steps above, then install the matching app on your phone and sign in or add the PC name.
Do I need to use the same method on every computer?
No. Each computer is set up on its own, so you can use Remote Desktop on a Windows Pro desktop and Chrome Remote Desktop on a Windows Home laptop. One tool everywhere is easier to keep track of, because all of your computers appear in a single list.
Next Step
Pick the method that matches your computer, set it up while you are sitting at it, and run one test connection from another device today. Once you have seen the remote desktop appear, write down the PC name or PIN somewhere safe so you have it when you are away from home.

Matthew Burleigh is the founder, head writer, and editor of Solve Your Tech, which he launched in 2012. He has written technology tutorials since 2008 and worked in IT since 2003, including small-business support, IT management, and consulting. He holds Bachelor’s and Master’s degrees in Computer Science from Arizona State University.
Matthew writes practical guides for Windows, iPhone and iPad, Microsoft Office, Outlook, Google apps, and Android. Solve Your Tech’s guides are checked step by step against the device or app maker’s own documentation and tested on his own devices whenever he has the hardware or software, with clear steps, sources, and update dates.
Read more about Matthew and how Solve Your Tech writes and updates its guides, or report a correction.