This post contains affiliate links. As an Amazon Associate, solveyourtech.com earns from qualifying purchases, at no extra cost to you.
To back up Windows 10 to an external hard drive, plug in the drive, open Settings > Update & Security > Backup, select Add a drive, and choose the external drive. Windows turns on File History, which copies your personal files to the drive and keeps saving new versions while it’s connected. For a full copy of Windows and your apps, create a system image as well.
These steps cover Windows 10 Home and Pro, version 22H2, and the File History and system image steps also work in Windows 11 through Control Panel. Windows 10 reached the end of support on October 14, 2025, so a current backup also makes moving to a new PC much easier. Microsoft’s articles on File History and backing up and restoring your PC support the steps below.
What You Need
You need an external drive with more free space than the files you’re backing up, ideally a lot more, since File History keeps older versions too. A portable hard drive like the WD 2TB Elements Portable is a low-cost option. An SSD such as the Samsung T7 1TB is smaller and much faster.
How much space is enough? Check the size of your user folders, then pick a drive at least twice that size. For a system image, the drive needs more free space than the used space on your C: drive. To see that number, open File Explorer, select This PC, and look under Local Disk (C:).
A USB flash drive works for File History, but most are small and slow, so an external hard drive or SSD is the better choice. You can keep other files on the same drive; File History and system images each use their own folder.
Which Backup Method Should You Use?
| Method | What it saves | Best for |
|---|---|---|
| File History | Your personal files and folders, with older versions | Everyday backups |
| System image | The whole drive: Windows, settings, apps and files | Recovering a failed drive or PC |
| Windows Backup | Folders, settings and apps, synced to OneDrive | Setting up a new PC with the same Microsoft account |
Windows Backup saves to OneDrive rather than an external drive, so for an external-drive backup, use File History and a system image. The two work well together: File History runs often and lets you grab one lost file, while a system image is a snapshot you make every month or so, and before big changes.
Back Up Your Files With File History
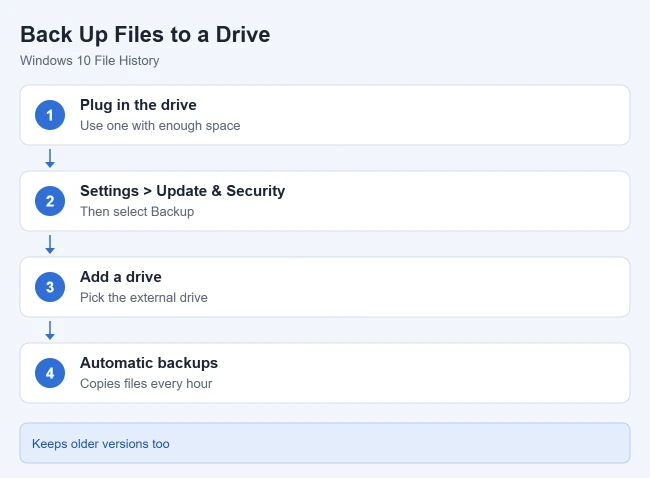
- Connect the external drive and wait for it to appear in File Explorer.
- Open Settings with Windows key + I.
- Select Update & Security, then Backup in the left pane.
- Under Back up using File History, select Add a drive and choose the external drive. The button changes to an Automatically back up my files switch.
- Make sure Automatically back up my files is on.
- Select More options, then Back up now to start the first backup right away.
The first backup can take a while if you have many photos or videos. When it finishes, the Backup options page shows the size of the backup and the date and time of the last backup.
Choose What and How Often It Backs Up
On the Backup options page you can change these settings:
- Back up my files: how often File History saves new copies. The default is every hour.
- Keep my backups: how long older versions stay on the drive. The default is Forever; pick a shorter period if the drive fills up.
- Back up these folders: the folders included. Windows lists Desktop, Documents, Pictures, Videos, Music and other folders in your user account. Select Add a folder to include another one.
- Exclude these folders: folders to skip, such as a large Downloads folder.
- Back up to a different drive: select Stop using drive before you switch to a new drive.
File History only backs up files in the folders on that list. It does not save Windows itself or your installed apps, which is why a system image is worth adding.
If you’re saving an old account’s files before removing it, you can then delete the user profile in Windows 10.
Using Control Panel Instead
You can also open Control Panel > System and Security > Save backup copies of your files with File History, select the drive, and select Turn on. Microsoft’s File History article uses this Control Panel path, which also works on Windows 11. Select Run now to start a backup, or Advanced settings to change how often it saves and how long it keeps versions.
Create a Full System Image
A system image copies the whole Windows drive so you can put the PC back exactly as it was. Close your apps first, and plug a laptop into power so the backup isn’t interrupted.
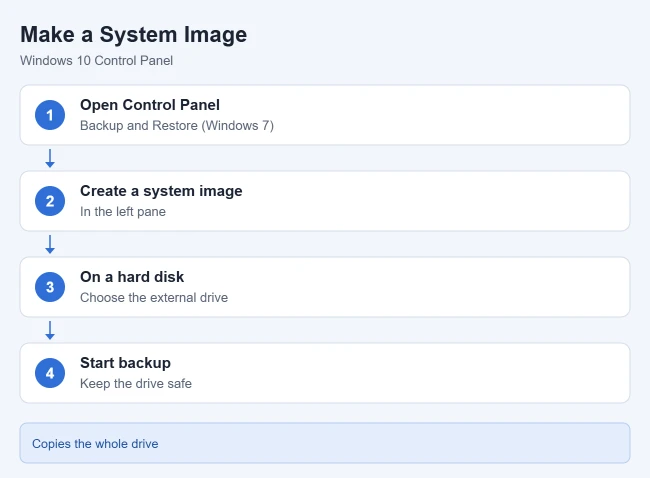
- Open Control Panel, select System and Security, and then select Backup and Restore (Windows 7).
- Select Create a system image in the left pane.
- Choose On a hard disk and pick the external drive from the list.
- Select Next. Windows checks the drives it needs, such as the system and recovery partitions. Leave those checked.
- Select Next, then Start backup.
- When it finishes, Windows asks whether to create a system repair disc. That needs a blank CD or DVD. Select No if your PC has no disc drive, and make a USB recovery drive instead (see below).
The backup time depends on how much data you have and how fast the drive is, from several minutes to a few hours. The image is saved in a folder named WindowsImageBackup on the external drive. Don’t rename or move that folder, or Windows won’t find it when you restore.
Microsoft lists the system image tool, Backup and Restore (Windows 7), as a deprecated feature. It no longer gets new development, but it still works in Windows 10 and Windows 11.
Make a USB Recovery Drive
A recovery drive lets you start the PC and reach the restore tools when Windows won’t load. Type Create a recovery drive in the taskbar search box, open it, and follow the prompts with a spare USB flash drive. Creating it erases the flash drive, so use one you don’t need for anything else, and label it.
Other Ways to Copy Files to the Drive
- Copy by hand: press Windows key + E, select the folders you want, and drag them to the external drive, or right-click and use Copy and Paste. Use copy, not cut, so the originals stay on your PC. This makes a one-time copy that doesn’t update.
- Backup and Restore file backup: in Backup and Restore (Windows 7), select Set up backup, choose the drive, and pick Let Windows choose or your own folders. It saves files on a schedule, but File History is easier to use for everyday backups.
How to Restore Files From Your Backup
- From Settings: Go to Settings > Update & Security > Backup > More options and select Restore files from a current backup. Browse to the file, pick a version with the arrows, and select the green Restore button.
- From File Explorer: Right-click the folder where the file used to be, select Restore previous versions, and pick the version you want. Select Restore to put it back in place, or open the menu next to Restore and choose Restore to to save it somewhere else.
Restoring in place replaces the current copy of the file, and Microsoft notes that the replacement can’t be undone. If you aren’t sure, use Restore to and compare the two.
How to Restore the Whole PC From a System Image
Restoring an image erases everything on the Windows drive and replaces it with the copy in the image, so first save any files created since the image was made.
- Connect the external drive that holds the image.
- Go to Settings > Update & Security > Recovery and select Restart now under Advanced startup. If Windows won’t start, boot from your recovery drive instead.
- Select Troubleshoot > Advanced options, then System Image Recovery. On some PCs it’s under See more recovery options.
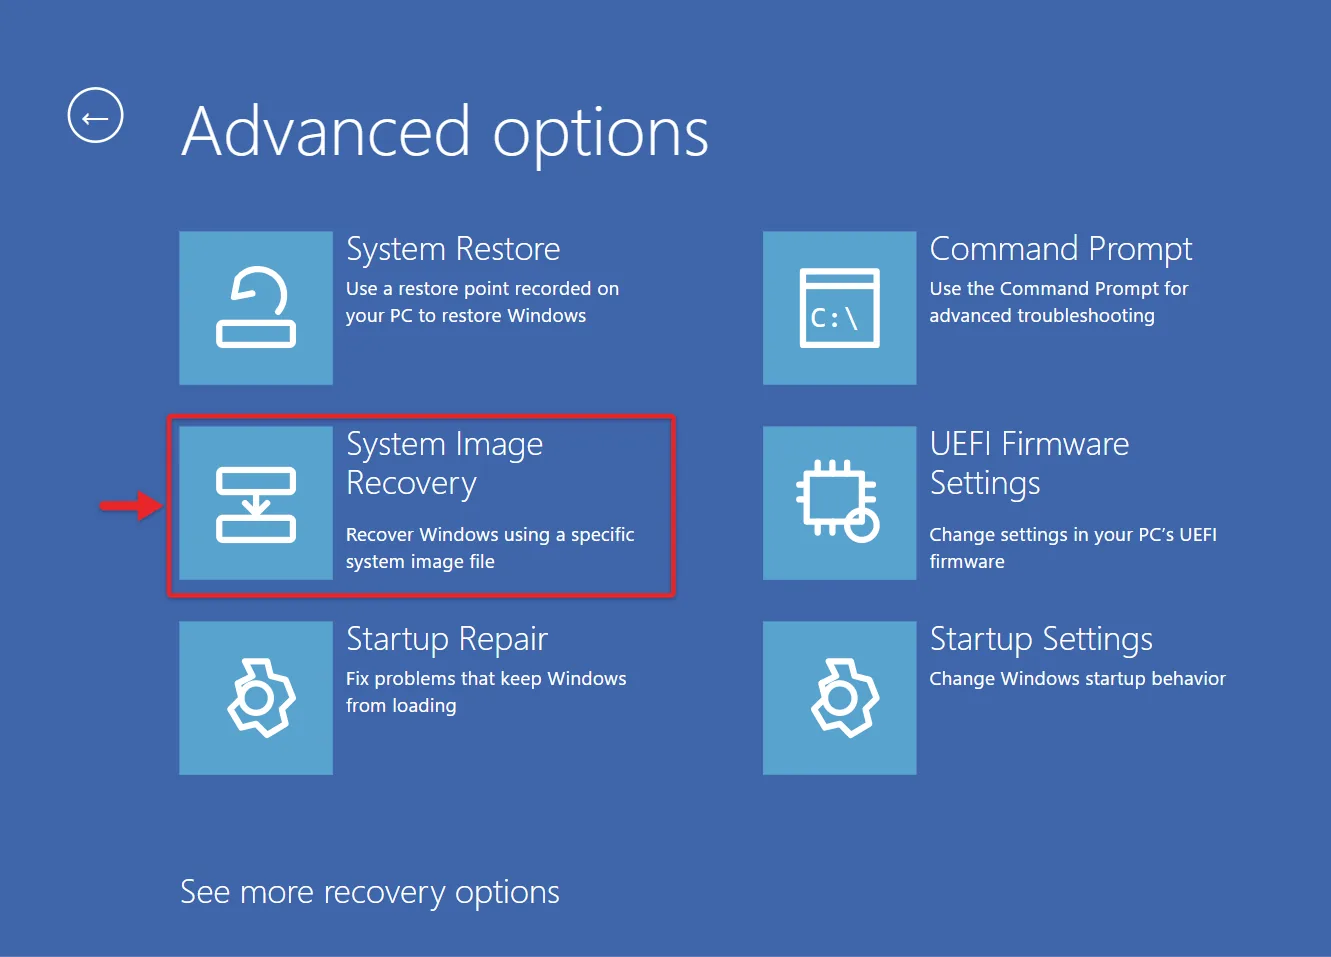
- Choose your account, enter its password, and pick the latest image.
- Follow the prompts and confirm. The PC restarts when the restore is done.
If the Backup Doesn’t Work
Try the fix that matches what you see:
- The drive doesn’t appear under Add a drive: plug it into a different USB port and check that it shows up in File Explorer. If it doesn’t, open Disk Management to see whether it needs a drive letter. Formatting a drive erases it, so copy anything on it first.
- File History says the drive is disconnected: reconnect the drive, open More options, and select Back up now. File History only runs while the drive is plugged in.
- The drive is full: under More options, shorten Keep my backups. In Control Panel’s File History page, Advanced settings > Clean up versions deletes older copies.
- The system image fails: make sure the external drive is formatted as NTFS and has more free space than the used space on your C: drive. To check the format, right-click the drive in File Explorer and select Properties. If it shows exFAT or FAT32, copy its files elsewhere, then right-click the drive, select Format, choose NTFS, and select Start.
Tips for Keeping Your Backup Useful
- Connect the drive regularly. File History only backs up while the drive is plugged in.
- Eject before you unplug. Use the Safely Remove Hardware and Eject Media icon in the taskbar so a backup in progress isn’t cut off.
- Store it safely. Keep the drive somewhere other than next to your PC, so one accident doesn’t take out both. For important files, keep a second copy on another drive or in cloud storage.
- Test a restore. Restore one file now and then to confirm the backup works.
- Avoid duplicate backups. If Norton 360 also backs up the same files and you don’t need both, you can turn off Norton 360 backups after File History is working.
Frequently Asked Questions
How often should I back up?
Let File History run on its default hourly schedule whenever the drive is connected. Make a new system image about once a month, and before major changes such as a Windows upgrade.
Can I restore a Windows 10 backup on a Windows 11 PC?
Yes, for personal files. Connect the drive to the Windows 11 PC and copy the files you need from the backup, or set up File History there and restore. A system image is meant for restoring the PC it came from, not a new one. For other ways to move, see how to transfer data from Windows 10 to Windows 11.
Should I upgrade to Windows 11?
Windows 10 no longer gets support, so it’s worth checking. Back up first, then see how to update to Windows 11 from Windows 10.
What about Windows 11 backups?
See how to back up Windows 11 to an external hard drive. If you use OneNote, also see how to back up your notebooks in OneNote.
What if I reinstall Windows 10?
Reconnect the drive and restore your files with File History, or restore the whole PC from your system image. If Windows asks to be activated after a reinstall, see how to activate Windows 10.
Next step: once the first backup finishes, restore one test file so you know the backup works before you need it.

Matthew Burleigh is the founder, head writer, and editor of Solve Your Tech, which he launched in 2012. He has written technology tutorials since 2008 and worked in IT since 2003, including small-business support, IT management, and consulting. He holds Bachelor’s and Master’s degrees in Computer Science from Arizona State University.
Matthew writes practical guides for Windows, iPhone and iPad, Microsoft Office, Outlook, Google apps, and Android. Solve Your Tech’s guides are checked step by step against the device or app maker’s own documentation and tested on his own devices whenever he has the hardware or software, with clear steps, sources, and update dates.
Read more about Matthew and how Solve Your Tech writes and updates its guides, or report a correction.