To install Chamberlain’s myQ Smart Garage Control, plug the small hub in near your opener, pair it in the myQ app, stick the door sensor on the top door panel, and link the hub to the opener’s Learn button. Installation usually takes 30 to 45 minutes. The kit launched at a $40 list price and commonly sells for about $30, and it lets you open, close and check the door from your phone.
This guide covers the current white Smart Garage Control (model MYQ-G0401, also sold by LiftMaster as 821LMC) and the older black myQ Garage and Smart Garage Hub, following Chamberlain’s support documentation. My hands-on impressions of the original 2016 hub are in their own section.
Disclosure: The original 2016 version of this article was a sponsored post written on behalf of Chamberlain through IZEA. The opinions were and are my own. This update has no sponsor and contains no affiliate links.
Pros and Cons at a Glance
Pros: inexpensive, installs in under an hour, works with most Chamberlain, LiftMaster and Craftsman openers made after 1993, keeps your remotes working, lets you share access with family members, and needs no subscription to open, close or check the door.
Cons: no official Alexa, Google Assistant, HomeKit or Home Assistant control, openers with a blue Learn button need an extra control panel, openers with DIP switches only get Monitor Mode, the hub needs wall power and a 2.4 GHz Wi-Fi network, and app control stops when your internet or power is out.
What the myQ Smart Garage Control Does
The kit has two parts. A battery-powered door sensor sits on the top panel of the garage door and reports whether the door is open or closed. A hub mounts on the ceiling near your opener, plugs into an outlet, connects to your Wi-Fi, and sends the open or close signal to the opener the same way a remote does.
Once it’s set up, the myQ app on iPhone or Android lets you:
- Open or close the door from anywhere with an internet connection.
- See whether the door is open or closed, and how long it has been that way.
- Get access alerts when the door opens or closes. myQ says access notifications are free with compatible devices.
- Give other people in your household their own access through their own myQ accounts.
Your existing remotes and wall button keep working. If your opener already has myQ or Wi-Fi built in, you don’t need this kit at all; set it up directly in the myQ app instead.
Will It Work With Your Garage Door Opener?
Check this before you buy. According to Chamberlain’s Smart Garage Control compatibility list, the door has to be a sectional door (the kind made of hinged horizontal panels) with safety sensors installed. Safety sensors are the small photo eyes near the floor on each side of the door. myQ’s setup page adds that sensors which switch to a low-power mode can cause problems. Beyond that:
- LiftMaster, Chamberlain and Craftsman: Compatible if the opener was made after 1993 and has a Learn or Program button that is yellow, purple, orange/red or green. The button is on the opener’s motor unit, usually under the light cover.
- Blue Learn button (433 MHz): Not compatible by itself. These need an extra myQ Control Panel (model 889LM).
- Genie and Overhead Door: Intellicode 1 and 2 openers from 1996 on generally work. Overhead Door openers made in 2016 or later don’t. Chamberlain notes that some Genie models need your Genie remote during programming.
- Older openers with DIP switches: These only get Monitor Mode, which shows the door’s status in the app but can’t open or close it.
- Other brands: Stanley (310 MHz SecureCode), Linear (318 MHz Megacode), Wayne-Dalton (372.5 MHz only), Guardian (303 MHz) and Sommer (310 MHz) work only at the listed frequencies. Check the list for your exact model.
Other door types, such as one-piece doors, are not supported, because Chamberlain limits unattended (remote) operation to sectional doors.
Safety Before You Start
Remote operation means the door can move when nobody is standing next to it. Chamberlain’s safety guidance for myQ-equipped openers comes down to a few rules:
- Only operate the door when you can see it clearly and it is properly adjusted, and nothing is in its path. When you close it from the app while you are away, the hub beeps and flashes its light as a warning to anyone in the garage. Chamberlain calls this expected behavior.
- Your safety reversing sensors must be connected and aligned. Chamberlain says the opener won’t move the door down until they are. Never bypass or unplug them.
- Test the safety reversal system every month. With the door open, lay a 2×4 flat on the floor in the center of the door’s path and close the door. It must reverse when it touches the board. Remove the board, then run the door through three or four full cycles. Chamberlain’s safety reversal test steps also say to retest after any adjustment or repair. If the door doesn’t reverse, stop using the opener remotely and call a trained door technician.
- Don’t use the opener during setup. Chamberlain says not to operate the opener until the app says installation is complete.
What You Need
- The myQ Smart Garage Control kit (hub, door sensor and mounting hardware)
- An iPhone or Android phone with the free myQ app and Bluetooth turned on
- A 2.4 GHz Wi-Fi network, its password, and a strong signal in the garage. Chamberlain recommends keeping the router within 50 feet. The hub can’t join a 5 GHz-only network.
- A power outlet near the opener
- A ladder and a screwdriver
If your router combines its bands under one network name and the hub won’t connect, change your Wi-Fi to 2.4 GHz on your router.
How to Install the myQ Smart Garage Control
These steps follow Chamberlain’s Smart Garage Hub setup guide, which covers both the current white hub and the older black hubs. The app walks you through each screen, so treat this as a preview of what to expect.
- Sign in to the myQ app. Open the app and sign in, or tap the option to create an account.
- Start adding the hub. Tap the + sign in the lower-right corner (or the gear icon in the top right), then tap Devices > Add a new device > Smart Garage Hub, and pick your device.
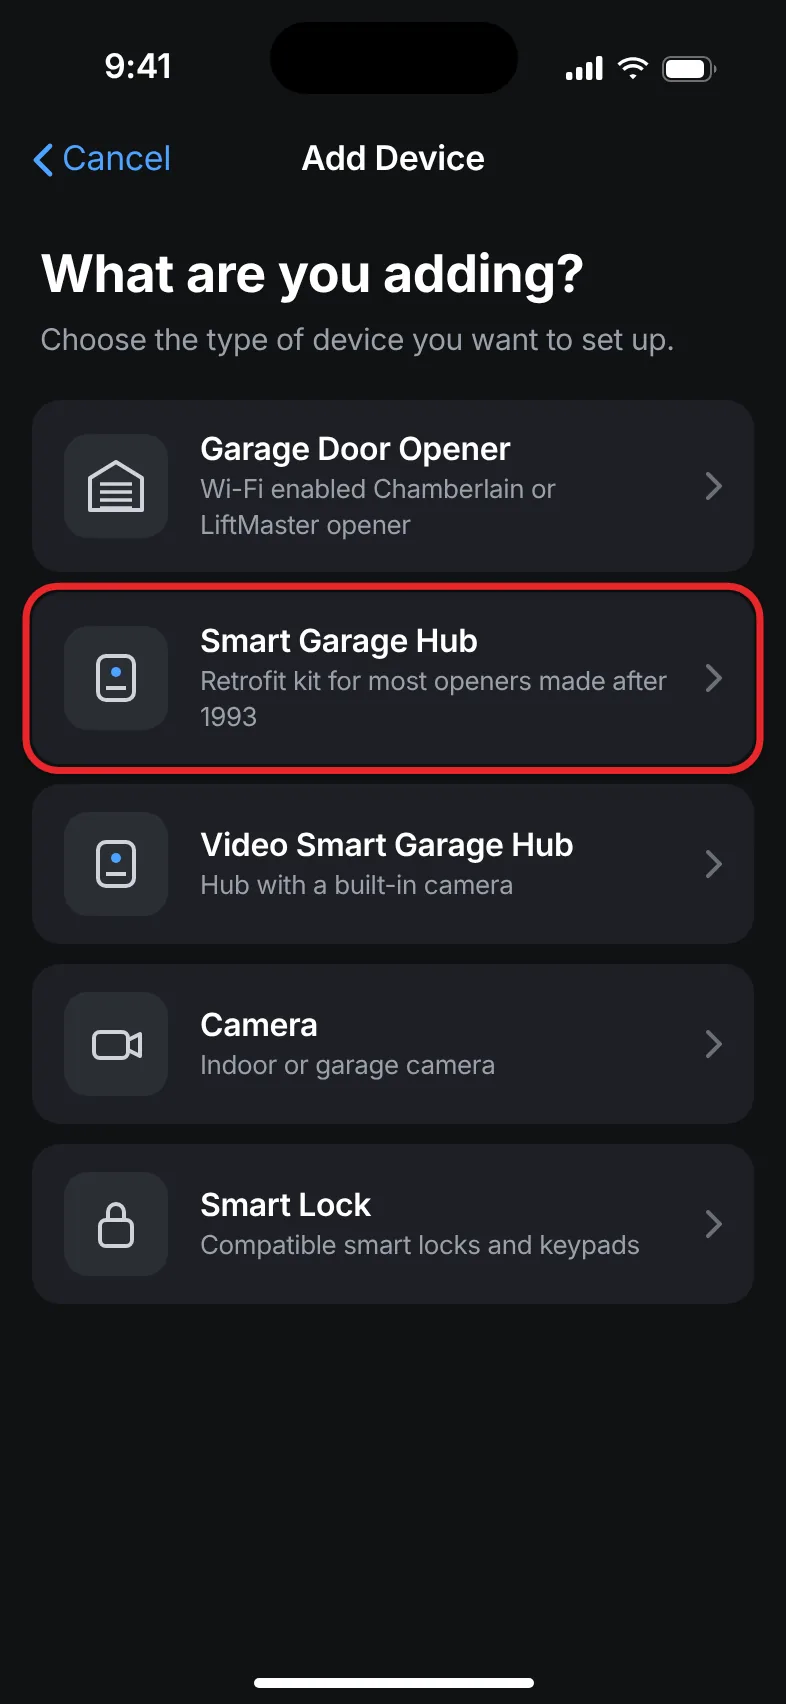
- Confirm you’re ready. Check off each item on the What You Need screen and tap I’m Ready.
- Plug in the hub, but don’t mount it yet. Plug the hub into an outlet near the opener and wait for its LED to blink blue. Tap Yes in the app when it does.
- Connect the hub over Bluetooth. On the Discovered screen, select the network named myQ- followed by three characters. On an iPhone, tap Pair on the Bluetooth prompt, then tap Join when asked to join the myQ network.
- Add your Wi-Fi. Choose your home network, type its password and tap Next. On Android, tap Next again on the Added to Wi-Fi screen. Hubs made before February 4, 2021 install a firmware update at this point, which takes 2 to 4 minutes.
- Activate the door sensor. Pull the plastic battery tab out of the sensor and tap Next. Press the Test button on the sensor. The hub beeps and flashes to show it heard the sensor. Follow the prompts to pair it.
- Mount the door sensor. Attach the sensor to the top panel of the garage door where the app shows. The hub won’t pair with the opener if the sensor isn’t mounted correctly.
- Pair the hub with the opener. Tap Next through the Pair to Motor screens, reading the safety warning the app shows, and select your opener’s brand. Find the Learn or Program button on the motor unit, tap Found It, and choose the button color if asked. Press and quickly release the button, then tap Next. The garage door should move.
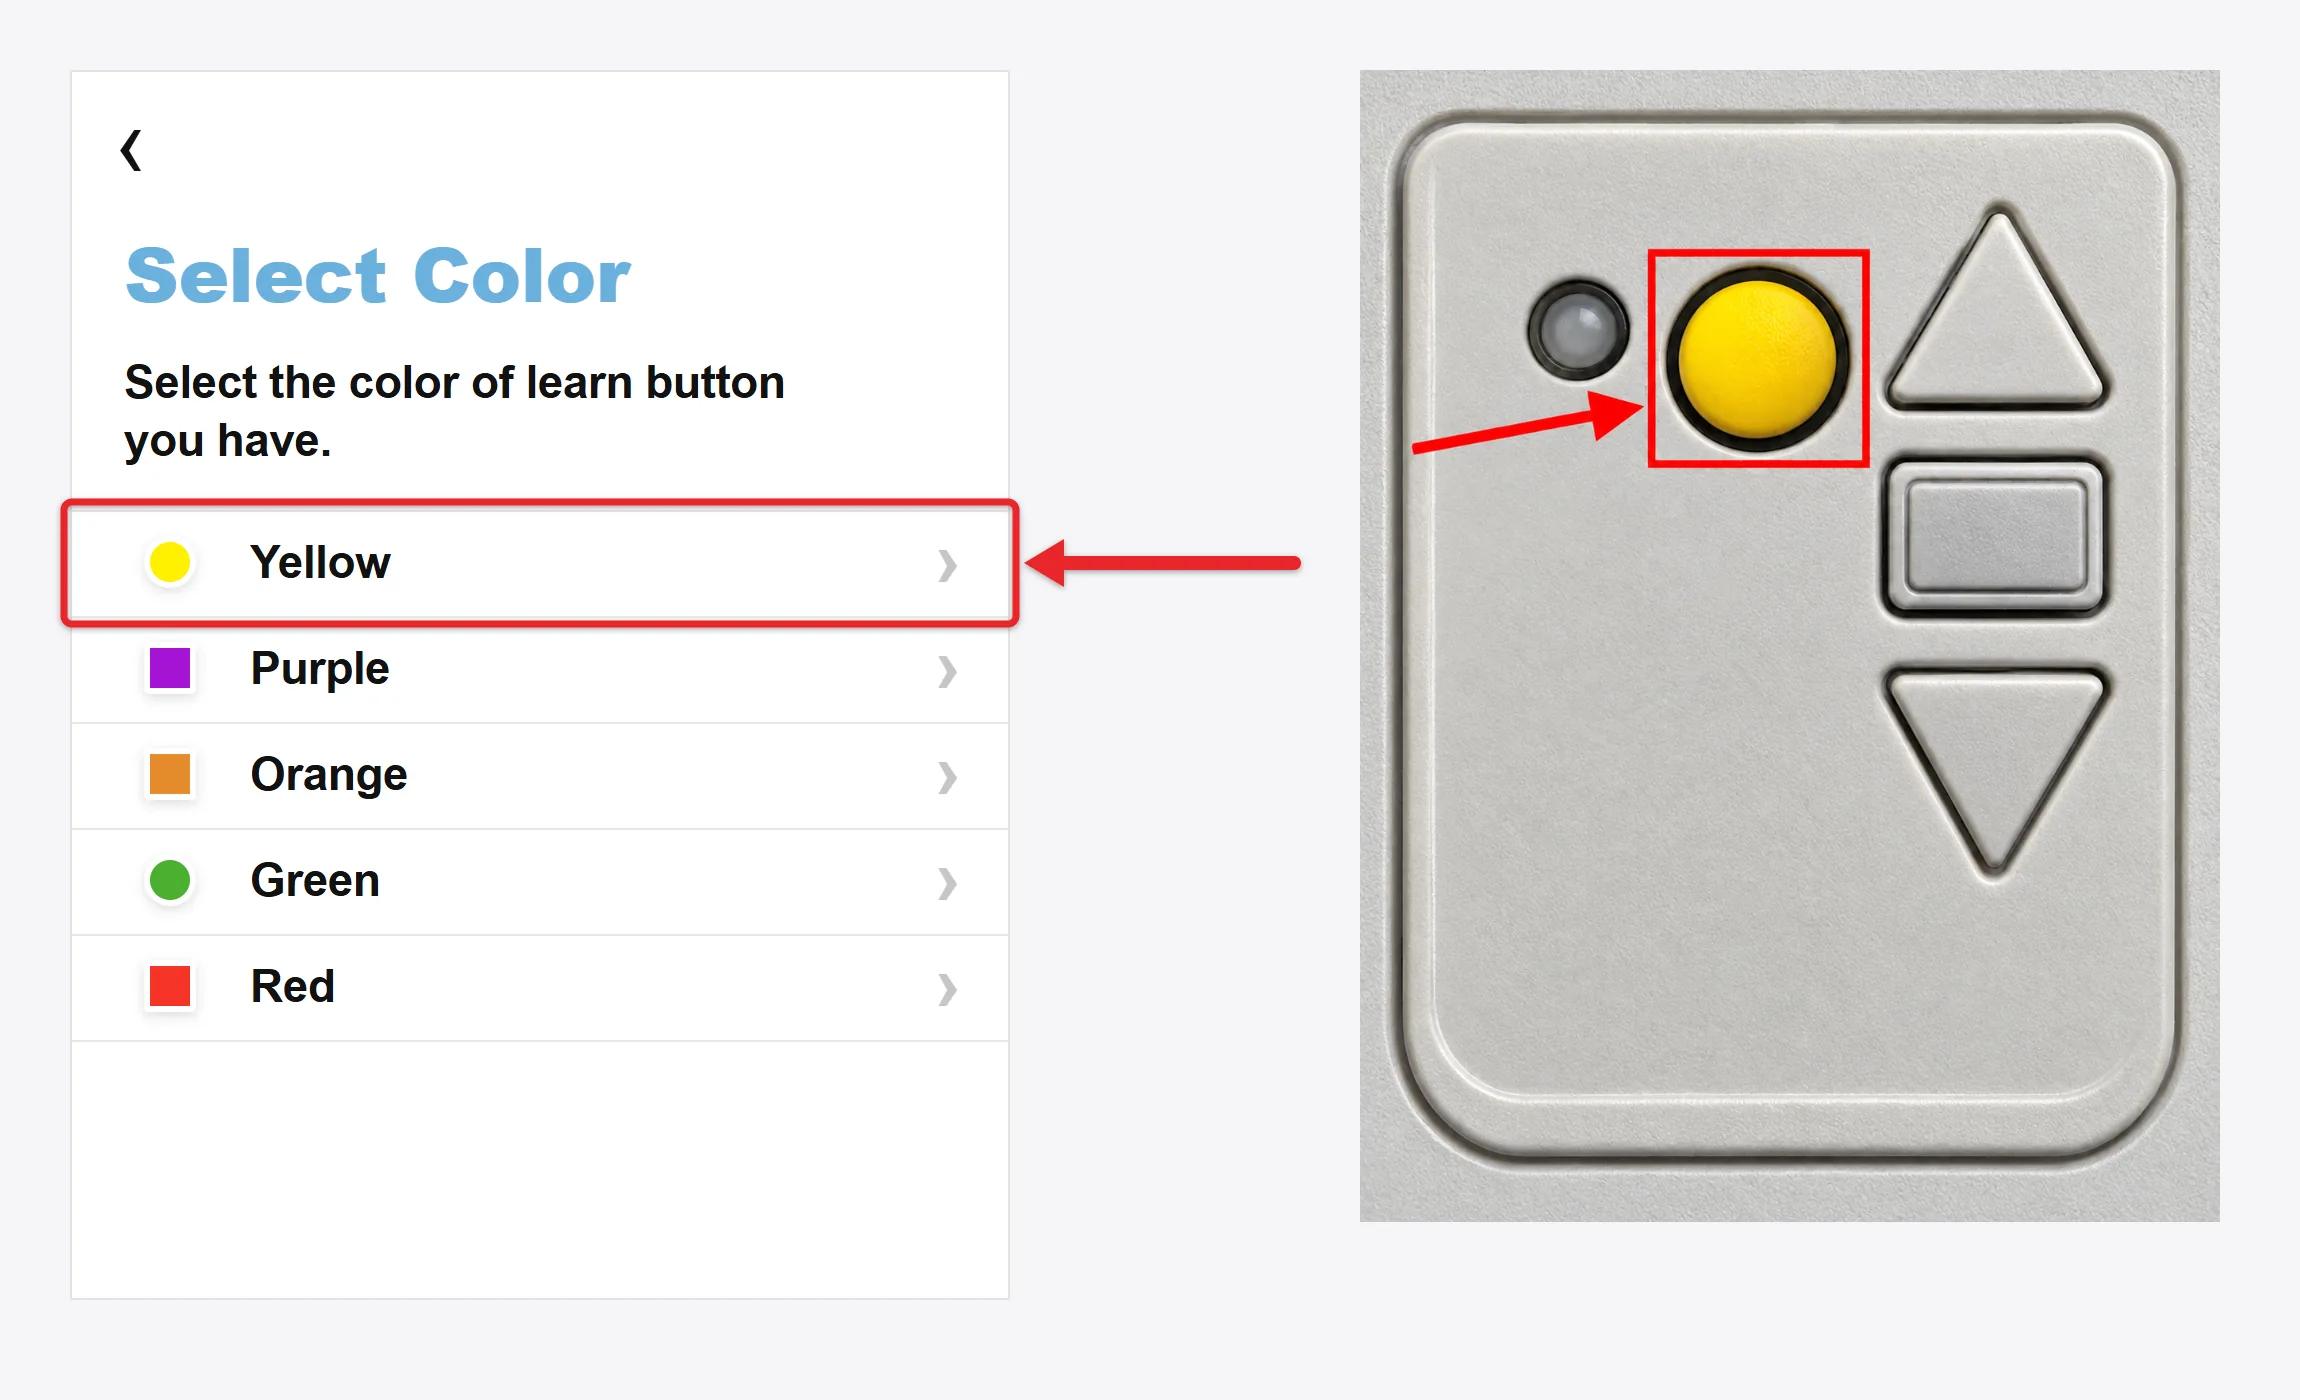
- Name the door. Type a name such as “Garage Door” and tap Next.
- Mount the hub and finish. Mount the hub on the ceiling following the app’s instructions, tap Finish, then tap the garage door in the app once to activate it. Don’t operate the opener until the app says setup is complete.
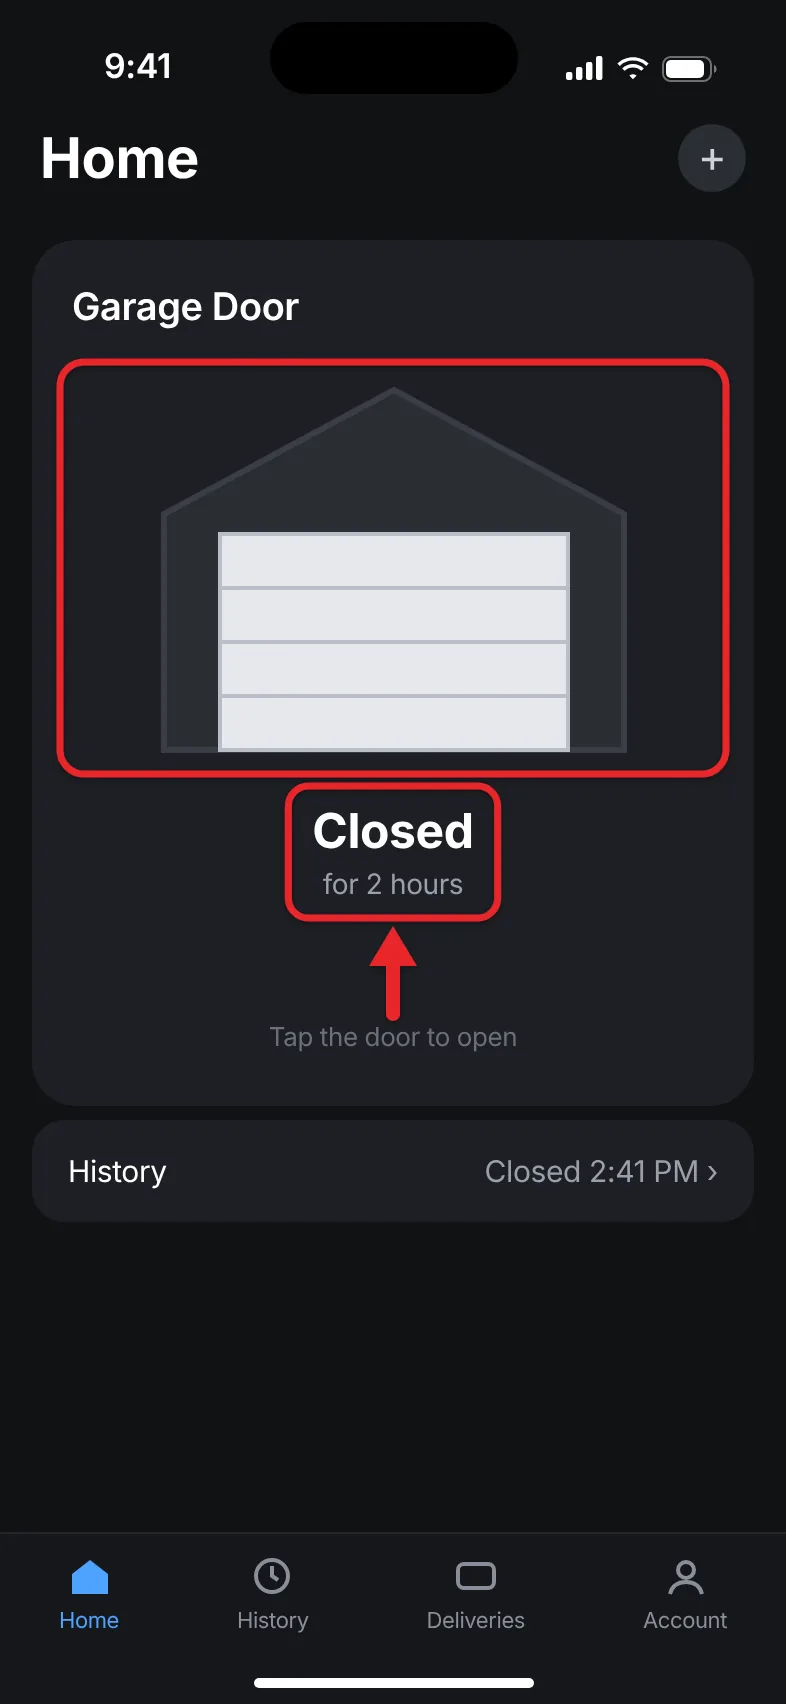
When it’s done, the app’s main screen shows a picture of your garage door with its current status underneath. Tap the picture to open or close it. Watch the door the first few times to confirm the status in the app matches what the door is doing. For everyday use, read about opening and closing your garage from an iPhone with myQ.
If you have the older black myQ Garage hub
The original myQ Garage (model MYQ-G0201) and the later black Smart Garage Hub (MYQ-G0301) use the same Add a new device path. The difference is that you type the 10-digit serial number from the sticker on the back of the hub and tap Done, instead of pairing over Bluetooth. Write the serial number down before you mount the hub, because the sticker is hard to read once it’s on the ceiling. The black Smart Garage Hub also has an Ethernet port; the white Smart Garage Control does not.
Instead of handing out your password, use myQ Users. In the myQ app, tap Settings (the gear icon), then User & guest access, and send an invitation. The other person gets an email, has seven days to accept, and signs in with their own myQ account.
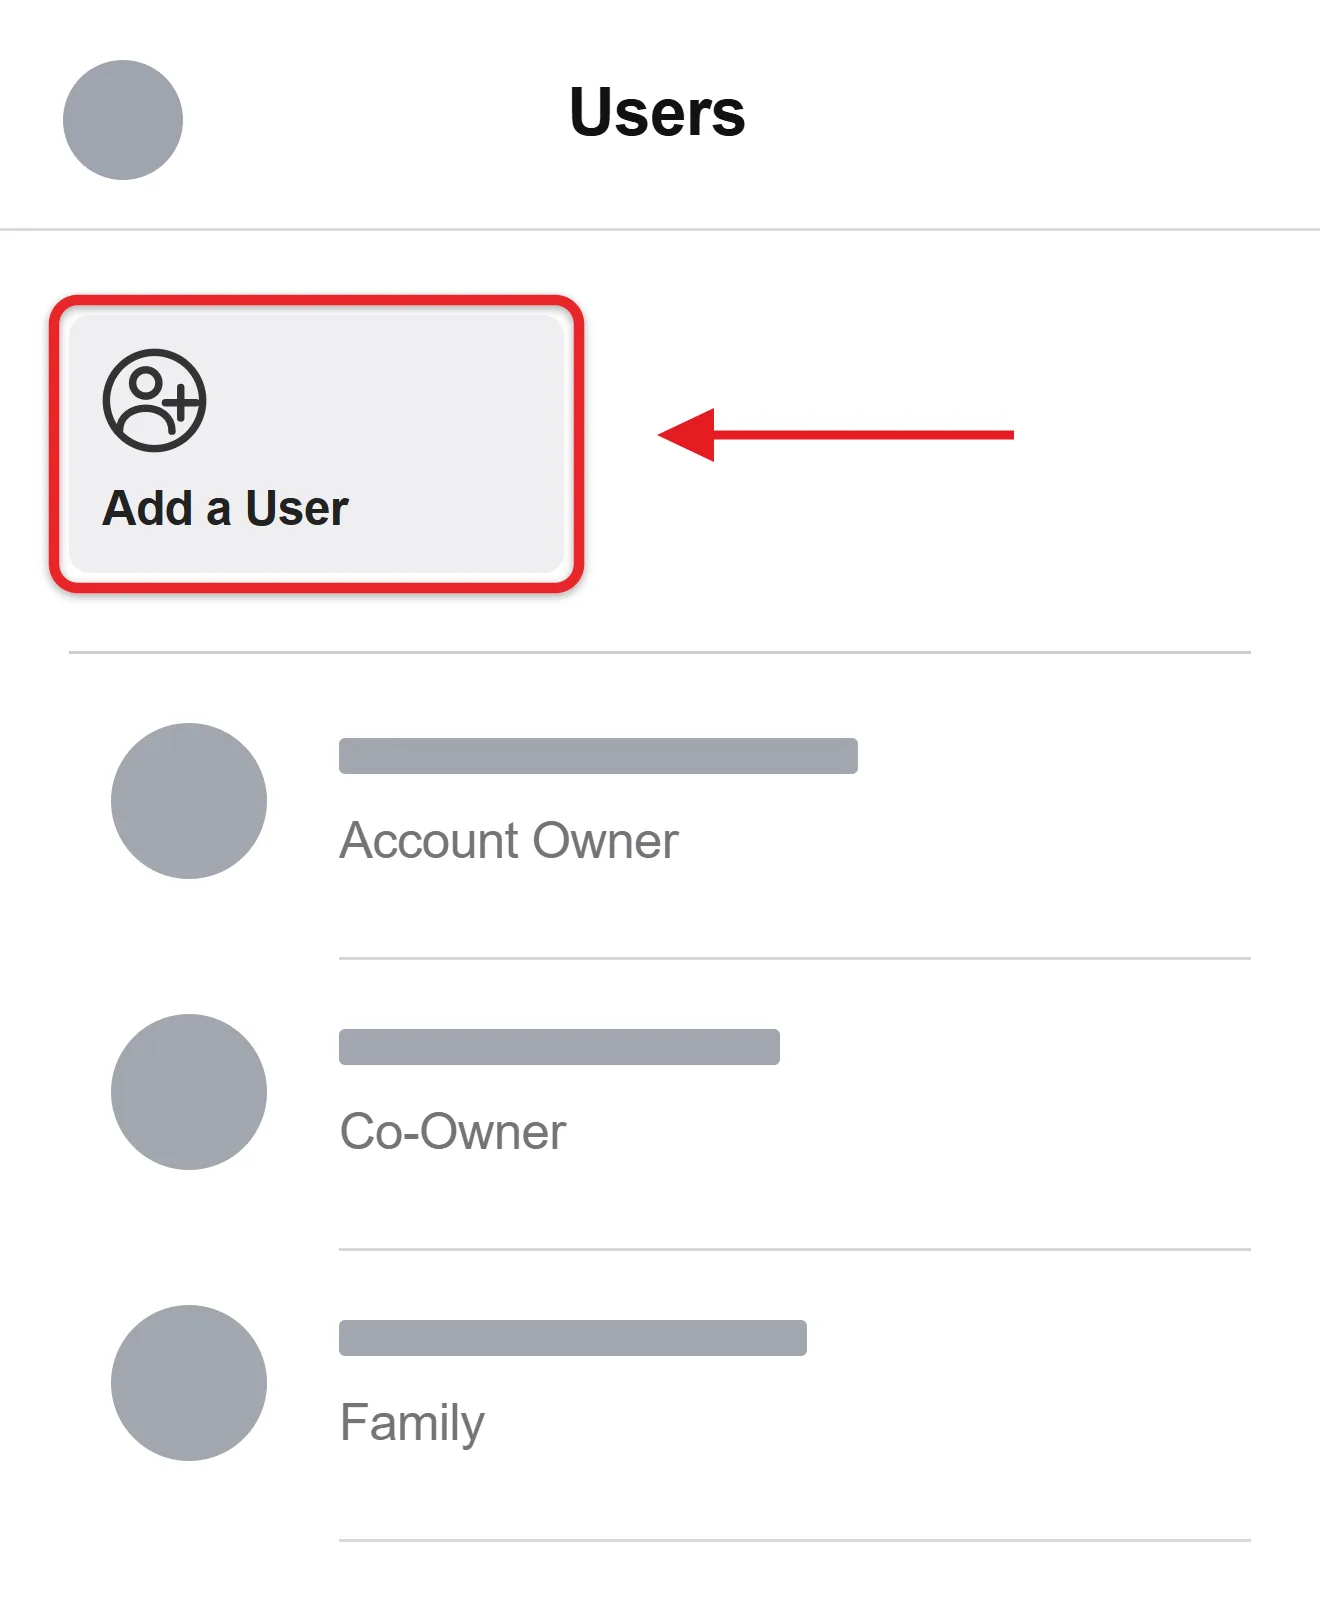
According to Chamberlain’s myQ Users page, one account can have up to 16 users: 1 Owner, 2 Co-Owners and 13 Household Users. Co-Owners can do nearly everything the Owner can, including viewing history and schedules. Household Users can open and close the door, with round-the-clock or limited access times, but can’t see history or schedules. You can remove a user from the same screen at any time.
My Hands-On Experience (2016, Original myQ Garage)
When I installed the first-generation myQ Garage in 2016, the process took about 30 to 45 minutes. The door sensor went on the top door panel with the included adhesive strips. I drilled pilot holes with an 11/64″ bit for the anchors that held the hub’s mounting bracket, and placed it near the opener’s outlet so the power cord would reach.
After a few days I realized how rarely I had used my old car remote. It always felt clunky, so I usually just used my house key. My phone, on the other hand, is always with me, whether I’m driving, riding with someone else, or out for a run. That made the myQ a practical replacement for both the remote and the key.
The feature I liked most was the status check. I had turned the car around more than once because I wasn’t sure I’d closed the garage, and I’d even thought about putting a camera in the garage for that reason. Being able to open the app and see “Closed” solved that.
What Has Changed Since 2016
The basic idea is the same, but a few things a buyer should know have changed:
- The hardware is cheaper and simpler. The current white hub sets up over Bluetooth, launched at $40 in 2021 and usually sells for about $30. One hub supports up to two door sensors, so a second door needs an extra sensor (model MYQ-G0402), and a third door needs a second hub.
- No official Google Assistant, Alexa or HomeKit control. The Google Assistant integration ended in June 2023, and Chamberlain discontinued its HomeKit bridge in 2022. None of the three appears on myQ’s Works with myQ page.
- Unofficial integrations are blocked. In late 2023 Chamberlain cut off third-party tools such as Home Assistant and Homebridge. Official partners listed on myQ’s site include Amazon Key and Walmart+ InHome for in-garage delivery; IFTTT, Vivint, Alarm.com, Resideo, Control4 and Crestron for smart home systems; and in-car controls from Tesla, Honda, Acura, Hyundai, Kia, Nissan, INFINITI, Mercedes-Benz, Volkswagen and Mitsubishi. Check the carmaker’s own terms, since some connected-car services have their own subscription.
- Paid plans are for video. myQ’s Video Monitoring plans are Basic at $49.99 a year (one video garage door opener), Essential at $79.99 a year or $7.99 a month (any one device), and Ultra at $149.99 a year or $14.99 a month (unlimited devices). They add recorded video for myQ cameras and camera-equipped openers. Opening the door, checking its status and getting open/close alerts with this kit don’t require a plan.
Is It Still Worth Buying?
For around $30, the Smart Garage Control is still an easy way to answer “did I close the garage?” from anywhere and to let someone in remotely. It’s a good fit if you have a compatible opener and are happy using the myQ app.
Skip it if you want voice control or to run your garage from Apple Home, Google Home or Home Assistant, since myQ no longer supports those. Owners of openers with a blue Learn button or DIP switches should also look at the compatibility notes above before buying, because they’ll either need an extra control panel or will only get Monitor Mode. If you’re replacing an old opener anyway, an opener with myQ built in skips the separate hub.
Troubleshooting
- The hub won’t connect to Wi-Fi. Confirm you picked a 2.4 GHz network and typed the password correctly. Move the hub closer to the router, or temporarily set it up on a closer outlet.
- The LED never blinks blue. Unplug the hub and plug it back in. If that doesn’t work, hold the gear (Settings) button until the blue LED flashes, release it, hold it again until the hub beeps, then unplug and replug the hub.
- The hub doesn’t beep when you test the sensor. Make sure the battery tab is fully removed, then press the sensor’s Test button again within range of the hub.
- The app shows Monitor Mode. Open and close the door once with a remote or the wall button, then repeat the pairing step. If it stays in Monitor Mode, your opener may not support control.
- The door won’t close from the app. Check that the safety sensors near the floor are aligned and that nothing blocks the beam, then make sure the door sensor is still on the top panel and paired. The hub relies on that sensor to know where the door is.
- You changed your router or Wi-Fi password. Erase only the Wi-Fi settings: with the green LED on or blinking, hold the Settings button until the blue LED blinks, then reconnect the hub in the app.
- The app can’t reach the door during an outage. The hub needs wall power and an internet connection. During a power cut, use the opener’s emergency release cord as your opener manual describes; when only the internet is down, your remotes and wall button still work.
- You need to start over. Hold the Settings button until the blue LED blinks, release it, then hold it again until the hub beeps. This factory reset erases the Wi-Fi settings, door sensors and opener from your myQ account.
FAQ
Does myQ require a subscription?
No, not for the garage control features. Opening and closing the door, checking its status, and open/close alerts are free. myQ’s paid plans add video recording for myQ cameras and video-equipped openers.
Does the myQ Smart Garage Control work with 5 GHz Wi-Fi?
No. The hub connects only to 2.4 GHz networks. Most dual-band routers broadcast 2.4 GHz alongside 5 GHz, so you usually just need to choose or separate that band.
Can I use myQ with Alexa or Google Home?
Not through an official integration. Chamberlain’s Google Assistant support ended in 2023, and neither Alexa nor Google Home is listed among myQ’s current partners.
Do I need this if my opener already has myQ?
No. Many newer Chamberlain and LiftMaster openers have myQ and Wi-Fi built in. Add them directly in the myQ app; the Smart Garage Control is for openers without Wi-Fi.
Can I control two garage doors with one kit?
Yes, with an additional door sensor. One hub supports up to two sensors, as long as both openers are compatible and within range.
Why does the hub beep when I close the door from my phone?
It’s a built-in safety warning. Chamberlain says the hub beeps and flashes when the app closes the door, so anyone in the garage knows the door is about to move.

Matthew Burleigh is the founder, head writer, and editor of Solve Your Tech, which he launched in 2012. He has written technology tutorials since 2008 and worked in IT since 2003, including small-business support, IT management, and consulting. He holds Bachelor’s and Master’s degrees in Computer Science from Arizona State University.
Matthew writes practical guides for Windows, iPhone and iPad, Microsoft Office, Outlook, Google apps, and Android. Solve Your Tech’s guides are checked step by step against the device or app maker’s own documentation and tested on his own devices whenever he has the hardware or software, with clear steps, sources, and update dates.
Read more about Matthew and how Solve Your Tech writes and updates its guides, or report a correction.