To disable the Hyper-V hypervisor feature on a supported Windows 11 PC, open Control Panel > Programs > Programs and Features > Turn Windows features on or off, expand Hyper-V > Hyper-V Platform, and clear Hyper-V Hypervisor. Apply the change and restart when requested. Then check the result rather than assuming every virtualization conflict is resolved.
This guide distinguishes the optional Hyper-V feature from the running Windows hypervisor. WSL2 and virtualization-based security can also use that underlying technology, so a missing or cleared Hyper-V checkbox is not enough to diagnose the whole system.
Check Your Edition and Reason First
Open Settings > System > About and check your Windows edition. Microsoft’s Hyper-V installation guide says the full role cannot be installed on Windows 11 Home. Home can still run WSL2 using a subset of the virtualization platform.
If you are troubleshooting VMware, VirtualBox, or an emulator, record its exact version and error. Microsoft’s WSL FAQ acknowledges versions of third-party tools that support Hyper-V/WSL2 coexistence. Check the application’s current compatibility instructions before making a system-wide change. Disabling Hyper-V is not a guaranteed speed improvement or universal fix.
Prepare for the Change
- Save work in Windows and shut down running guest systems normally. Back up important VM and Linux data using their supported backup methods. Do not delete virtual disks or unregister a Linux distribution to disable a Windows feature.
- Check dependencies. Hyper-V virtual machines need the hypervisor. WSL2 also relies on virtualization; review the impact on any development environment you use.
- Record existing feature selections. A note or screenshot helps you restore the configuration instead of enabling every checkbox later.
- Consider security and management. Memory Integrity and Credential Guard use virtualization-based protection. Stopping the hypervisor can affect those protections. On a managed computer, ask IT before changing the configuration.
Use an authorized administrator account for the feature change. Keep the firmware’s Intel VT-x or AMD-V setting distinct from the Windows feature: switching hardware virtualization off can also prevent the other virtual-machine app you want to use from working.
Disable the Hyper-V Hypervisor in Windows Features
- Search Start for Control Panel and open it. In Category view, choose Programs > Programs and Features. In an icon view, open Programs and Features directly.
- Select Turn Windows features on or off. Complete any administrator prompt using an account authorized to manage this PC.
- Expand Hyper-V, then Hyper-V Platform. Clear Hyper-V Hypervisor. This targets the component described by Microsoft rather than indiscriminately changing every virtualization feature.
- Select OK and let Windows finish. Save outstanding work and restart when prompted. Treat a pending restart as an incomplete change.
- Retest the original application after restart. Note whether its exact error is gone, changed, or still present. Keep that result separate from whether the Windows feature changed.
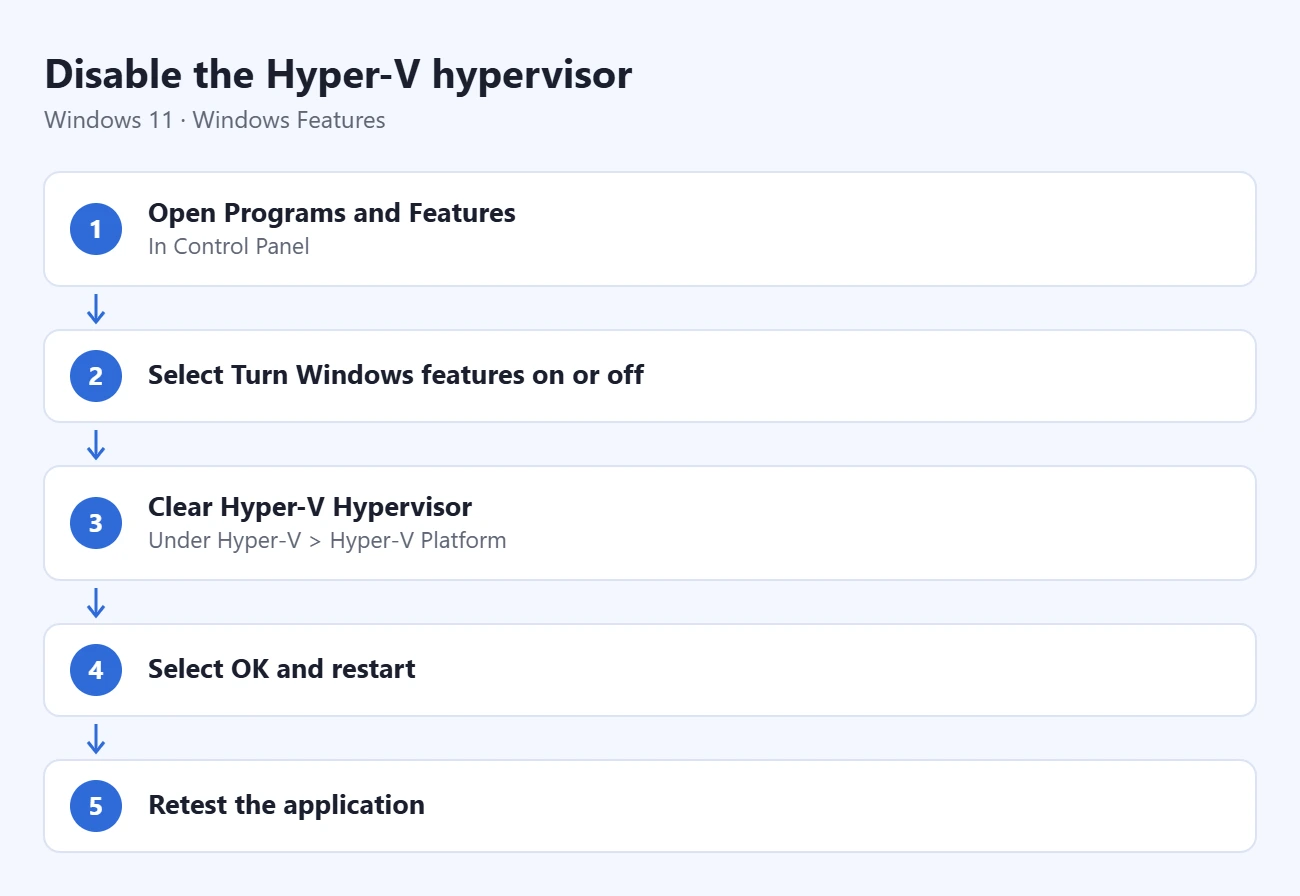
Microsoft’s virtualization compatibility troubleshooting guide documents the checkbox and equivalent commands. Hyper-V management tools can remain present; seeing Hyper-V Manager alone does not prove that the hypervisor is running.
PowerShell Alternative
Use this instead of the checkbox method, not as an additional mandatory step. Search for Windows PowerShell, choose Run as administrator, and run:
Disable-WindowsOptionalFeature -Online -FeatureName Microsoft-Hyper-V-HypervisorRead the result and any restart request. If Windows reports that the feature is unknown, access is denied, or servicing failed, stop and check the edition, administrator access, and exact error. Repeatedly running the command or adding unrelated removal commands does not establish success.
Verify and Interpret the Result
Reopen Windows Features to check the component’s selection. Also search Start for msinfo32.exe and open System Information. Microsoft’s troubleshooting guide explains the message indicating that a hypervisor has been detected.
If that message remains after restarting, inspect the rest of the configuration before making more changes. Virtual Machine Platform and security protections can explain why a hypervisor is still in use. The feature checkbox and the running-hypervisor check answer different questions.
Do not automatically disable Memory Integrity, Credential Guard, or every related feature just to make the message disappear. Review the security tradeoff and the specific application’s supported configuration with its vendor or your administrator. Changing those protections is a separate decision.
If a vendor specifically identifies Credential Guard as the compatibility issue, use our Credential Guard configuration guide to check its running state and choose the relevant policy or registry route. Treat that security decision separately from removing the Hyper-V feature.
If Hyper-V Is Missing or Linux Stops Working
No Hyper-V entry: check the edition first. Windows 11 Home lacks the full role, but that does not establish that no Windows virtualization is running. Use the System Information check and the relevant application documentation.
WSL2 no longer starts: restore the configuration you changed before reinstalling Linux. Microsoft’s FAQ identifies Virtual Machine Platform as part of WSL2’s requirements. Our Windows 11 WSL2 guide explains installation and common errors; preserve existing distribution data while troubleshooting.
Re-Enable the Feature
Return to Windows Features, restore the recorded Hyper-V selections, apply the change, and restart when requested. Microsoft’s installation guide covers enabling the full role if you removed more than the hypervisor component. Recheck any dependent applications afterward.
For VM setup and the distinction between Windows editions, see our Windows 11 virtual-machine guide. Finish by verifying both the feature state and the task you originally needed to complete.

Matthew Burleigh has been writing tech tutorials since 2008. His writing has appeared on dozens of different websites and been read hundreds of millions of times.
After receiving his Bachelor’s and Master’s degrees in Computer Science he spent several years working in IT management for small businesses. However, he now works full time writing content online and creating websites.
His main writing topics include iPhones, Microsoft Office, Google Apps, Android, and Photoshop, but he has also written about many other tech topics as well.