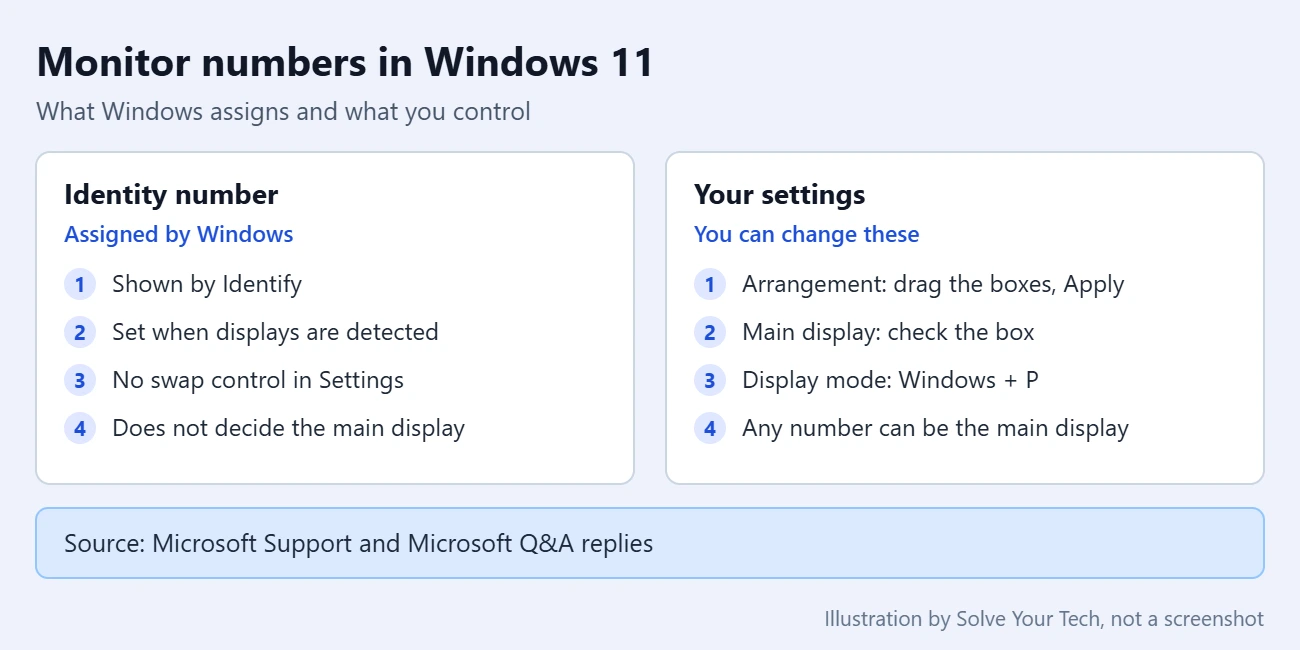
No. Windows 11 has no supported setting for changing or swapping monitor identity numbers. Windows assigns the numbers automatically when it detects your displays. What you can change is the screen arrangement (drag the numbered boxes in Settings > System > Display, then select Apply) and the main display (select a screen, then check Make this my main display).
That is usually enough. If monitor 2 sits on the left of your desk, you can place its box on the left and make it your main display. It does not need to become monitor 1 for either setting to work.
What a monitor identity number is
When Windows detects more than one display, it gives each one a number. The numbers appear on the boxes at the top of the Display settings page, and selecting Identify shows the matching number on each physical screen. Microsoft describes the numbers as a way to help you tell your displays apart.
The number is a label, not a ranking. Display 1 is not automatically the main display, and the numbers do not have to run left to right across your desk. A laptop with two external monitors might show them as 1, 3, 2 from left to right, and everything can still work normally.
Microsoft staff have answered this question directly. In a July 2026 Microsoft Q&A reply, a Microsoft external-staff moderator explains that Windows assigns display identity numbers automatically when monitors are detected, and that there is no supported setting to manually swap them while keeping the same configuration. The same reply points to arrangement and the main display as the settings that matter.
Choose the setting that matches your goal
Most people who want to change a monitor number are really trying to fix one of the problems below. Each one has its own control.
| What you want | What to use | Does the number change? |
|---|---|---|
| Find which number belongs to each physical screen | Identify in Display settings | No |
| Make the mouse cross between screens on the correct side | Drag the screen boxes to match your desk, then Apply | No |
| Choose your main screen | Select that screen, then Make this my main display | No |
| Show separate desktop space on each screen | Windows + P, then Extend | No |
| Swap the labels, such as 1 and 2 | No supported control in Display settings | Not available |
Before you start
These steps apply to Windows 11. Microsoft’s multiple-monitor instructions cover Windows 10 as well, and the same controls exist there, although the page layout differs slightly.
- Connect every monitor you plan to use and turn each one on. The arrangement diagram only appears when Windows detects more than one display.
- Check that the cables are firmly seated in your PC or dock.
- Install pending updates from Settings > Windows Update > Check for updates. Microsoft lists this as a step to take before changing external display settings.
How to arrange your monitors and choose a main display
None of these steps renumber your screens. They change how the screens behave, which is what the number was never controlling in the first place.
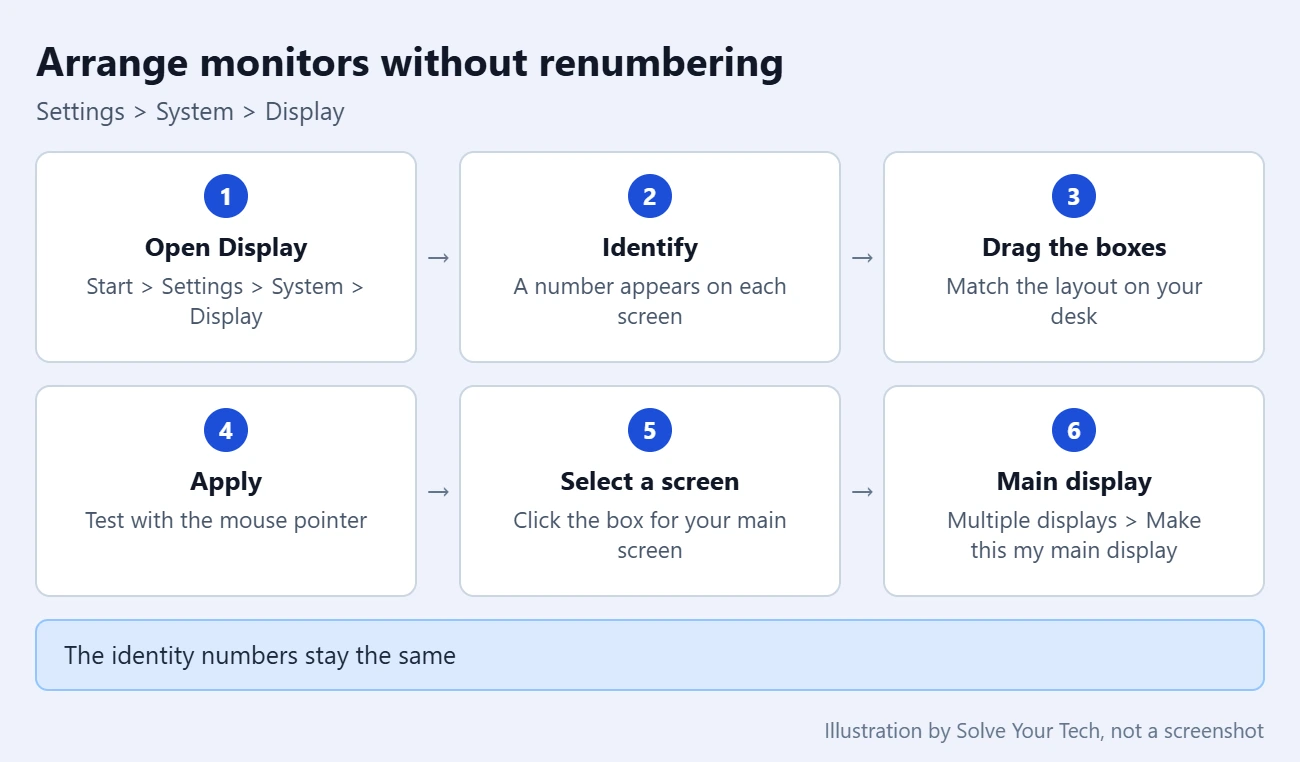
- Select Start > Settings > System > Display. You can also right-click an empty part of the desktop and select Display settings. A diagram with one numbered box per detected screen appears at the top.
- Select Identify. A number appears on each physical screen for a few seconds. Note which number is on which monitor.
- If a monitor is missing from the diagram, expand Multiple displays and select Detect.
- If both screens show the same picture, press Windows + P and select Extend. Extend gives each screen its own part of the desktop, so you can move windows between them.
- Drag each box so the diagram matches where the monitors sit on your desk: side by side, stacked, or offset. Select Apply when the layout looks right.
- Move the mouse pointer across the edge between two screens. It should cross on the same side as the real monitors. If it crosses on the wrong side, drag the boxes again and select Apply.
- To choose a main screen, select its box in the diagram, expand Multiple displays, and check Make this my main display.
Microsoft documents Identify, Detect, the arrangement diagram, and the Windows + P choices in How to use multiple monitors in Windows. For more on the main-display checkbox, including what to do when it is unavailable, see our guide on how to change the main display in Windows 11.
How to confirm it worked, and how to undo it
Select Identify again. The numbers on your screens will be the same as before. That is expected. Check these instead:
- The pointer moves between screens in the direction you expect.
- Dragging a window off one edge makes it appear on the neighboring screen, not a distant one.
- With your preferred screen selected in the diagram, Make this my main display is checked.
To undo an arrangement, drag the boxes back and select Apply. To undo a main-display change, select the previous screen’s box and check Make this my main display for that one. Only one screen can be the main display at a time.
Can reconnecting monitors change the numbers?
Sometimes, but not reliably. Because Windows assigns the numbers during detection, changing how the monitors are detected can lead to different numbers. Replies from community advisors on Microsoft Q&A suggest shutting down the PC, starting it with only the monitor you want as number 1 connected, and then reconnecting the others, or moving cables to different video ports.
Treat this as something you can try, not a setting. Those same replies note that Windows may still assign the numbers differently, and Microsoft does not publish a supported procedure for it. A later driver update, dock change, or cable swap could also shuffle the numbers again.
Warning: some web guides suggest uninstalling monitor entries in Device Manager, editing the registry, or installing third-party display tools to force new numbers. Microsoft does not document any of these as a way to renumber displays. Registry mistakes can cause serious problems, and none of these methods is guaranteed to work or to last. If the arrangement and main display are correct, there is rarely a reason to go further.
What if an app keeps choosing the wrong screen?
Open that app’s own display or monitor selector, if it has one, and choose the screen you want. Presentation, video-call, and game settings often include one. Changing the Windows main display may help apps that follow that preference, but it does not guarantee that every app will switch screens.
If an app insists on a particular numbered display and has no selector, check its maker’s instructions or support options. Rearranging the boxes will not turn display 2 into display 1.
If a window ends up on a screen that is switched off or no longer connected, see how to move an off-screen window in Windows 11.
Troubleshooting
There is no diagram, or Identify shows only one number
The arrangement options only appear when Windows detects more than one display. Expand Multiple displays and select Detect, then check the cable and the input selected on the monitor itself. Our Windows 11 and 10 multiple-monitor setup guide covers connection and detection problems.
The diagram shows one box labeled with two numbers
That normally means the screens are duplicated, so they show the same picture and act as one. Press Windows + P and select Extend. Separate boxes should then appear, and you can drag them. For more detail, see how to extend your display on Windows 11.
Make this my main display is grayed out
Check which box is selected in the diagram. The checkbox applies to the selected screen, and it typically cannot be changed when that screen is already the main display. Select a different box and look again.
The layout or numbers changed after an update, a reset, or a new dock
Set the arrangement and main display again using the steps above. If the screens are also misbehaving, Microsoft’s external monitor troubleshooting page suggests pressing Windows logo key + Ctrl + Shift + B to reset the graphics driver, restarting the PC, and then rolling back or reinstalling the display driver if the problem began after an update.
A third monitor will not show up at all
Microsoft notes that some display adapters (graphics cards) cannot drive more than one external monitor, and that a simple display splitter only duplicates one signal. Check with your PC or graphics card maker for how many screens your hardware supports.
Frequently asked questions
Can I make my main monitor display 1 in Windows 11?
Not with a setting. Windows 11 has no supported control for assigning a specific identity number to a monitor. You can make any monitor the main display by selecting its box in Settings > System > Display and checking Make this my main display, whatever number it carries.
Does dragging the boxes in Display settings change the monitor numbers?
No. Dragging the boxes and selecting Apply changes the arrangement, which controls where the pointer and windows cross between screens. The number printed on each box stays with that monitor.
Why is my main monitor numbered 2?
Because the number comes from how Windows detected the displays, not from which one you use most. On a laptop, the built-in screen is often number 1 and an external monitor is number 2, even when the external monitor is set as the main display. This is normal and does not need fixing.
Does the main display have to be number 1?
No. The main display is a separate setting from the identity number. Any detected screen can be the main display.
Will the numbers stay the same forever?
Not necessarily. Windows assigns them when it detects your monitors, so they can change after you reconnect screens in a different order, switch ports, or change docks. Plugging each monitor into the same port each time is the simplest way to keep things consistent, though Microsoft does not promise fixed numbers.
Is this different in Windows 10?
No. Microsoft’s multiple-monitor article applies to both Windows 11 and Windows 10, and neither version offers a renumbering control. In Windows 10, the same Identify, arrangement, and main-display options are under Settings > System > Display.
Next step
Open Settings > System > Display, select Identify, and fix the arrangement first. If the pointer crosses correctly and the right screen is your main display, you can leave the identity numbers exactly as Windows assigned them.

Matthew Burleigh is the founder, head writer, and editor of Solve Your Tech, which he launched in 2012. He has written technology tutorials since 2008 and worked in IT since 2003, including small-business support, IT management, and consulting. He holds Bachelor’s and Master’s degrees in Computer Science from Arizona State University.
Matthew writes practical guides for Windows, iPhone and iPad, Microsoft Office, Outlook, Google apps, and Android. Solve Your Tech’s guides are tested on current devices or checked against official product documentation, with clear steps, sources, and update dates.
Read more about Matthew and how Solve Your Tech writes and updates its guides, or report a correction.