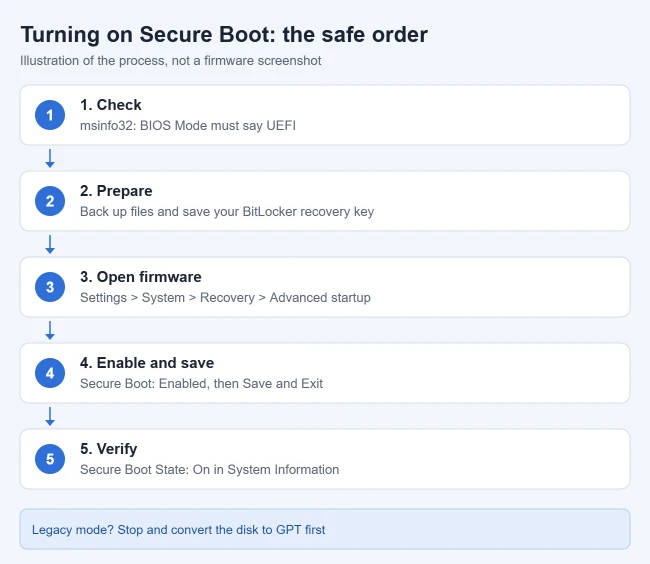
To enable Secure Boot in Windows 11, check that System Information shows BIOS Mode: UEFI, go to Settings > System > Recovery > Advanced startup > Restart now, choose Troubleshoot > Advanced options > UEFI Firmware Settings, set Secure Boot to Enabled, and save. Back in Windows, System Information should show Secure Boot State: On.
This guide covers Windows 11 Home and Pro on PCs and laptops from any maker. The Windows part is the same everywhere; the firmware screens differ by brand and model, so the steps below tell you what to look for and link to each maker’s own instructions. Plan on about 10 minutes, plus time to find your BitLocker recovery key.
What You Need Before You Start
- An administrator account on the PC.
- Your BitLocker or Device Encryption recovery key, saved somewhere other than this PC. Microsoft explains where to find it.
- A current backup of files you can’t lose.
- For a work or school PC, permission from IT. Managed PCs often lock firmware settings.
- Power: plug a laptop in before you restart into firmware.
Step 1: Check Your Current Secure Boot State
- Press Windows + S, type System Information (or
msinfo32), and open it. - Make sure System Summary is selected on the left.
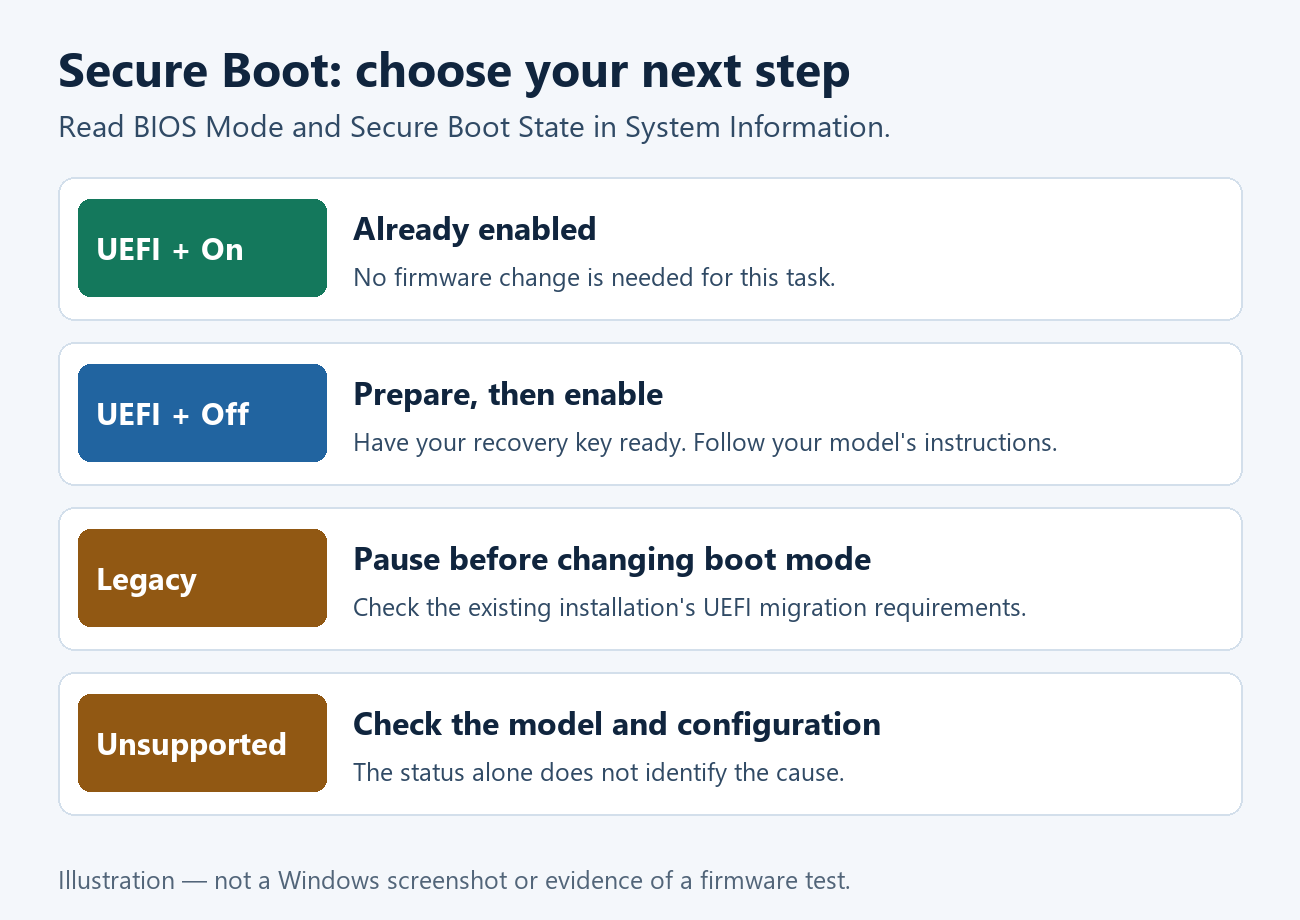
- On the right, find BIOS Mode and Secure Boot State. Expected result: you see one of the combinations in the table below.
| What System Information shows | What it means | What to do |
|---|---|---|
| BIOS Mode: UEFI, Secure Boot State: On | Secure Boot is already on | Nothing. You are done. |
| BIOS Mode: UEFI, Secure Boot State: Off | The PC supports it, but it is turned off | Follow Steps 2 to 4. |
| BIOS Mode: Legacy | Windows started in old BIOS (CSM) mode | Stop. The disk must be converted to GPT first. See the Legacy section below. |
| Secure Boot State: Unsupported | Windows can’t use it in the current setup | Check the firmware boot mode and your maker’s instructions. |
Prefer a command? Open Terminal (Admin) and run the following. It returns True when Secure Boot is on and False when it’s off. On a legacy BIOS PC it says the cmdlet is not supported on this platform. (Microsoft documents Confirm-SecureBootUEFI.)
Confirm-SecureBootUEFISystem Information shows much more than boot settings. See how to check your system configuration in Windows 11 for the rest.
Step 2: Protect Your Data and Recovery Key
A firmware change can make BitLocker ask for your recovery key at the next startup. The key only helps if you can read it from another device or a printout. If you haven’t set encryption up yourself, read how BitLocker and Device Encryption work first.
Some makers suggest suspending BitLocker protection before firmware changes. Suspending is temporary and is different from decrypting the drive, which you don’t need to do here. If you suspend it, resume it once Windows starts normally. Microsoft’s BitLocker FAQ covers the difference.
Step 3: Open Your UEFI Firmware Settings
From Windows (works on most PCs)
- Save your work and close apps.
- Open Settings > System > Recovery.
- Next to Advanced startup, select Restart now, then confirm.
- On the blue Choose an option screen, select Troubleshoot > Advanced options > UEFI Firmware Settings.
- Select Restart. Expected result: the PC restarts straight into its firmware setup screen.
If UEFI Firmware Settings isn’t listed, the PC is probably running in Legacy mode, or the maker hides the option. Use a startup key instead. Microsoft’s Secure Boot page documents this route.
With a startup key
Turn the PC off, turn it on, and tap the setup key as soon as the logo appears. These are the common keys, but models vary, so check your manual if one doesn’t work:
| Brand | Common key to enter firmware |
|---|---|
| Dell | F2 |
| HP laptops | Esc, then F10 for BIOS Setup |
| HP desktops | F10 |
| Lenovo | F1 or F2 |
| ASUS | F2 or Delete |
| Acer | F2 or Delete |
| MSI | Delete |
| Microsoft Surface | Hold Volume Up, then press and release Power |
Our BIOS and UEFI access guides have brand-by-brand walkthroughs.
Step 4: Turn On Secure Boot in Firmware
- If the firmware opens in an EZ, Basic, or Simple view, switch to the Advanced view so all settings show.
- Open the Boot, Security, or Authentication tab and find Secure Boot. Use the arrow keys and Enter if the mouse doesn’t work.
- Set Secure Boot to Enabled. If you also see Legacy Support or CSM, it must be Disabled for Secure Boot to work.
- Choose Save Changes and Exit (often F10) and confirm with Yes.
- Expected result: the PC restarts and boots to Windows. If a BitLocker recovery screen appears, enter your key.
What the setting is called depends on the maker. Here’s what the main brands document:
- HP consumer laptops: BIOS Setup > System Configuration > Boot Options. Disable Legacy Support if it’s listed, then set Secure Boot to Enabled and press F10. HP business models use Security > Secure Boot Configuration. (HP’s guide)
- Dell: press F2, find the Secure Boot option, change it to Enabled, then choose Apply or Save and Exit. (Dell’s guide)
- ASUS: the switch is often called Secure Boot Control. If Windows still reports Secure Boot as not active, ASUS says to restore the Secure Boot keys to their default values. (ASUS’s guide)
- Custom-built desktops: some motherboards need Secure Boot Mode set to Standard, or an option like Install default Secure Boot keys, before Secure Boot turns on.
Only restore default keys. Don’t choose options that clear or delete keys unless your maker tells you to. That turns Secure Boot off.
Step 5: Confirm Secure Boot Is On
- Once Windows starts, open System Information again.
- Check that BIOS Mode says UEFI and Secure Boot State says On.
- If you suspended BitLocker, resume it in Control Panel > BitLocker Drive Encryption.
A firmware menu that says Enabled doesn’t prove Secure Boot is active. Windows’ own report is the check that counts.
If BIOS Mode Says Legacy
Secure Boot needs UEFI mode, and UEFI needs a disk that uses the GPT partition style. Don’t switch the firmware from Legacy/CSM to UEFI first. If the disk is still MBR, Windows won’t start. Convert the disk, then change the firmware.
Check the partition style
- Right-click Start and choose Disk Management.
- Right-click the disk that holds Windows (the disk label on the left, not a partition) and choose Properties.
- Open the Volumes tab. Expected result: Partition style reads either GUID Partition Table (GPT) or Master Boot Record (MBR).
Convert MBR to GPT with MBR2GPT
Back up first. This is a separate, bigger job than flipping Secure Boot on.
- Go to Settings > System > Recovery > Advanced startup > Restart now, then Troubleshoot > Advanced options > Command Prompt.
- Type
mbr2gpt /validateand press Enter. Expected result: validation completes without errors. - Type
mbr2gpt /convertand press Enter. A return code of 0 means it worked. - Restart into firmware, set the boot mode to UEFI (disable Legacy/CSM), then enable Secure Boot as in Step 4.
MBR2GPT checks the disk layout first and refuses disks it can’t convert safely. Read Microsoft’s MBR2GPT requirements before you start, including its BitLocker notes. If it fails, the fallback is a clean install in UEFI mode, which erases the drive. Dell notes this for its PCs.
Troubleshooting
The Secure Boot option is grayed out
- Disable Legacy Support or CSM first; many firmware menus lock Secure Boot while it’s on.
- Switch to the Advanced view. Some models only show or unlock Secure Boot there.
- Update the BIOS from your maker’s support site. HP says a missing Secure Boot Configuration option can mean the BIOS needs updating.
Firmware says Enabled but Windows says Off
Make sure you chose Save and Exit, not just Exit. Then look for a key option: the PC may be in setup mode with no keys installed. Restoring or installing the default Secure Boot keys (your maker’s wording will vary) usually fixes it.
Windows won’t start after enabling it
Go back into firmware and set Secure Boot to Disabled, then save. If that was your only change, Windows should start again. Then look for what didn’t pass the check: often a Legacy boot, an older graphics card, or another operating system’s boot loader. Microsoft covers turning it back off when it blocks startup.
A BitLocker recovery screen appears
Match the Key ID on screen to your saved key and type the 48-digit number. Don’t clear the TPM or reset the PC to get past it. Once you’re in, you can check how to turn off BitLocker if you’d rather not use encryption.
You can’t boot from a USB drive anymore
With Secure Boot on, older boot media is rejected. Use a drive made for UEFI, such as a Windows 11 recovery USB or Microsoft’s installation media. HP recommends GPT-formatted USB drives.
Frequently Asked Questions
Does Windows 11 require Secure Boot to be on?
To upgrade, Microsoft only requires the PC to be Secure Boot capable, meaning UEFI is enabled. Microsoft still recommends turning it on for better security, and HP warns that running Windows 11 without it can cause problems with updates. For the full upgrade and clean-install steps, see how to install Windows 11.
Why does my game say Secure Boot is required?
Some anti-cheat systems check it. EA says some of its games require Secure Boot for Javelin Anticheat, and Riot has its own Secure Boot guide. Use the steps above, then restart the game.
Will enabling Secure Boot erase my files?
No. The switch only controls which startup software is allowed to run. The risk is a PC that won’t start, not lost files. Converting a disk from MBR to GPT is a different operation, which is why you should back up first.
Will Secure Boot stop Linux or dual-boot setups?
Many major Linux distributions boot with Secure Boot on, but not all do, and some custom boot loaders won’t. If you dual-boot, check that system’s Secure Boot instructions before you change anything.
Is Secure Boot the same as TPM?
No. Both are Windows 11 security features, but TPM stores encryption keys in hardware while Secure Boot checks the software that loads at startup. You can have one on without the other.
What about the 2026 Secure Boot certificate update?
Microsoft’s original 2011 Secure Boot certificates start expiring in June 2026. On supported versions of Windows, the update is installed automatically through Windows Update. A Secure Boot State of On doesn’t prove the new certificates are in place, so keep Windows and your firmware up to date. Microsoft explains the certificate change.
Need to clean up other certificates on your PC? See how to remove certificates from Windows 11.
For other firmware settings, see how to turn on hardware virtualization in Windows 11.

Matthew Burleigh has been writing tech tutorials since 2008. His writing has appeared on dozens of different websites and been read hundreds of millions of times.
After receiving his Bachelor’s and Master’s degrees in Computer Science he spent several years working in IT management for small businesses. However, he now works full time writing content online and creating websites.
His main writing topics include iPhones, Microsoft Office, Google Apps, Android, and Photoshop, but he has also written about many other tech topics as well.