To use StandBy on an iPhone, connect the phone to a charger, set it down on its side so it stays still, and press the side button. StandBy then fills the screen with a clock, photos, or widgets that you can read from across the room. Swipe left or right to change views, and swipe up or down to change what a view shows. These steps apply to iPhones running iOS 17 or later, including iOS 18 and iOS 26.
Apple’s own overview of the feature is on its iPhone User Guide page Use StandBy to view information at a distance while iPhone is charging. Setting names can differ slightly between iOS versions, so the guide points out where your screen may not match.
What You Need to Use StandBy
StandBy is not an app that you open. It starts by itself when four conditions are met at the same time.
- iOS 17 or later. StandBy arrived with iOS 17. To check your version, go to Settings > General > About and look at the iOS Version line.
- A charger. The iPhone has to be charging. A cable works, and so does a wireless or MagSafe charger.
- The iPhone on its side. The phone must be in landscape, propped up rather than lying flat, and it has to stay still. A charging stand is the easiest way to do this, but leaning the phone against something stable also works with a cable.
- A locked screen. StandBy appears in place of the Lock Screen. It does not show while you are using the Home Screen or an app.
StandBy must also be switched on in Settings. It is on by default, so most people never have to change that.
How to Start StandBy on Your iPhone
- Connect your iPhone to a charger. Plug in the cable or place the phone on a wireless or MagSafe charger. You should see the charging indicator.
- Set the iPhone down on its side. Turn it to landscape and keep it stationary. StandBy does not start while the phone is moving or lying flat on a table.
- Press the side button. This locks the screen. After a moment the StandBy screen replaces the Lock Screen.
- Swipe left or right to switch views. There are three: widgets, photos, and clocks.
- Swipe up or down to change the current view. In the widget view this scrolls through a widget stack. In the photo view it changes the photo collection. In the clock view it changes the clock style.
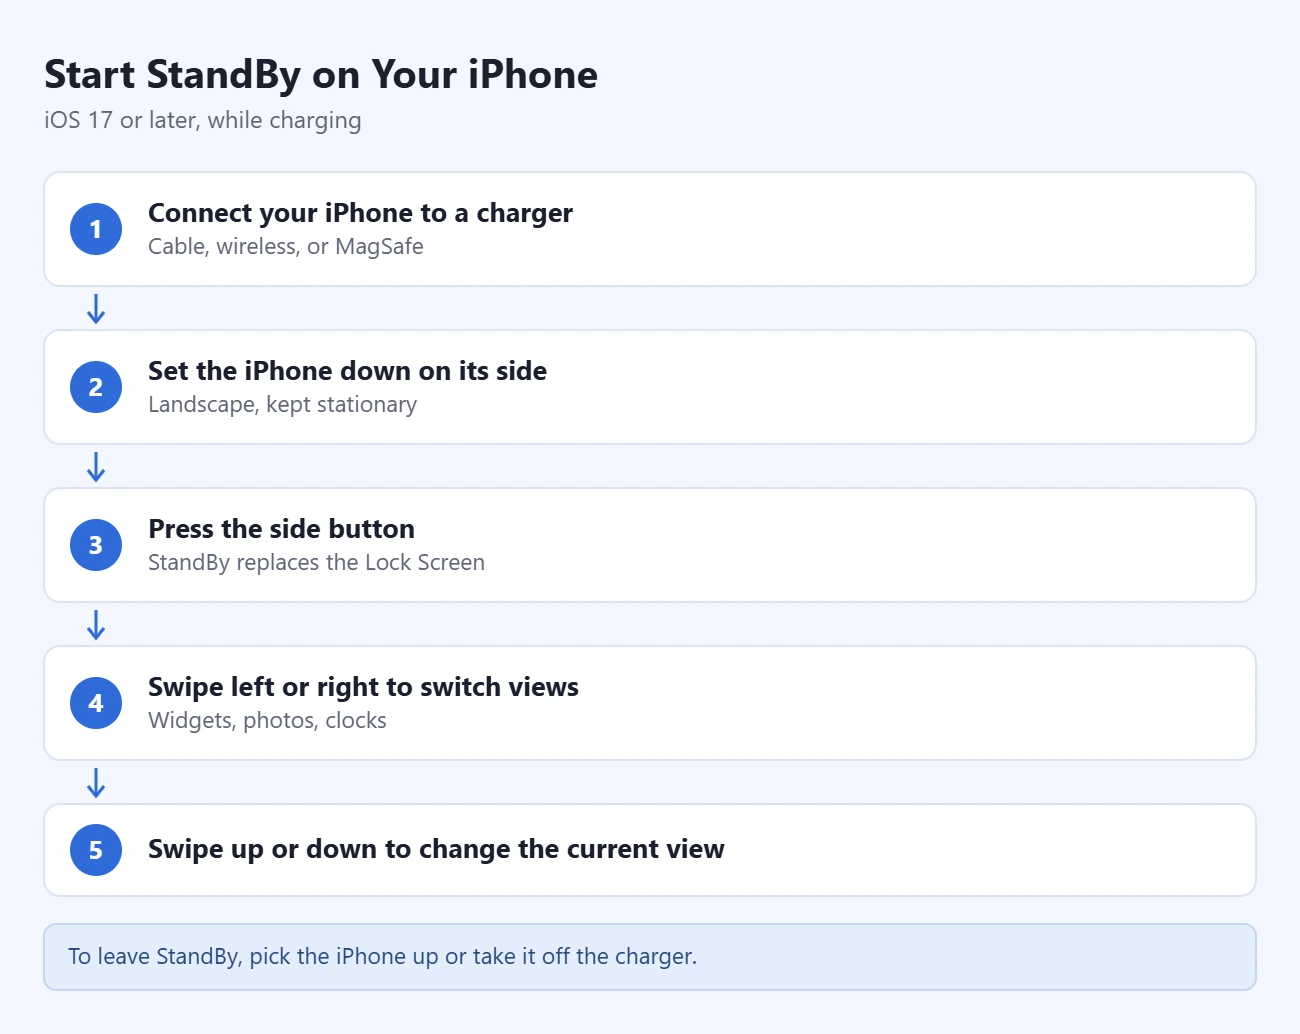
To leave StandBy, pick the iPhone up, turn it upright, or take it off the charger. The normal Lock Screen comes back. Nothing you set up in StandBy is lost, and it returns the next time you charge the phone on its side.
The Three StandBy Views
| View | What it shows | Swipe up or down to |
|---|---|---|
| Widgets | Two widget stacks side by side, such as a clock and a calendar | Move through the widgets in that stack |
| Photos | Pictures from your photo library, shown full screen | Change to another photo collection or album |
| Clocks | A large full-screen clock | Change the clock style |
Your iPhone remembers the view you used last. Apple also says that when you charge with MagSafe, StandBy remembers your preferred view for each MagSafe charger. That means the charger on your nightstand can show a clock while the one on your desk shows widgets.
How to Customize the Widgets in StandBy
The widget view holds two stacks, one on the left and one on the right. Each stack is edited separately. You can only edit StandBy while it is on the screen. There is no editor for it in the Settings app.
- Start StandBy and swipe to the widget view. You should see two widgets next to each other.
- Touch and hold the stack you want to change. Your iPhone may ask for Face ID or your passcode first. The stack then opens in an editing screen.
- Tap the Add button (+) to add a widget. Pick a widget from the list, then tap Add Widget.
- Tap the Remove button (–) on a widget to delete it from the stack. This only removes it from StandBy. The app stays on your iPhone.
- Turn Smart Rotate and Widget Suggestions on or off. Smart Rotate lets the stack change widgets by itself during the day. Turn it off if you want the stack to stay on the widget you chose.
- Tap Done. Repeat the steps for the other stack.
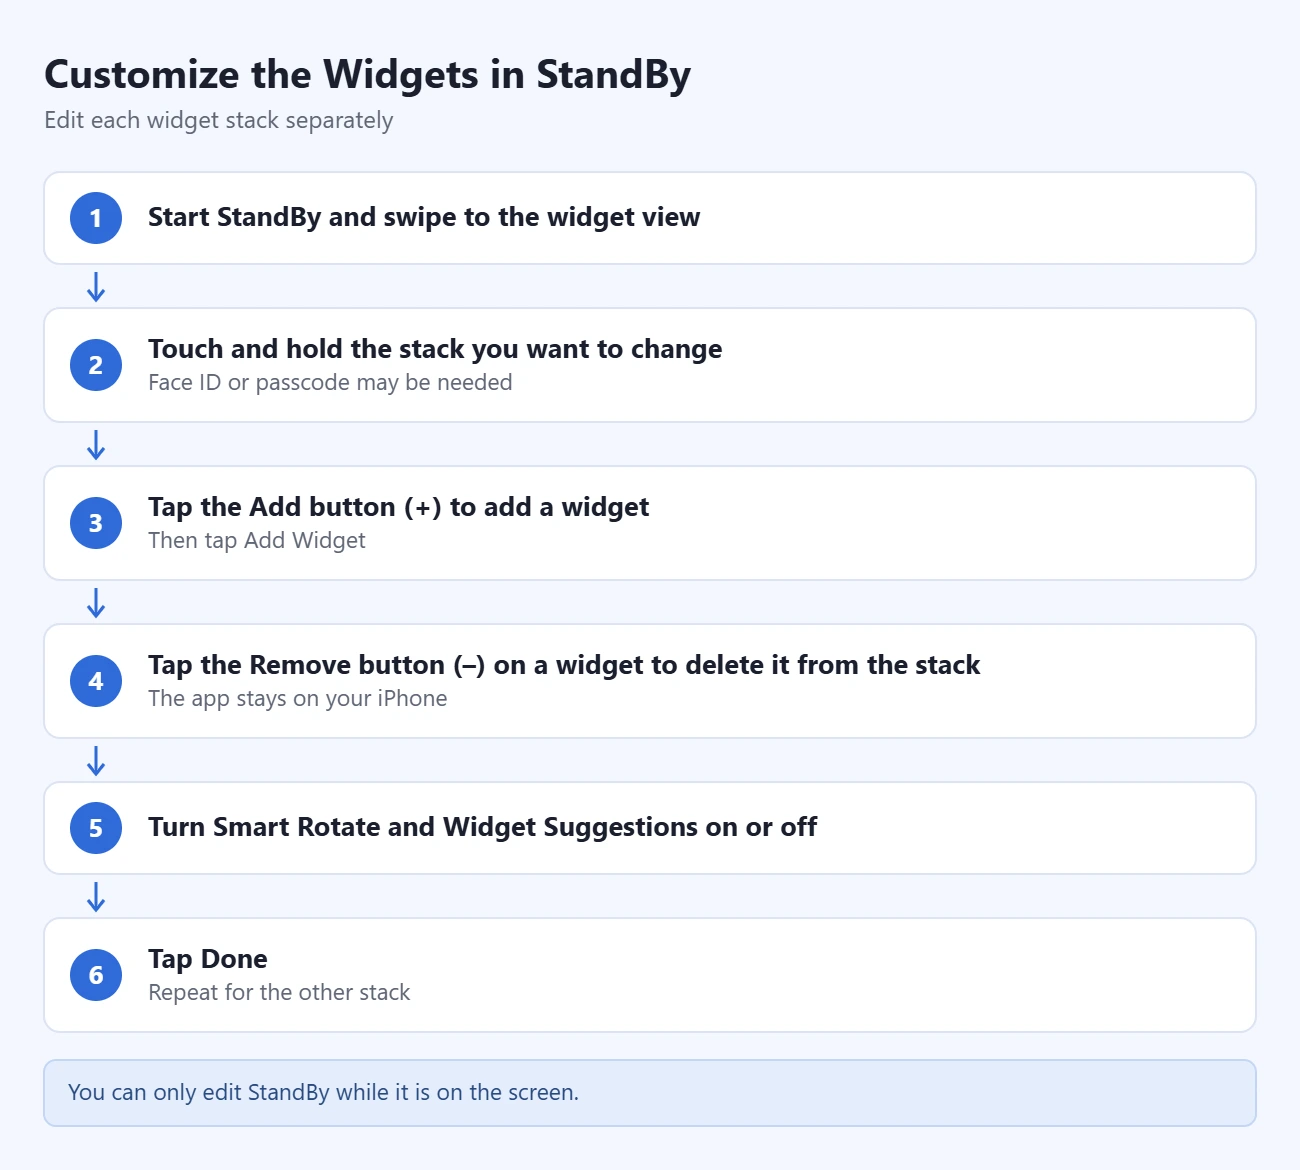
If a stack keeps changing to a widget you did not pick, Smart Rotate is the cause. Turn it off for that stack and swipe to the widget you want.
How to Choose Which Photos StandBy Shows
The photo view works like a digital picture frame. By default it shuffles through photos your iPhone has picked out as highlights. You can also point it at a specific album.
- Start StandBy and swipe to the photo view. If the phone is locked, it may need Face ID or your passcode before it shows your pictures.
- Touch and hold the screen. The collections appear as cards you can scroll through.
- Tap the Add button (+) to add an album. Choose an album from your photo library.
- Tap the eye button on a collection to hide it. Hidden collections no longer appear when you swipe up or down. Tap the eye again to bring one back.
- Tap Done.
Tip: make an album in the Photos app that contains only the pictures you want on display, then add that album here. It keeps screenshots and receipts off your nightstand.
How to Change the StandBy Clock
Apple lists five clock styles for StandBy: Digital, Analog, World, Solar, and Float.
- Start StandBy and swipe to the clock view.
- Swipe up or down to move from one clock style to the next. Stop on the one you like. That is all you need to do to change the style.
- To change the color, touch and hold the clock. The styles open in an editing screen.
- Tap the round color button next to the clock and pick an accent color. The colors on offer depend on the clock style.
- Tap Done.
If you use StandBy as a bedside clock, your next alarm can appear on the clock face. See our guide on how to set an alarm on your iPhone if you have not set one up yet. One thing to know: Apple notes that haptics for alarms are disabled while you use StandBy, so make sure your alarm has a sound selected and is not set to vibrate only.
How to Use Night Mode in StandBy
Night Mode is a StandBy setting, and it has nothing to do with the camera feature of the same name. When Night Mode is on, the StandBy screen adapts to low light at night and displays with a red tint so it does not disturb you while you sleep. It switches back to normal colors when the room is bright again.
To turn Night Mode on or off:
- Open the Settings app.
- Tap StandBy.
- Find Night Mode. On some iPhones it is on this screen. On iPhones with an Always-On display, tap Display first.
- Turn Night Mode on or off.
If your StandBy clock looks red and dim in the evening, this is why. Nothing is wrong with the screen.
How to Keep StandBy on the Screen
How long StandBy stays visible depends on the display in your iPhone.
- iPhones with an Always-On display. StandBy can stay on the screen the whole time the phone is charging on its side. Apple introduced this with iPhone 14 Pro and iPhone 14 Pro Max, and it is included on later models that have an Always-On display.
- All other iPhones. The screen turns off after a short time. Tap the screen whenever you want to see StandBy again.
On an iPhone with an Always-On display, you can choose when the StandBy screen turns off. Apple added these options in iOS 17.1.
- Open Settings and tap StandBy.
- Tap Display.
- Under Turn Display Off, choose Automatically, After 20 Seconds, or Never.
With Automatically, the iPhone turns the display off when it is not in use and the room is dark. Choose Never if you want the clock visible all night. The same Display screen can include Motion To Wake, which turns the display back on when the iPhone detects movement at night. If you do not see a Display option, your iPhone does not have an Always-On display, and tapping the screen is the way to wake StandBy.
If you are not sure whether your model has an Always-On display, Apple lists the supported models on its page Keep the iPhone display on longer. That setting is separate from Auto-Lock, which controls how long the regular screen stays awake. Our guide on changing the lock screen timeout on an iPhone covers Auto-Lock.
Notifications, Live Activities, and Siri in StandBy
StandBy does more than show a clock. Apple designed it to handle the things that normally appear on the Lock Screen, in a larger size that is easier to read from a distance.
- Notifications appear in a larger size than they do on the Lock Screen.
- Live Activities, such as a running timer or music that is playing, appear in StandBy. Tap one to see it full screen.
- Siri results are shown full screen. You can ask for a timer or the weather without picking the phone up.
- Incoming calls are shown in the landscape layout too.
Because the phone is sitting in the open, you may not want message text visible to anyone who walks by. You have two controls for that.
- Open Settings and tap StandBy.
- Turn off Show Notifications if you do not want notifications to appear in StandBy.
- Or leave it on and turn on Show Preview on Tap Only. Notifications still arrive, but the content stays hidden until you tap.
These switches affect StandBy only. To control what appears on the regular Lock Screen, see our guide on showing or hiding notifications on the iPhone Lock Screen.
How to Turn Off StandBy
If you would rather see the normal Lock Screen when your iPhone charges on its side, switch the feature off. This does not delete your widget, photo, or clock choices.
- Open the Settings app.
- Scroll down and tap StandBy.
- Turn off the StandBy switch at the top.
To confirm it worked, put the iPhone on its charger in landscape and press the side button. You should see the ordinary Lock Screen instead of the large StandBy clock or widgets. To undo the change, go back to Settings > StandBy and turn the switch on again.
What to Do If StandBy Does Not Start
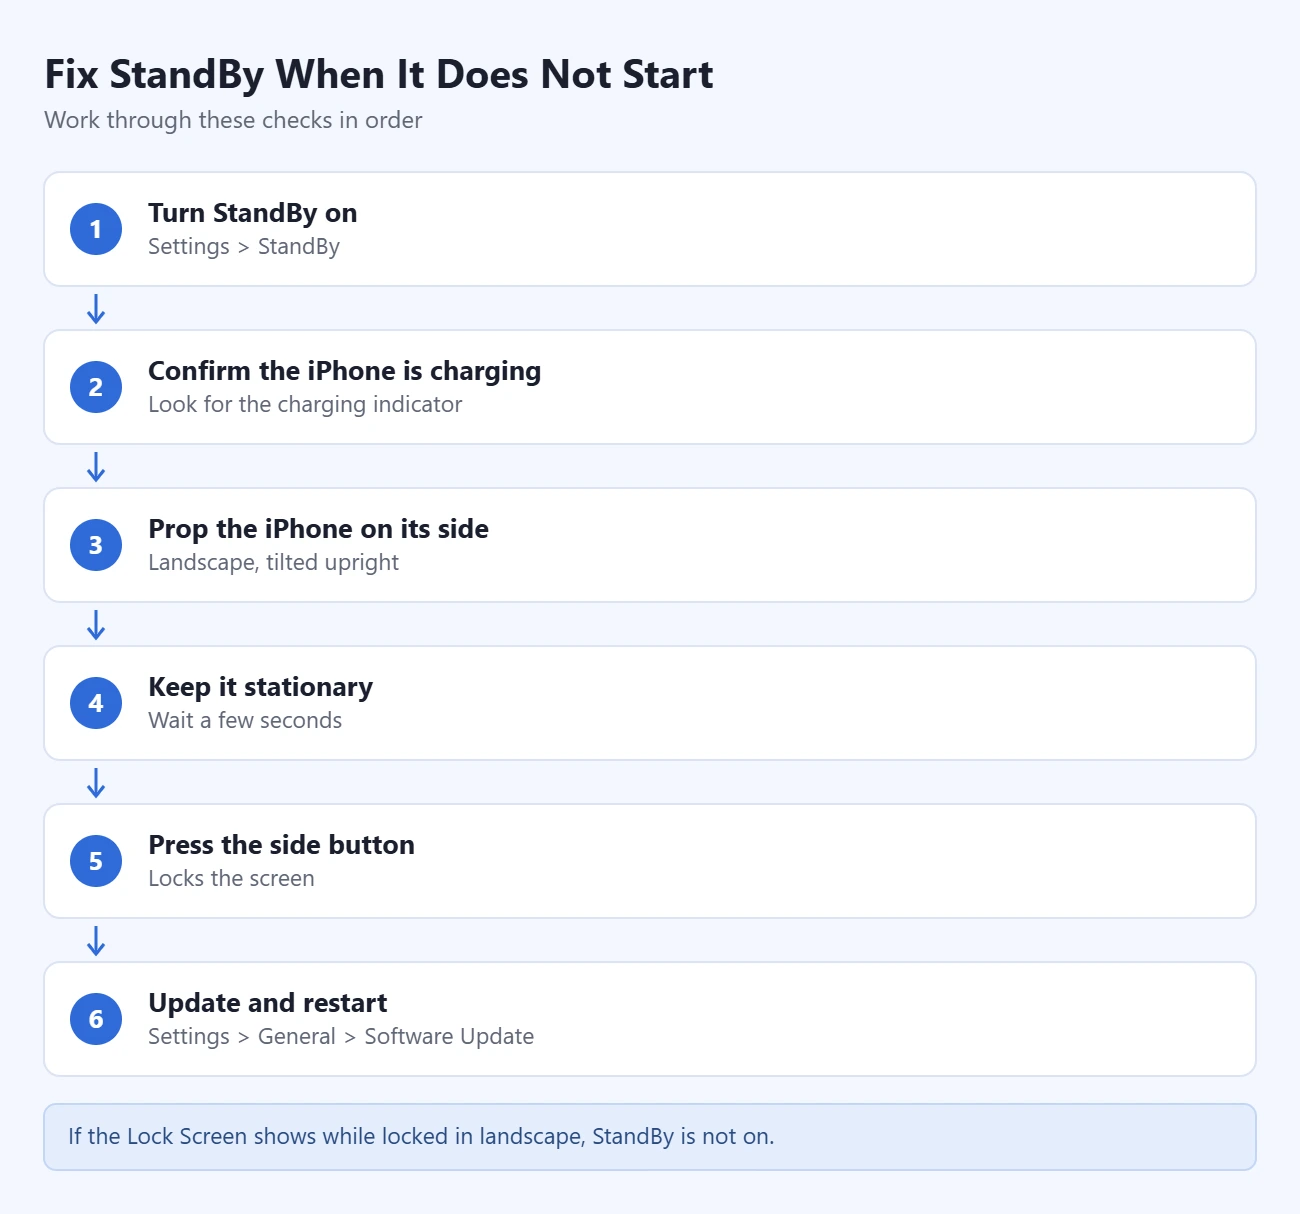
Apple gives one clear sign that the feature is switched off: if the Lock Screen is displayed while the iPhone is locked, charging, and in landscape, StandBy is not on. Work through these checks in order.
- Turn StandBy on. Go to Settings > StandBy and make sure the StandBy switch is on.
- Confirm the iPhone is charging. Look for the charging indicator. If it is missing, reseat the cable or reposition the phone on the wireless charger.
- Prop the iPhone on its side. It must be in landscape and tilted upright. StandBy does not start when the phone lies flat.
- Keep it stationary. Let go of the phone and wait a few seconds. StandBy does not start while the phone is being moved.
- Press the side button. This locks the screen so StandBy can take over.
- Update and restart. Go to Settings > General > Software Update, install any update, then restart the iPhone and try again.
A few related problems have simple causes:
- There is no StandBy entry in Settings. The iPhone is running a version older than iOS 17. Update it if an update is offered. If your model cannot install iOS 17, it cannot use StandBy.
- There is no Display option under StandBy. That menu appears only on iPhones with an Always-On display.
- StandBy disappears after a few seconds. On an iPhone without an Always-On display this is normal. Tap the screen to bring it back. On a model with an Always-On display, check Settings > StandBy > Display > Turn Display Off. Low Power Mode can also switch off the Always-On display, so turn it off in Settings > Battery while you test.
- The screen is red. Night Mode is on and the room is dark. Turn off Night Mode if you prefer normal colors.
- The photo view asks you to unlock. Your pictures are private, so the iPhone may need Face ID or your passcode before it shows them.
Frequently Asked Questions
Which iPhones can use StandBy?
Any iPhone running iOS 17 or later can use StandBy. The difference between models is how long it stays visible. iPhones with an Always-On display can show StandBy continuously while charging. Other iPhones turn the screen off after a short time, and you tap the screen to see StandBy again.
Do I need a MagSafe charger for StandBy?
No. StandBy works with any charger, as long as the iPhone is charging, locked, and resting on its side. MagSafe adds one extra: StandBy remembers your preferred view for each MagSafe charger you use. A stand of some kind simply makes it easier to keep the phone upright.
Can I use StandBy without charging the iPhone?
No. Apple describes StandBy as a feature for when the iPhone is on its side and charging. If you take the phone off the charger, the regular Lock Screen returns.
Does StandBy work on an iPad?
Apple documents StandBy as an iPhone feature, and its instructions are in the iPhone User Guide. This guide does not cover iPad.
Why is my StandBy screen red?
Night Mode is turned on. In low light it gives the StandBy screen a red tint so it is less intrusive at night. To stop it, go to Settings > StandBy and turn off Night Mode. On iPhones with an Always-On display, the switch is under Settings > StandBy > Display.
How do I stop notifications from showing in StandBy?
Go to Settings > StandBy and turn off Show Notifications. If you still want to know that something arrived but want the content hidden, leave Show Notifications on and turn on Show Preview on Tap Only instead.
Will my alarm still go off in StandBy?
Yes. Alarms sound as usual. Apple notes that alarm haptics are disabled in StandBy, so an alarm that is set to vibrate only is easy to miss. Give the alarm a sound.
Can I edit StandBy from the Settings app?
Only partly. Settings > StandBy holds the on and off switch, Night Mode, notification options, and the display options on supported models. Widgets, photo albums, and clock styles are changed on the StandBy screen itself by touching and holding the view you want to edit.
Next Step
Put your iPhone on its charger tonight, turn it on its side, and press the side button. Swipe to the clock view, pick a style, then decide whether you want Night Mode and notifications on. Once it is set up the way you like, it will be waiting each time you charge. If the picture behind your regular clock needs a refresh too, our guide on how to change the Lock Screen on an iPhone walks through that.

Matthew Burleigh is the founder, head writer, and editor of Solve Your Tech, which he launched in 2012. He has written technology tutorials since 2008 and worked in IT since 2003, including small-business support, IT management, and consulting. He holds Bachelor’s and Master’s degrees in Computer Science from Arizona State University.
Matthew writes practical guides for Windows, iPhone and iPad, Microsoft Office, Outlook, Google apps, and Android. Solve Your Tech’s guides are checked step by step against the device or app maker’s own documentation and tested on his own devices whenever he has the hardware or software, with clear steps, sources, and update dates.
Read more about Matthew and how Solve Your Tech writes and updates its guides, or report a correction.