To change your desktop background in Windows 11, right-click the desktop and select Personalize, then select Background. Under Personalize your background, choose Picture, Solid color, Slideshow or Windows spotlight, and pick your image. The change happens right away.
This guide covers Windows 11. It shows the main steps, what each background type does, quicker ways to set a picture, how to make an image fit your screen, and how backgrounds work with multiple monitors and virtual desktops. The steps match Microsoft’s Change the desktop background in Windows guide.
How to Change the Desktop Background
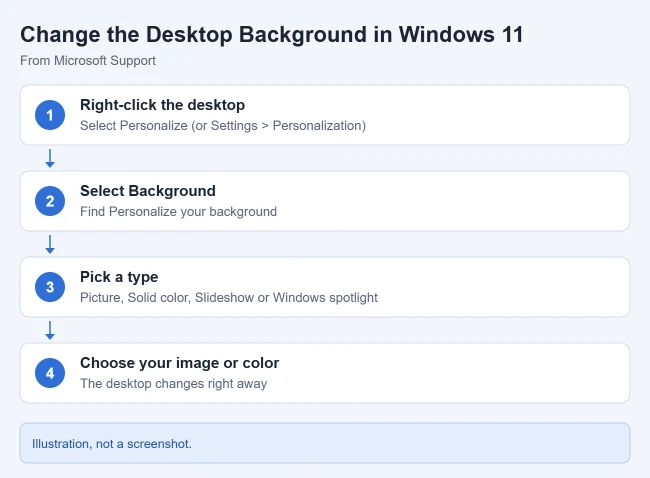
- Right-click an empty spot on the desktop and select Personalize. You can also open Settings > Personalization. The Personalization settings open.
- Select Background. The background options appear with a preview at the top.
- Open the list next to Personalize your background and choose Picture, Solid color, Slideshow or Windows spotlight. The options below change to match your choice.
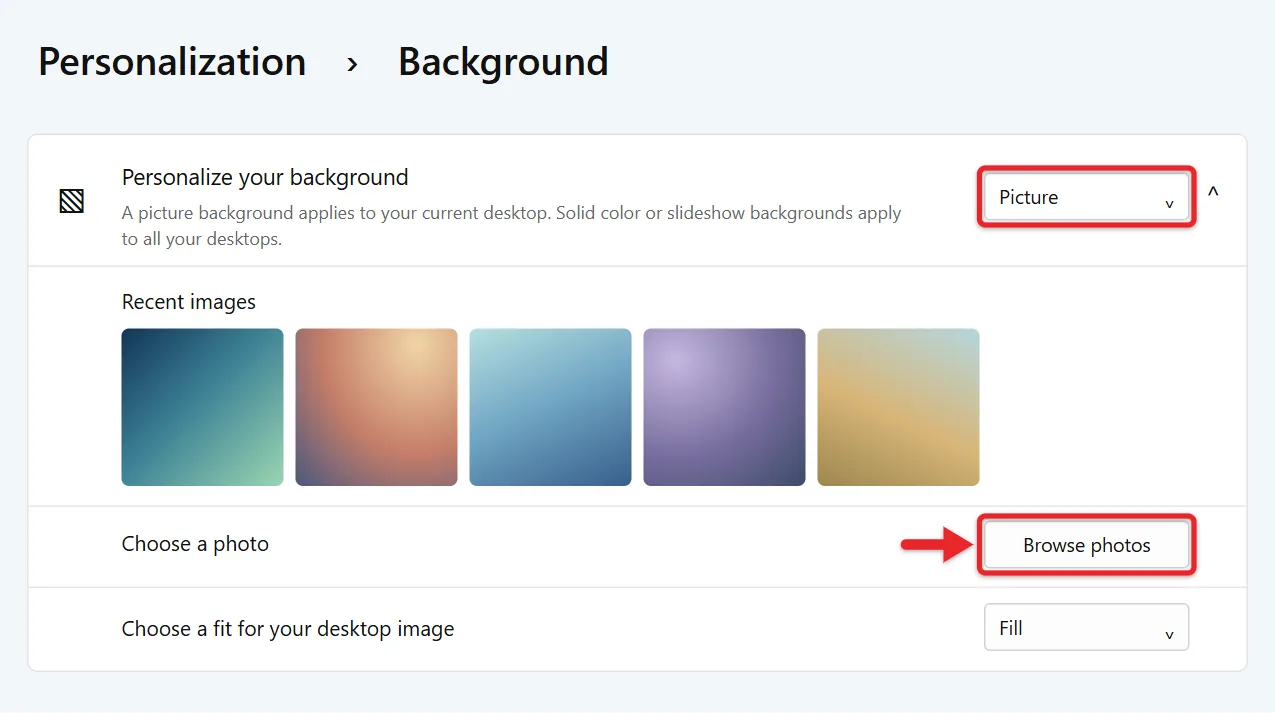
- For Picture, select one of the recent images or select Browse photos to pick your own. Your desktop shows the new picture.
The Four Background Types
- Picture: one image that stays put. Choose a default image or browse to one of your own.
- Solid color: a single plain color.
- Slideshow: rotates through the pictures in a folder you choose. Microsoft says you can set how often the images change and whether they shuffle. To skip ahead, right-click the desktop and select Next desktop background. On a Windows 10 PC, you can also view pictures as a full-screen slideshow.
- Windows spotlight: a new image from around the world every day. It adds a “Learn about this picture” desktop icon, which you can remove if you don’t want it.
Faster Ways to Set a Picture
- From File Explorer: right-click a picture and select Set as desktop background.
- From the Photos app: open the picture, select the three-dot menu, then Set as > Background.
Make the Picture Fit Your Screen
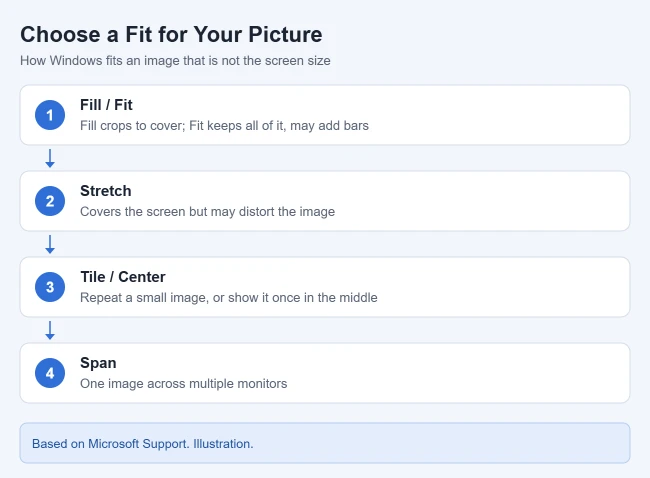
When you choose Picture or Slideshow, use Choose a fit for your desktop image. Here’s what each option does:
- Fill: enlarges the image to cover the whole screen. Parts may be cropped.
- Fit: shows the whole image without distorting it. You may see bars on the sides or top and bottom.
- Stretch: stretches the image to cover the screen, which can distort it.
- Tile: repeats the image across the screen. Good for small images and patterns.
- Center: places the image in the middle without resizing it. A smaller image leaves a border.
- Span: stretches one image across multiple monitors.
For a picture that looks cut off or blurry, Fit usually solves it. For more help, read about resizing your desktop background in Windows 11.
If your icons or taskbar are missing too, get back to the normal desktop.
Backgrounds With More Than One Monitor
With Picture selected, you can use the same picture on every display or a different one on each. Right-click an image under recent images and choose the display. With Slideshow, each screen shows a different picture from your folder. To use one wide image across all screens, choose the Span fit. For details, read how to set a different background for each monitor in Windows 11.
The display numbers in that menu come from Display settings, where you can also change the main display in Windows 11.
Backgrounds With Multiple Virtual Desktops
If you use more than one virtual desktop, you can give each desktop its own picture. Right-click the image preview under recent images, then select Set for all desktops or pick a specific desktop. Two limits apply when you use multiple desktops: you can’t set a different picture per monitor, and Slideshow isn’t supported.
To create those desktops and move between them, read about switching between desktops in Windows 11.
To add, rename or reorder those desktops, learn how Task View manages virtual desktops.
Change the Background With a Theme
A theme changes your background along with window colors, sounds and the mouse cursor in one step. Microsoft’s themes guide says to open Settings > Personalization > Themes, then pick a default theme or select Browse themes to get more from the Microsoft Store. After you customize the Background, Color, Sounds and Mouse cursor options, you can save the result as your own theme to reapply later.
Desktop Background vs. Lock Screen
The lock screen has its own picture. To change it, go to Settings > Personalization > Lock screen. Microsoft’s lock screen guide lists three choices under Personalize your lock screen: Windows spotlight, Picture or Slideshow. There’s also a switch to show the lock screen picture on the sign-in screen.
For widgets, slideshows and a PIN that protects the lock screen, read how to set the lock screen on Windows 11.
Microsoft also suggests the Bing Wallpaper app if you want the Bing image of the day as your desktop background, with a short description of each photo.
Frequently Asked Questions
Why can’t I set a different picture on each monitor?
This option isn’t available when you use multiple virtual desktops. Close the extra desktops, or set one picture for all screens.
How do I get a new background every day automatically?
Choose Windows spotlight, or use Slideshow with a folder of your own pictures.
Does this work on Windows 10?
Yes. In Windows 10, right-click the desktop, choose Personalize > Background, and pick Picture, Solid color, or Slideshow. Microsoft’s background instructions cover both versions. Microsoft ended support for Windows 10 on October 14, 2025.

Matthew Burleigh is the founder, head writer, and editor of Solve Your Tech, which he launched in 2012. He has written technology tutorials since 2008 and worked in IT since 2003, including small-business support, IT management, and consulting. He holds Bachelor’s and Master’s degrees in Computer Science from Arizona State University.
Matthew writes practical guides for Windows, iPhone and iPad, Microsoft Office, Outlook, Google apps, and Android. Solve Your Tech’s guides are checked step by step against the device or app maker’s own documentation and tested on his own devices whenever he has the hardware or software, with clear steps, sources, and update dates.
Read more about Matthew and how Solve Your Tech writes and updates its guides, or report a correction.