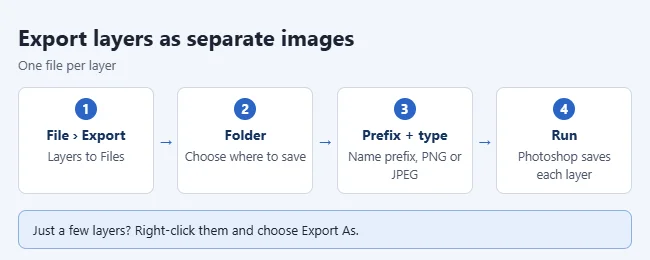
To export layers as separate images in Photoshop, choose File › Export › Layers to Files, pick a destination folder, enter a file name prefix, choose a File Type such as PNG or JPEG, and select Run. Photoshop saves one image per layer in that folder.
These steps match Adobe’s current help pages for Photoshop on Windows and Mac. Photoshop CS5 and other older versions use the same dialog from a different menu, covered in its own section below.
To export only a few layers, select them in the Layers panel, right-click, and use Quick Export as PNG or Export As. Adobe covers the full-document method in Export layers as files.
Before you start
- Name your layers. Layer names end up in the file names, so rename “Layer 1” and “Layer 2” to something you will recognize. Double-click a layer name to edit it.
- Decide what to skip. Click the eye icon next to any layer you do not want. You can then tell Photoshop to export only visible layers.
- Make an empty folder. A document with many layers produces many files. A new, empty folder keeps them together and away from files you already have.
- Save your PSD first. The export does not change your document, but a saved copy keeps your layers safe if Photoshop stops responding during a long export.
Export all layers with Layers to Files
Layers to Files is the built-in command that turns each layer of the open document into its own image file.
- Open your layered file in Photoshop.
- Choose File › Export › Layers to Files. A small dialog box opens.
- Click Browse and choose the destination folder.
- Type a name in the File Name Prefix box. It starts out as the document name, and every exported file begins with this text.
- Check Visible Layers Only to skip layers whose eye icon is turned off. Leave it unchecked to export hidden layers too.
- Choose a format from the File Type dropdown. The list includes BMP, JPEG, PDF, PSD, Targa, TIFF, PNG-8, and PNG-24.
- Set the options that appear for that format. For PNG-24, keep Transparency checked so see-through areas stay see-through. For JPEG, set the Quality.
- Decide on Trim Layers. Checked, each file is cropped to the pixels on that layer. Unchecked, every file keeps the full canvas size, which keeps each layer in its original position if you stack the files again later.
- Check Include ICC Profile if you want the color profile embedded in each file. This matters mostly for color-managed print work.
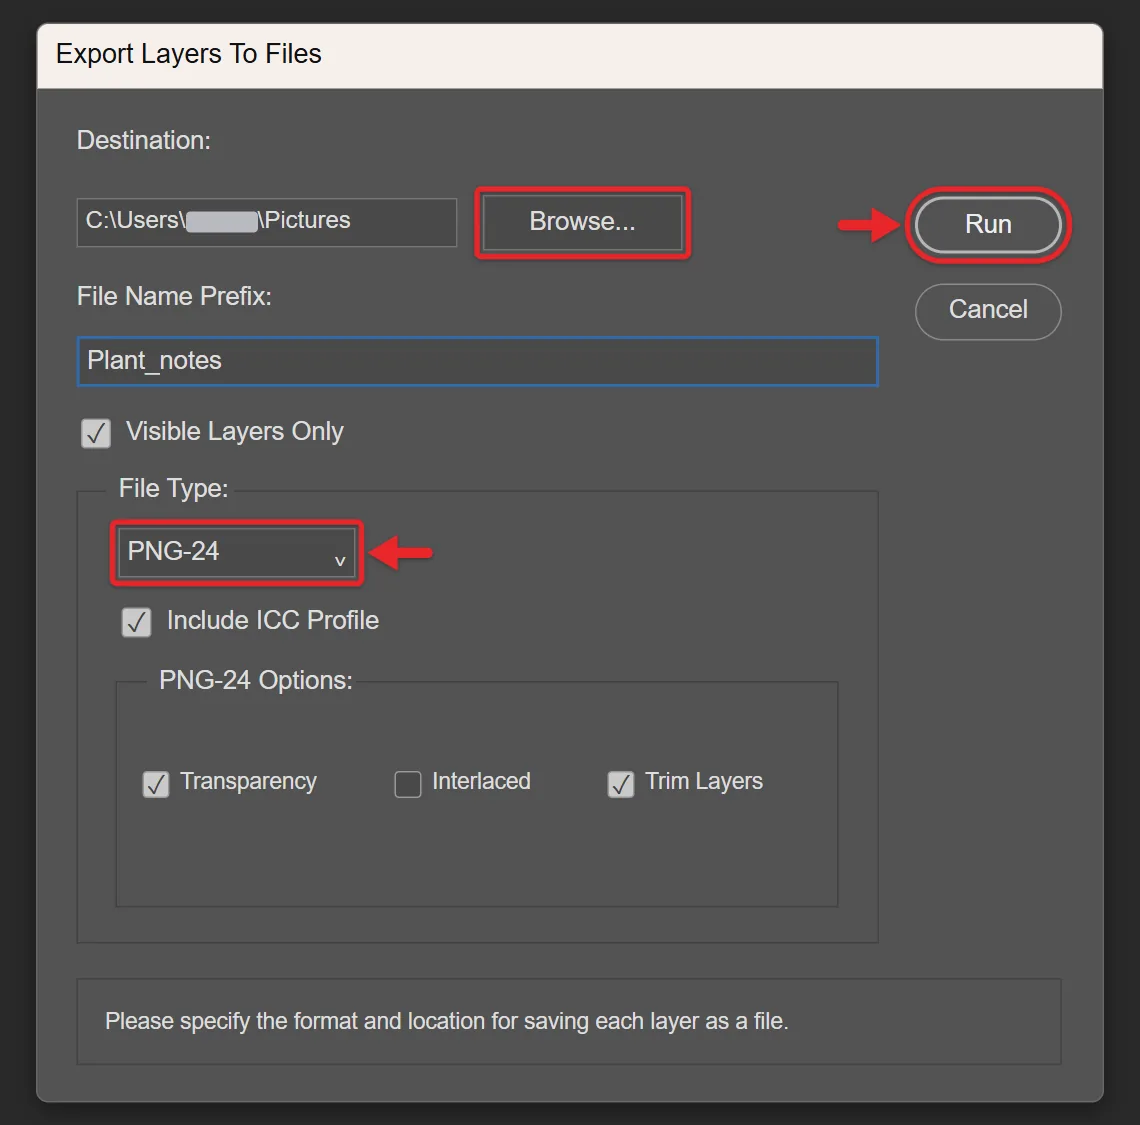
- Select Run and wait. Photoshop opens and saves each layer in turn, then shows a message when it is done.
A file with dozens of layers can take a few minutes, especially on a computer with little memory, so let it finish before you use Photoshop again.
How the files are named
Each file name has three parts: your prefix, a sequence number that Photoshop adds, and the layer name. The number is there so that two layers with the same name do not overwrite each other. Adobe community experts note that removing it means editing the script that runs the command, so most people rename the files afterward if the numbers get in the way.
Export only the layers you select
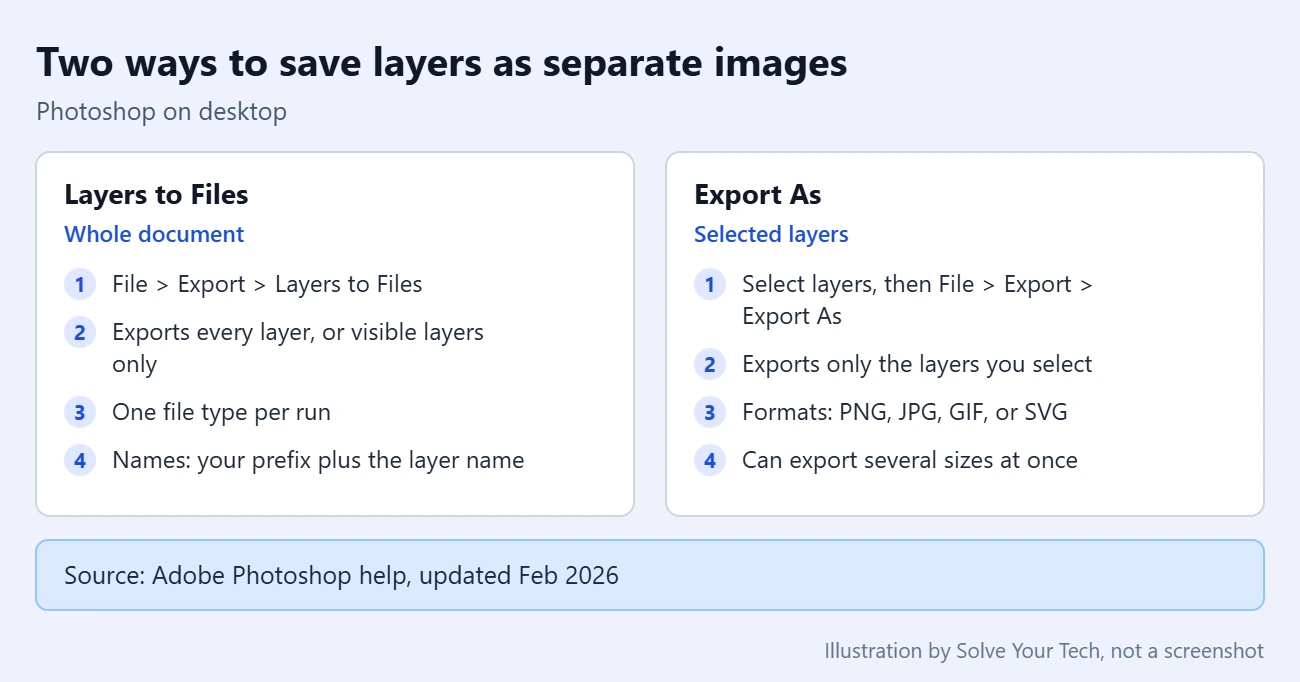
Layers to Files has no way to pick individual layers, apart from hiding the ones you do not want. For a handful of layers, these two commands are faster. To select several layers, Shift-click to pick a run of layers, or Ctrl-click (Windows) or Command-click (Mac) to pick layers that are not next to each other.
Quick Export as PNG
- Select the layers in the Layers panel.
- Right-click one of the selected layers and choose Quick Export as PNG.
- If Photoshop asks for a location, choose a folder and select Save.
Each file takes the name of its layer. Quick Export uses saved settings, so there are no options to set each time.
To change the format, go to Edit › Preferences › Export (Windows) or Photoshop › Settings › Export (Mac) and set Quick Export Format to PNG, JPG, or GIF. The menu command then changes its name to match. New to that window? It’s the same place where you change the theme and other preferences in Photoshop. The same screen has Quick Export Location, where you choose between being asked each time and saving to an assets folder next to the current document. See Adobe’s Quick Export page for the full list.
Export As
- Select the layers you want in the Layers panel.
- Choose File › Export › Export As, or right-click the selected layers and choose Export As.
- Pick a Format: PNG, JPG, GIF, or SVG.
- Adjust the format settings, such as transparency for PNG or quality for JPG.
- Optional: add extra sizes, such as 2x, each with its own file name suffix.
- Select Export. Photoshop saves each selected layer as a separate image.
Export As is the one to use when the layers need different formats or sizes, because you can change the settings before each export instead of relying on saved preferences. It also works on layer groups and artboards. A layer group is a folder of layers in the Layers panel, and it exports as one image. Adobe covers this in Fine-tune export settings with Export As.
Keep exporting the same layers with Image Assets
If you update a design often and want fresh images every time you save, Photoshop’s Image Assets generator can do it automatically.
- Rename a layer or group with a file extension, such as logo.png or banner.jpg.
- Turn the feature on. In current versions it is under File › Automate › Generator Plugins › Image Assets.
Photoshop then saves those layers to a folder next to your PSD and updates them as you edit. Adobe says releases before July 2024 kept the command under File › Generate › Image Assets. The naming options, such as sizes and JPEG quality, are listed in Adobe’s Generate image assets from layers page.
Which file type to pick
| Format | Transparency | Good for |
|---|---|---|
| PNG-24 | Yes | Logos, icons, cutouts, anything with a see-through background |
| PNG-8 | Limited | Small, simple graphics with up to 256 colors |
| JPEG (JPG) | No | Photos where a small file size matters more than perfect quality |
| PSD or TIFF | Yes | Separate files you still want to edit in Photoshop |
PNG is lossless, which means no image detail is thrown away when the file is saved. JPEG is lossy: it discards some detail to make the file smaller, and it does not support transparency. If your layers sit on a transparent background, use PNG-24.
Photoshop CS5 and other older versions
In Photoshop CS5 and other older versions, the command is at File › Scripts › Export Layers to Files instead of the Export menu. The dialog asks for the same things: destination, file name prefix, visible layers only, file type, and Trim Layers. Quick Export and Export As are not in CS5, so hiding layers and checking Visible Layers Only is the way to export a few of them.
Check the result or undo it
Open the destination folder in File Explorer or Finder. You should see one image for each exported layer, each starting with your prefix. Open one or two to confirm the format, size, and transparency look right.
Exporting writes new files to that folder and leaves your PSD alone. To undo an export, delete the files you do not want, change your settings, and run it again.
If the exported images all need the same trim, you can crop many pictures at once in Photoshop with a recorded action and the Batch command.
Troubleshooting
- Layers to Files is not under File › Export. Look under File › Scripts, where older versions keep it.
- Hidden layers were exported. Run the export again with Visible Layers Only checked.
- Transparent areas came out solid. The file type was JPEG, which cannot store transparency, or Transparency was unchecked for PNG-24. Export again as PNG-24 with it checked.
- The files are different sizes. Trim Layers was checked. Run it again with that box cleared to keep the full canvas size.
- Quick Export did not ask where to save. In Preferences › Export, set Quick Export Location to Ask where to export each time. Otherwise the files go to an assets folder beside your document.
- Export As looks different from these steps. The Use legacy “Export As” setting in Preferences › Export switches between the older and newer dialog.
- Colors need to match on the web. Export As has a Color Space option that converts the exported image to sRGB. The edits worth making before you export are covered in creating a good product picture quickly.
Frequently asked questions
Can I export some layers as PNG and others as JPEG?
Not in one run of Layers to Files, because each run uses a single file type. Run it once per format and hide the layers you do not want each time, or select specific layers and use Export As.
How do I export only certain layers?
Select those layers in the Layers panel, right-click, and choose Quick Export as PNG or Export As. With Layers to Files, hide the other layers and check Visible Layers Only.
Why do my file names have numbers in them?
Layers to Files adds a sequence number between the prefix and the layer name so layers with matching names do not replace each other. Quick Export uses only the layer name.
Does this work in Photoshop CS5?
Yes. Use File › Scripts › Export Layers to Files. The dialog asks for the same basic choices.
Next steps
- Need the layer in another Photoshop file instead? You can copy a layer to another image.
- Saving the whole image as a transparent PNG? Here’s how to convert a transparent PSD to PNG.

Matthew Burleigh is the founder, head writer, and editor of Solve Your Tech, which he launched in 2012. He has written technology tutorials since 2008 and worked in IT since 2003, including small-business support, IT management, and consulting. He holds Bachelor’s and Master’s degrees in Computer Science from Arizona State University.
Matthew writes practical guides for Windows, iPhone and iPad, Microsoft Office, Outlook, Google apps, and Android. Solve Your Tech’s guides are checked step by step against the device or app maker’s own documentation and tested on his own devices whenever he has the hardware or software, with clear steps, sources, and update dates.
Read more about Matthew and how Solve Your Tech writes and updates its guides, or report a correction.