To record your screen in Windows 11, press Windows key + Shift + R, drag to select the area you want to record, and select Start. Select Stop when you’re done. Snipping Tool saves the video to the Screen Recordings folder inside your Videos folder.
That is the shortest route, and it works on the desktop, in File Explorer and in any app. To record a single game or app instead, press Windows key + Alt + R to start and stop a Game Bar recording. Both tools come with Windows 11, so there is nothing to install. The rest of this guide walks through each one, shows how to add sound, and covers what to do when a recording will not start.
Which Windows 11 Screen Recorder Should You Use?
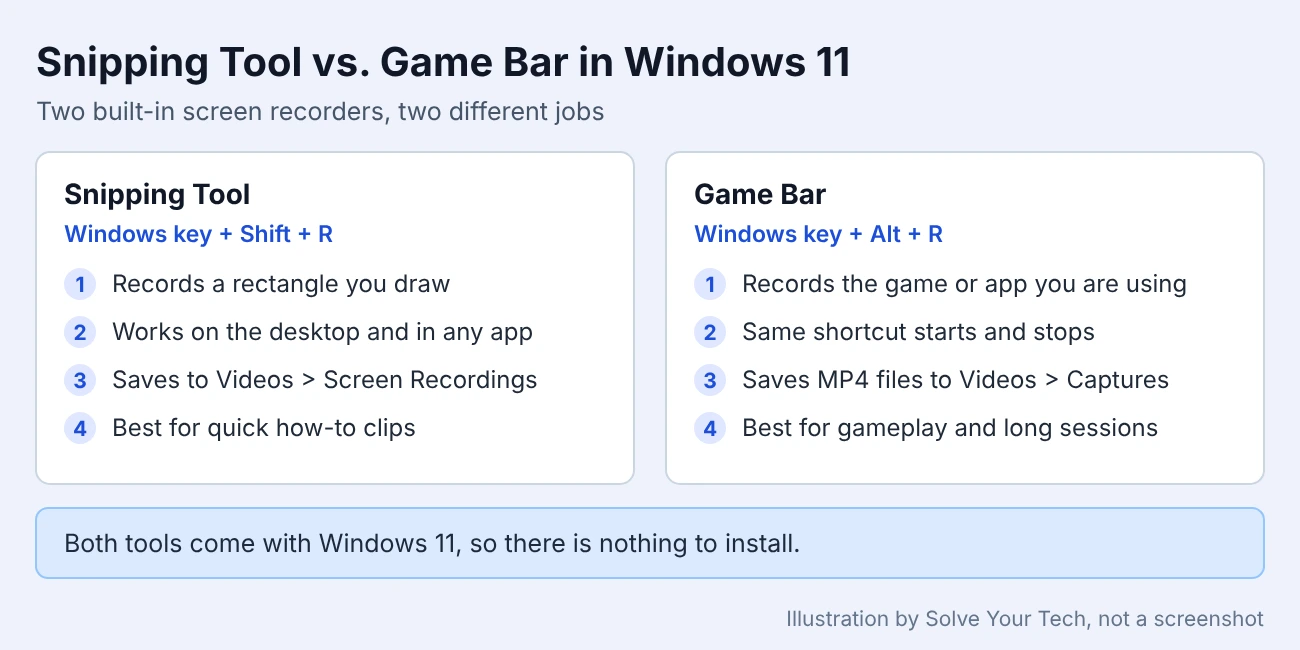
Windows 11 has two built-in recorders, and they do different jobs. Pick the one that matches what you want to capture.
| Tool | Shortcut | What it records | Where the video goes |
|---|---|---|---|
| Snipping Tool | Windows key + Shift + R | A rectangle you draw anywhere on the screen | Videos > Screen Recordings |
| Game Bar | Windows key + Alt + R | The game or app you are using | Videos > Captures |
| PowerPoint (if installed) | Insert > Screen Recording | An area you select, placed on a slide | Inside the presentation, or wherever you save it |
For a quick how-to clip, a bug report or anything on the desktop, use Snipping Tool. For gameplay or a long session in one app, use Game Bar. PowerPoint is only worth opening if the video is going into a presentation anyway.
Before You Start
- Windows version: these steps are for Windows 11 with current updates. Snipping Tool video recording is a Windows 11 feature. On an older PC, see how to screen record on a Windows 10 PC.
- App updates: Snipping Tool and Game Bar are updated through the Microsoft Store. If a button described here is missing, install the latest Windows and Store updates first.
- Graphics hardware for Game Bar: Microsoft says a PC needs a video card that supports Intel Quick Sync H.264, NVIDIA NVENC or AMD VCE to record game clips. Snipping Tool has no such requirement listed.
- What is on screen: a recording captures everything inside the area you choose, including notifications, open tabs and personal details. Close anything you do not want in the video before you start.
- Other people: if you plan to record a video call or someone else’s work, ask for permission first. Meeting apps have their own recording features that tell everyone a recording is running.
Record With Snipping Tool
Snipping Tool is the screenshot app that comes with Windows 11. Microsoft calls its video feature a video snip: a recording of a rectangular part of the screen that you choose.
- Press Windows key + Shift + R. The screen dims and a small toolbar appears at the top. Or open Snipping Tool from Start, switch from Snip to Record, and select New.
- Drag to select the part of the screen to record. To record everything, drag from one corner of the screen to the opposite corner.
- Turn on the microphone button in the toolbar if you want to narrate. Windows may ask you to let Snipping Tool use the microphone the first time.
- Select Start. A short countdown runs first, then recording begins.
- Do whatever you want to capture. Stay inside the rectangle you drew, because anything outside it is not recorded.
- Select Stop when you’re finished.
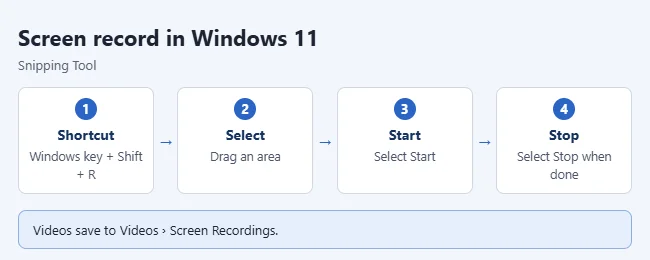
The recording opens in the Snipping Tool window, where you can watch it, copy it, or save a copy elsewhere. Microsoft says the video is also saved automatically to your Screen Recordings folder. These steps follow Microsoft’s Snipping Tool guide and its Snipping Tool help page.
To trim the clip or add captions, select Edit in Clipchamp in the Snipping Tool window. Clipchamp is Microsoft’s video editor for Windows 11. If you are new to the app itself, see how to use Snipping Tool on Windows 11.
How to Open Game Bar and Record a Game or App
Game Bar (also called Xbox Game Bar) is an overlay, meaning a panel that appears on top of whatever you are doing. It is built for recording one game or app at a time, so it suits gameplay and long sessions in a single program.
- Open the app or game you want to record and click inside it so it is the active window.
- Press Windows key + Alt + R to start recording. A small recording bar with a timer appears. In a full-screen game you may see the screen flash instead.
- Press Windows key + Alt + M if you want to turn the microphone on or off while recording.
- Press Windows key + Alt + R again to stop.
If you prefer buttons, press Windows key + G to open Game Bar, choose Widget Menu > Capture, and select Start recording. To review clips later, open Game Bar and choose Widget Menu > Gallery.
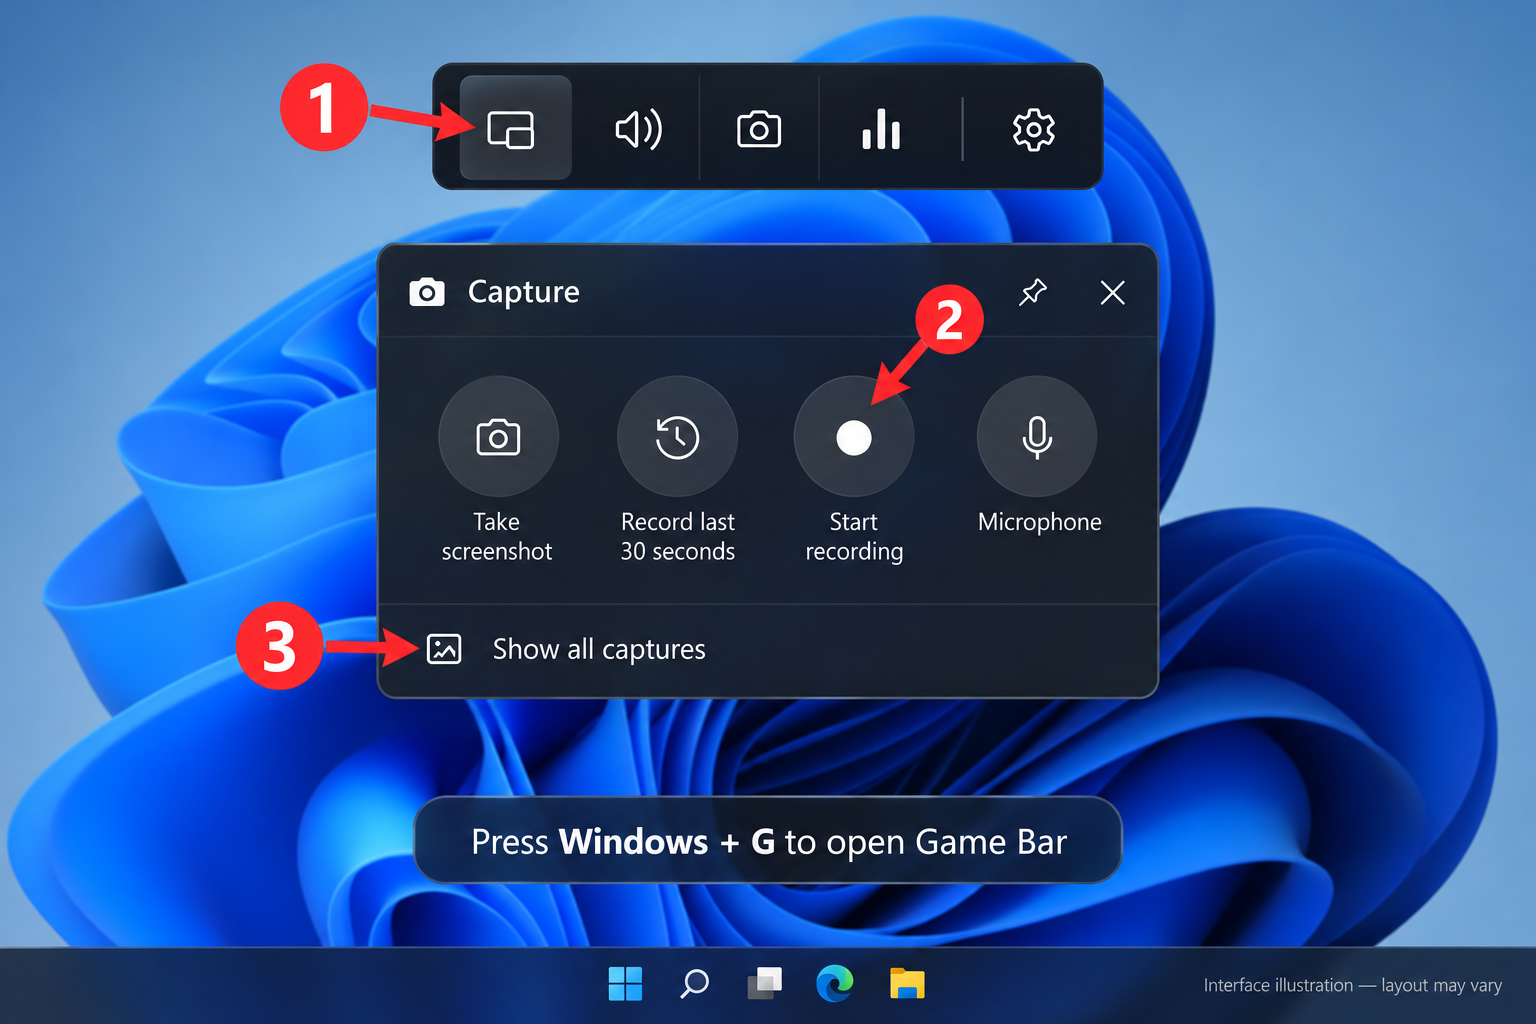
Clips save to Videos > Captures as MP4 files. Microsoft notes that the file name contains the name of the game or app plus the date and time. Its Game Bar recording instructions list the same shortcuts.
Game Bar is commonly reported not to record the Windows desktop or File Explorer, and Microsoft’s instructions describe it only for a game or app. If the shortcut does nothing on the desktop, use Snipping Tool for that recording. Game Bar’s settings sit next to Game Mode; see how to turn on Game Mode in Windows 11.
Before recording gameplay, hide any FPS counter you do not want visible. Use the controls in the app that supplies the overlay; Game Bar, Steam and graphics software manage their counters separately.
Change Game Bar Recording Settings
Open Settings > Gaming > Captures to adjust how Game Bar records. Microsoft documents these options there:
- Save location: the page shows the folder where clips are stored and has an Open folder button. To store clips somewhere else, move the Captures folder with File Explorer; Windows keeps saving to it in its new place.
- Maximum recording length: choose how long a clip can run before it is saved automatically.
- Audio: choose whether audio is recorded with a clip, whether system and microphone sound are included, and set their levels.
- Video frame rate and quality: higher settings make the PC work harder, so try them before a recording that matters.
- Mouse cursor: choose whether the pointer appears in game recordings.
- Background recording: off by default. When it is on, Windows key + Alt + G saves the last moments of play. Microsoft warns that it can affect game performance.
Record With Sound
Decide which sound you need before you start: your voice, the PC’s own sound, or both.
- Snipping Tool: turn on the microphone button in the recording toolbar before you select Start. Microsoft confirms microphone recording. Recent versions also show a system audio button beside it; if yours does not, update Snipping Tool from the Microsoft Store.
- Game Bar: press Windows key + G, select Settings, open the capture settings, and look at Audio to record. Game only records the game’s sound, All records your mic, background music and system sounds, and None blocks game and system audio but still records your mic.
- Microphone levels: if your voice is too quiet in the finished video, raise the input level in Windows sound settings and record a short test first.
For audio-only recordings, see how to enable Stereo Mix on Windows 11. To narrate a slide deck instead, see how to do a voiceover on PowerPoint.
Record With PowerPoint
If Microsoft PowerPoint is installed, it can record the screen and place the video on a slide. This is useful when the recording belongs in a presentation, or when Game Bar says your PC cannot record clips.
- Open the slide where the recording should go.
- On the Insert tab, select Screen Recording. A small control dock appears at the top of the screen.
- Choose Select Area and drag over the part of the screen to record. The smallest area PowerPoint accepts is 64×64 pixels.
- Leave Audio and Record Pointer selected to capture sound and the mouse pointer, or deselect them.
- Select Record. Use Pause as needed, and select Stop when you are done. If the dock slides out of view, point at the top of the screen to bring it back.
- To keep the video as its own file, right-click the video on the slide, select Save Media as, choose a folder and name, and select Save.
Microsoft’s PowerPoint screen recording page also covers trimming the clip on the slide.
Find, Check and Delete Your Recordings
To confirm a recording worked, open File Explorer, select Videos, and open the folder for the tool you used:
- Snipping Tool: Videos > Screen Recordings
- Game Bar: Videos > Captures
Double-click the newest file and play it through once. Check that the picture covers what you meant to show and that the sound is there before you send it to anyone.
There is nothing to undo after a recording, because recording does not change any Windows setting. If you do not want a clip, delete the file from its folder. Deleted files go to the Recycle Bin first, so you can restore one if you remove it by mistake. If you turned on Game Bar background recording and no longer want it, turn it off again in Settings > Gaming > Captures.
If Screen Recording Does Not Work
Windows key + Shift + R does nothing
Open Snipping Tool from Start and select Record, then New. If there is no Record option, install Windows updates and update Snipping Tool in the Microsoft Store. Microsoft also suggests checking that another app is not using the same shortcut. For app crashes or a missing app, see how to fix Snipping Tool in Windows 11.
Game Bar or its shortcuts do not respond
Microsoft’s troubleshooting steps are to check for Windows updates, then open Settings > Gaming > Game Bar and make sure Game Bar is turned on. Some games block shortcut keys. For a full-screen game, press Windows key + G once so the game is recognized, then use Windows key + Alt + R. Running the game in a borderless window can also help.
A message says the PC does not meet the hardware requirements
This Game Bar message means the video card does not support one of the encoders listed earlier, or its driver is out of date. Close the game, open Device Manager, expand Display adapters, right-click the video card and select Update driver. If that does not help, record with Snipping Tool instead.
The recording is blank
Microsoft notes that some games disable recording and that protected content can make a capture come out blank. This is a restriction set by the game or content owner, not a fault with your PC, and there is no supported way around it.
Recording worked once and then stopped
Microsoft says a recording sometimes does not end correctly. Close the game, open Task Manager, end the Broadcast bar server (bcastdvr.exe) process if it is listed, then start the game and try again.
There is no sound in the video
For Snipping Tool, check that the microphone button was on before you selected Start. For Game Bar, check Audio to record and the audio options in Settings > Gaming > Captures, and make sure the audio sliders there are not set to 0.
Frequently Asked Questions
Where do screen recordings go?
Snipping Tool recordings go to Videos > Screen Recordings. Game Bar clips go to Videos > Captures. PowerPoint recordings stay on the slide until you use Save Media as.
Can I record with sound?
Yes. In Snipping Tool, turn on the microphone button before you start. In Game Bar, set Audio to record to All to capture your mic and system sounds together.
How do I record the entire screen in Windows 11?
Press Windows key + Shift + R and drag from one corner of the screen to the opposite corner, then select Start. Snipping Tool records whatever rectangle you draw, so a rectangle that covers the screen records the whole screen.
Is screen recording free in Windows 11?
Yes. Microsoft says Snipping Tool is built into Windows 11 at no extra cost and does not need an account. Game Bar is also part of Windows. PowerPoint is a separate Microsoft 365 or Office app.
How long can I record?
Game Bar saves a clip automatically when it reaches the maximum recording length set in Settings > Gaming > Captures, and you can change that length there. Microsoft does not publish a time limit for Snipping Tool recordings, so keep an eye on free disk space during long sessions.
What file type are the recordings?
Game Bar saves MP4 files, which play in the Windows media player and most other apps. Snipping Tool recordings are MP4 videos as well.
Does Snipping Tool work with more than one monitor?
Microsoft says you can select content from any connected display. Game Bar supports one monitor at a time.
How do I take a screenshot instead?
See how to take a screenshot on Windows 11 and how to open Snipping Tool.
Next Step
Make a ten-second test recording with Windows key + Shift + R, then open Videos > Screen Recordings and play it back. Once you know the picture and sound are right, record the real thing.

Matthew Burleigh is the founder, head writer, and editor of Solve Your Tech, which he launched in 2012. He has written technology tutorials since 2008 and worked in IT since 2003, including small-business support, IT management, and consulting. He holds Bachelor’s and Master’s degrees in Computer Science from Arizona State University.
Matthew writes practical guides for Windows, iPhone and iPad, Microsoft Office, Outlook, Google apps, and Android. Solve Your Tech’s guides are tested on current devices or checked against official product documentation, with clear steps, sources, and update dates.
Read more about Matthew and how Solve Your Tech writes and updates its guides, or report a correction.