To use Sound Recognition on iPhone, open Settings, tap Accessibility, tap Sound & Name Recognition, tap Sound Recognition and turn it on, then tap Sounds and pick the sounds you want alerts for, such as Door Bell, Smoke or Baby Crying. Your iPhone then listens through its microphone and sends a notification when it recognizes one.
On older versions of iOS, Sound Recognition sits directly in the Hearing section of Accessibility.
What Sound Recognition Does
Sound Recognition turns your iPhone into a listener for specific household sounds. When the phone hears one you’ve chosen, it shows a notification on the screen and plays the alert you’ve set, so you can see that the doorbell rang even if you didn’t hear it.
It’s useful for people who are deaf or hard of hearing, but also for anyone who sometimes can’t hear what’s going on: someone wearing noise-canceling headphones, a parent in the far end of the house, or a person who sleeps through the dryer buzzer.
Apple is clear about one limit, and it belongs at the top. In its iPhone User Guide entry on recognizing sounds, Apple says not to rely on your iPhone to recognize sounds “in circumstances where you may be harmed or injured, in high-risk or emergency situations, or for navigation.” Treat it as an extra alert, never as your smoke alarm plan.
Turn On Sound Recognition
- Open the Settings app.
- Tap Accessibility.
- Tap Sound & Name Recognition.
- Tap Sound Recognition.
- Turn on Sound Recognition.
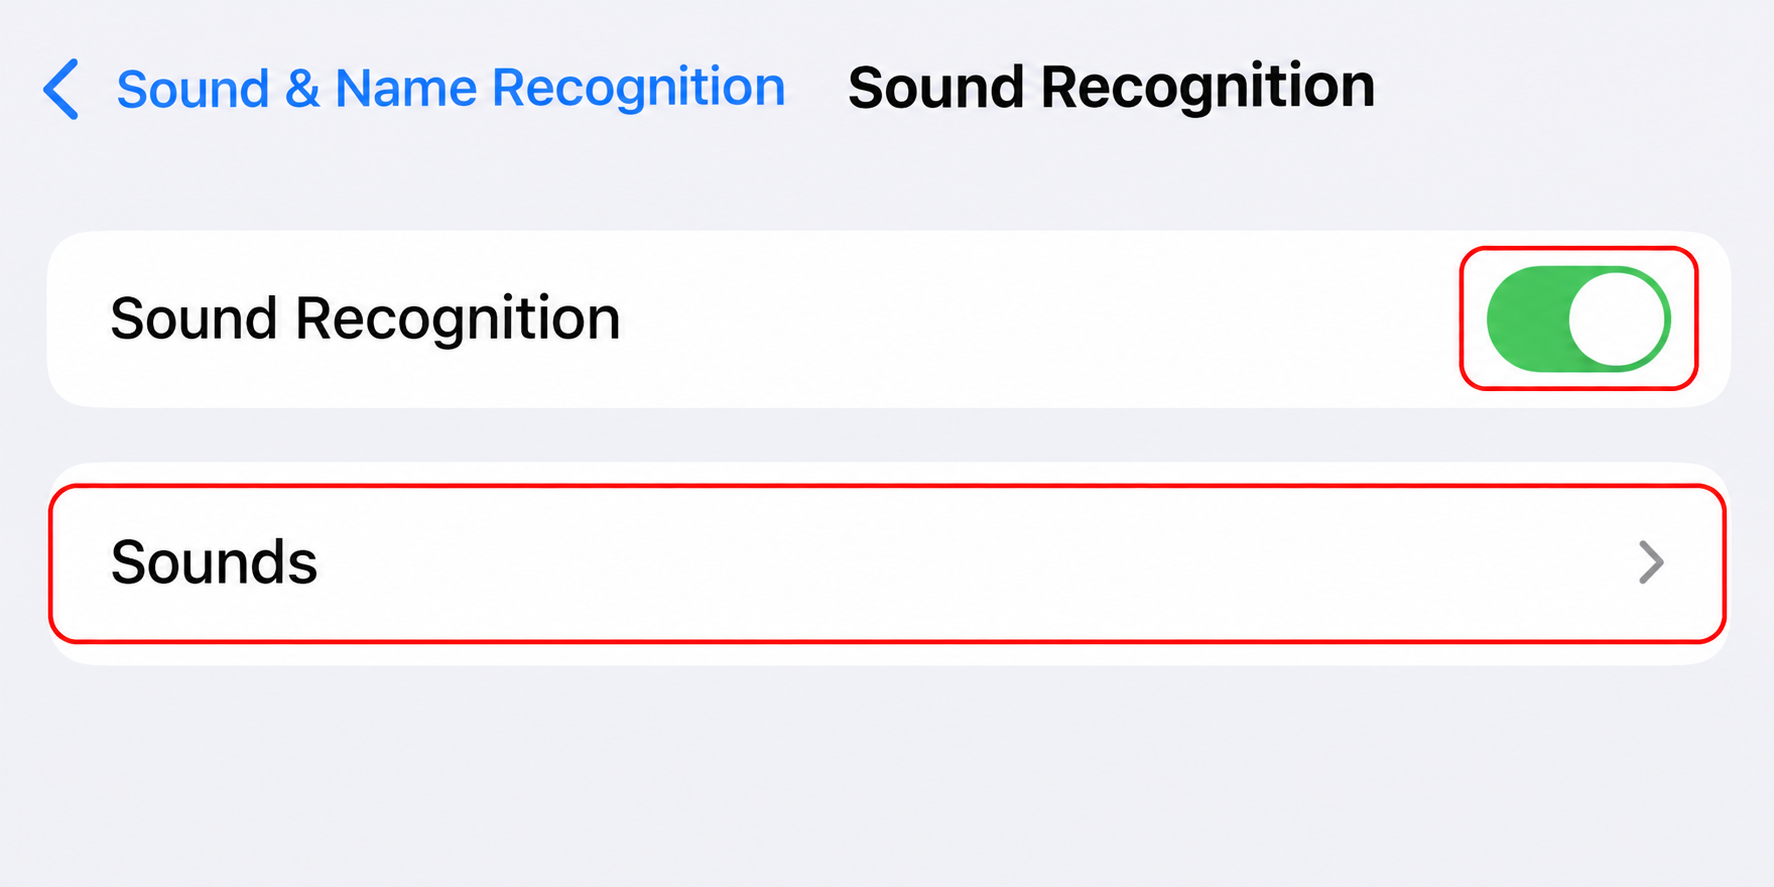
After you turn it on, your iPhone may need to download the available sounds before you can choose them. Give it a moment before you move on to choosing sounds.
Choose Which Sounds to Listen For
Turning the feature on doesn’t select any sounds by itself. You pick them.
- On the Sound Recognition screen, tap Sounds.
- Turn on each sound you want alerts for.
The built-in sounds are grouped by type. The exact list can change between iOS versions, but it typically looks like this:
| Group | Example sounds |
|---|---|
| Alarms | Fire, Siren, Smoke |
| Animals | Cat, Dog |
| Household | Appliances, Car Horn, Door Bell, Door Knock, Glass Breaking, Kettle, Water Running |
| People | Baby Crying, Coughing, Shouting |
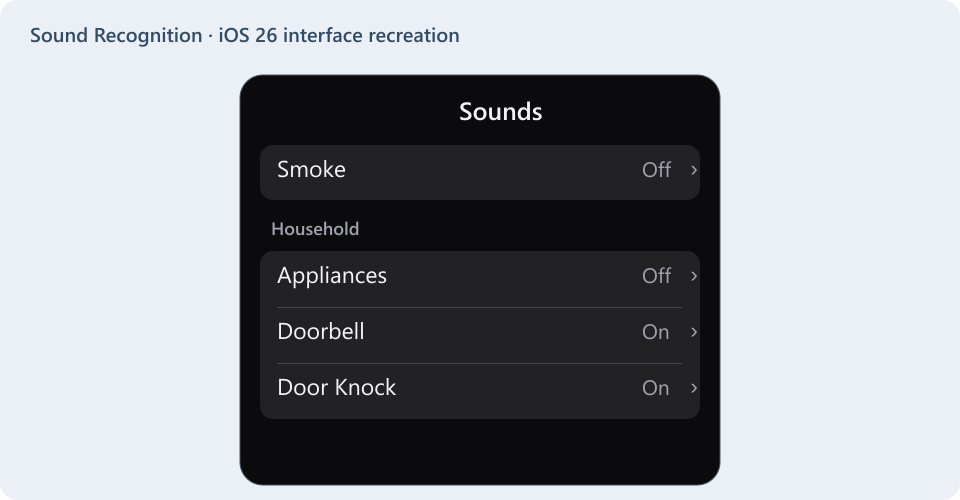
Only turn on what you need. Every extra sound is one more chance for a false alert, and a phone that cries wolf about coughing all evening is a phone you’ll start ignoring.
In recent iOS versions, tapping a sound’s name may show options such as the alert tone it plays.
Teach Your iPhone a Custom Alarm, Appliance or Doorbell
Doorbells and appliance chimes vary a lot. If your iPhone doesn’t pick yours up with the built-in sound, you can record your own.
- Go to Settings > Accessibility > Sound & Name Recognition > Sound Recognition > Sounds.
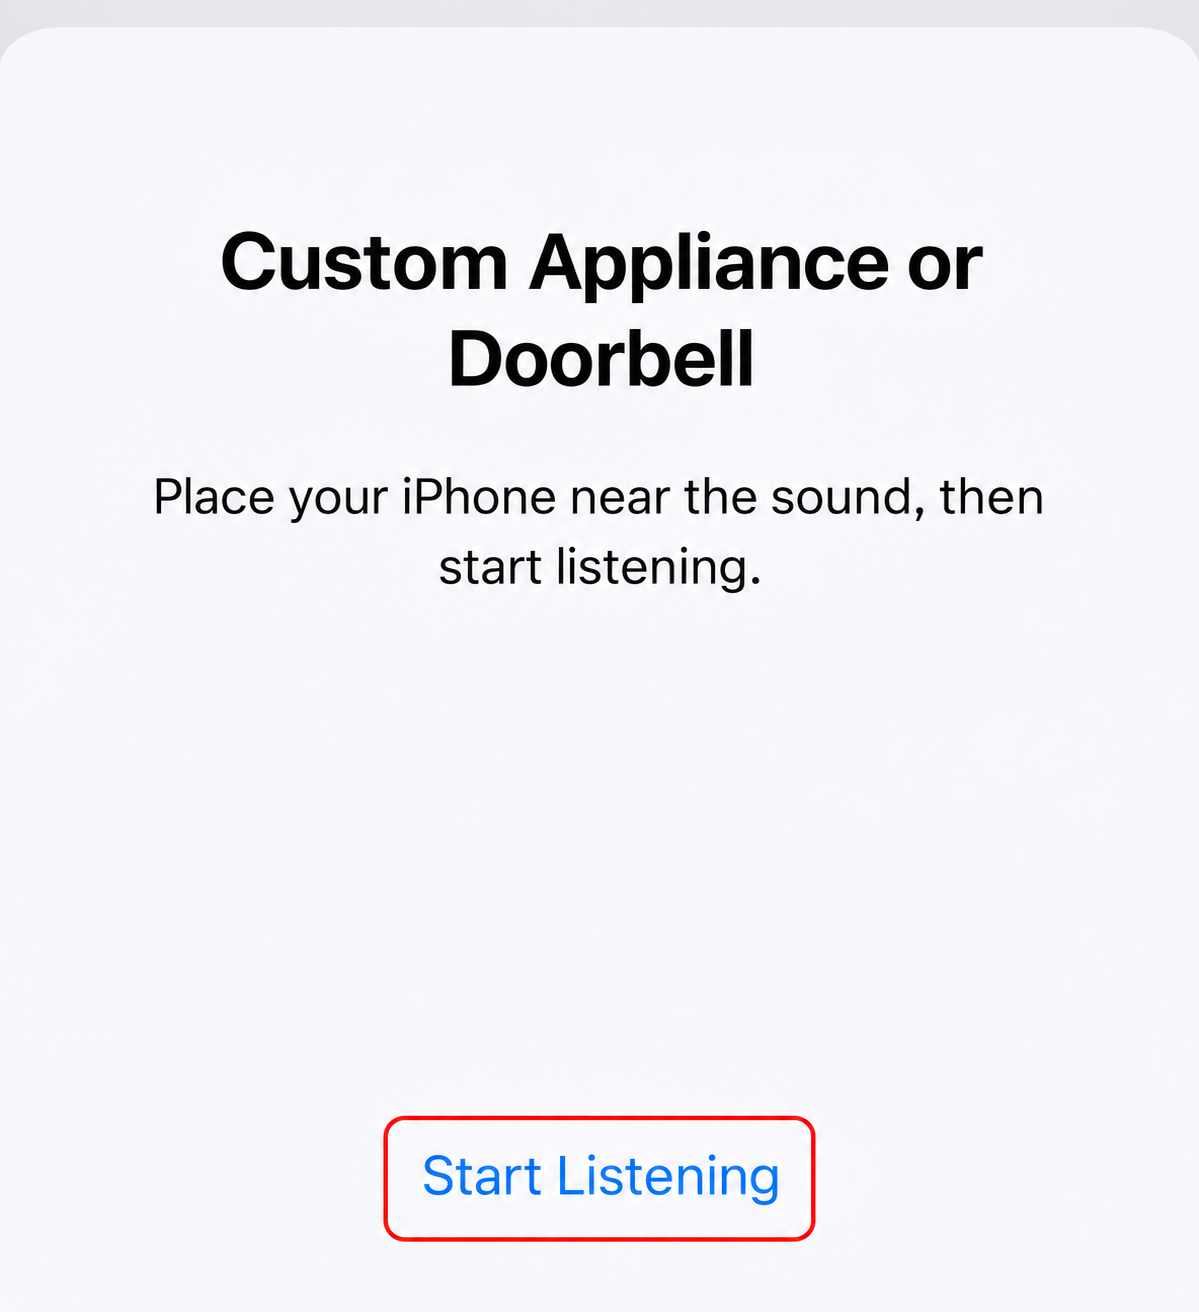
- Tap Custom Alarm, or Custom Appliance or Doorbell.
- Enter a name, such as Back Door Chime.
- Get the sound ready, place your iPhone near it, and cut down background noise.
- Tap Start Listening and follow the onscreen instructions. Your iPhone will likely ask you to play the sound several times so it can learn it.
Example: Catching an Apartment Intercom Buzzer
Marcus lives in an apartment where the intercom buzzer is down the hall from his desk. The built-in Door Bell sound never caught it, so he made a custom one.
- He waited for a quiet time and turned off the TV and the fan.
- He held his iPhone close to the intercom speaker and asked a neighbor to press the buzzer for him each time the iPhone asked.
- He named it Intercom so the alert would be obvious at a glance.
The first try didn’t save, likely because the neighbor pressed the buzzer for different lengths of time. On the second try each press was about the same length, and it worked. Consistent recordings tend to give a better match.
If a custom sound stops working well, record it again, ideally from the spot where your iPhone usually sits.
How You Get Alerted
When your iPhone recognizes a sound, it shows a notification and plays the alert tone set for that sound. Because the alert arrives as a notification, your notification settings matter.
- In Settings > Notifications, look for Sound Recognition and check that notifications are allowed.
- A Focus such as Do Not Disturb or Sleep can hide notifications. If you rely on alerts at night, check that your Focus lets Sound Recognition through.
- For an extra visual signal, you can also turn on flash notifications on iPhone, which blink the camera light when alerts arrive.
If your iPhone connects to CarPlay, Apple also offers a way to get sound notifications in the car.
Add Sound Recognition to Control Center
Turning Sound Recognition on and off from Settings is slow. Apple suggests adding it to Control Center instead, so you can switch it on when you go to bed or off when you’re at a noisy event.
In recent iOS versions, open Control Center, touch and hold an empty spot, tap Add a Control, and choose Sound Recognition. In older versions, go to Settings > Control Center and tap the add button next to Sound Recognition. Once it’s there, you can reach it from the Lock Screen too; this explainer on using Control Center from the Lock Screen shows how that access works.
What Sound Recognition Can’t Do
- It doesn’t replace certified alarms. Keep working smoke and carbon monoxide detectors, and consider alarms designed for people who are deaf or hard of hearing, such as models with strobe lights or bed shakers.
- It can miss sounds. A phone in a pocket, in another room or in a noisy space may not hear the sound clearly.
- It can raise false alerts. A TV show with a siren or a dog barking on a video can set it off.
- It only works when the phone is with you. Your iPhone has to be near the sound to hear it, and near you for you to notice the alert.
Sound Recognition or Another Option?
| Your goal | Best fit |
|---|---|
| Know when the doorbell, kettle or a baby crying happens nearby | Sound Recognition |
| Never miss a phone notification of any kind | Flash notifications, plus vibration |
| Hear a speaker or conversation better through AirPods or hearing devices | Live Listen |
| Wake up for a fire or carbon monoxide alarm | A certified alarm with strobe or bed shaker |
If Alerts Aren’t Showing Up
Work through these checks in order:
- Make sure Sound Recognition is still on, in Settings or Control Center.
- Open Sounds and confirm the specific sound is turned on.
- Wait for the sound download to finish after first turning the feature on.
- Check notifications and any active Focus. If notifications seem muted in general, see how to fix notifications silenced on iPhone.
- Move the iPhone closer to the source and take it out of any bag or pocket.
- For a custom sound, record it again in a quiet room.
- Restart the iPhone and install any available iOS update.
To turn the feature off, return to Settings > Accessibility > Sound & Name Recognition > Sound Recognition and turn it off, or tap its button in Control Center.
Sound Recognition Questions
Does Sound Recognition Need the Internet?
Your iPhone may need to download the available sounds when you first turn the feature on. After that, it listens through your iPhone’s microphone, and Apple’s guide doesn’t list an internet connection as a requirement.
Will It Use More Battery?
It keeps the microphone listening, so some extra battery use is reasonable to expect. If battery life matters on a long day out, switch it off from Control Center and turn it back on at home.
Can It Recognize My Name?
The menu is now called Sound & Name Recognition, which reflects a separate Name Recognition option in recent iOS versions. This walkthrough covers sound alerts only.
What Should I Do If My Custom Sound Won’t Save?
Start over in a quieter spot, hold the phone closer to the source, and make each repetition of the sound as similar as possible.
Pick the two or three sounds that matter most in your home, test each one once with the real sound, and adjust from there.

Matthew Burleigh is the founder, head writer, and editor of Solve Your Tech, which he launched in 2012. He has written technology tutorials since 2008 and worked in IT since 2003, including small-business support, IT management, and consulting. He holds Bachelor’s and Master’s degrees in Computer Science from Arizona State University.
Matthew writes practical guides for Windows, iPhone and iPad, Microsoft Office, Outlook, Google apps, and Android. Solve Your Tech’s guides are checked step by step against the device or app maker’s own documentation and tested on his own devices whenever he has the hardware or software, with clear steps, sources, and update dates.
Read more about Matthew and how Solve Your Tech writes and updates its guides, or report a correction.