To show hidden files on a Mac, open a Finder window and press Command-Shift-Period (.). Hidden files and folders appear dimmed, and pressing the same keys again hides them.
If a support article just asked you to open something inside your Library folder, you may not need to reveal everything. Finder can take you straight to that one folder, as shown below. These steps apply to current macOS versions, including macOS 27, Tahoe 26 and Sequoia 15.
Which Method Fits What You Need
| Your goal | Best method | Lasts |
|---|---|---|
| Peek at a hidden file once | Command-Shift-Period in Finder | Until you press it again |
| Open your user Library folder for a support step | Go menu with the Option key, or Go to Folder | Just that window |
| Open a specific path such as ~/Library/Preferences | Go > Go to Folder | Just that window |
| Keep all hidden files visible while you work on a project | Terminal command | Until you reverse it |
Start with the lightest option. Hidden files are hidden for a reason, and leaving them on screen all the time makes it easier to drag or delete something by accident.
Show Hidden Files With a Keyboard Shortcut
- Click the Finder icon in the Dock to open a Finder window.
- Go to the folder you want to look in. Your home folder is a good start; press Shift-Command-H to jump there.
- Press Command-Shift-Period. Items whose names start with a dot, such as .zshrc, and hidden folders like Library appear with greyed-out icons.
- Open or copy what you need.
- Press Command-Shift-Period again to hide them.
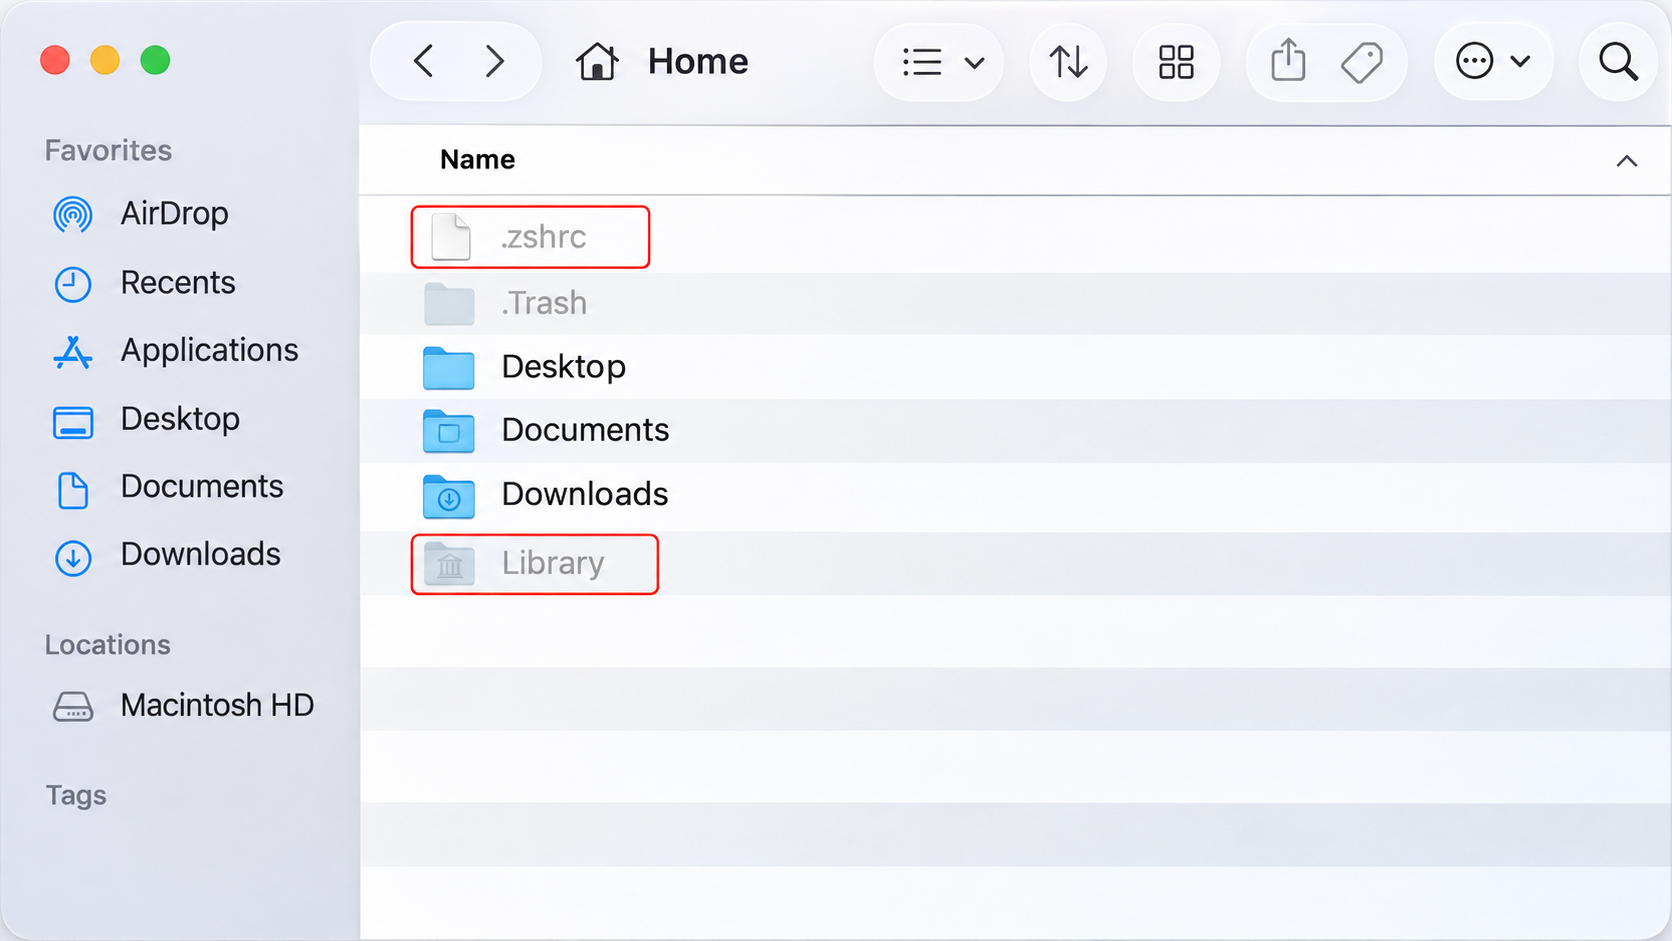
This shortcut is a long-standing Finder feature, but it isn’t listed on Apple’s main Mac keyboard shortcuts page, which does document the Shift-Command-H and Shift-Command-G shortcuts used below.
Open the Library Folder Without Showing Everything
Most “go find this hidden file” instructions point into your user Library, the folder in your home folder where apps keep settings, caches and support files. Apple’s Go to a folder help page describes two direct routes.
Option 1: the Go menu.
- Click on the desktop or a Finder window so Finder is the active app.
- Click Go in the menu bar.
- Press and hold the Option key. Library appears in the menu.

- Choose Library while still holding Option.
Option 2: Go to Folder. This is best when the instructions give a full path.
- In Finder, choose Go > Go to Folder, or press Shift-Command-G.
- Type the path, for example
~/Library/Application Support/. The tilde (~) stands for your home folder, and Finder suggests matches as you type; press Tab to accept one. - Press Return to open the folder.

Example. Marcus is told by an app’s support team to send the file in ~/Library/Logs/. He presses Shift-Command-G, pastes the path, presses Return, and drags the log file into his email. Nothing else on his Mac becomes visible.
Option 3: keep Library in your home folder. Open your home folder (Shift-Command-H), choose View > Show View Options, and look for a Show Library Folder checkbox. When it is there, turning it on keeps Library visible without revealing anything else.
Watch the tilde. ~/Library is your personal Library. /Library (no tilde) is a separate folder at the top of the startup disk that holds items for every user, and the System folder, which holds macOS itself, can’t be renamed or moved. Apple’s page on folders that come with your Mac advises against renaming or moving those built-in folders.
Keep Hidden Files Visible With Terminal
If you work with configuration files every day, you can tell Finder to always show hidden items. This changes a Finder preference and restarts Finder; it doesn’t change any files. Apple doesn’t document this command on a support page, so treat it as an advanced, widely used tweak.
- Open Terminal (in Applications > Utilities, or search for it with Spotlight).
- Type
defaults write com.apple.finder AppleShowAllFiles -bool trueand press Return. - Type
killall Finderand press Return. Finder windows close and reopen with hidden items showing.
Many articles leave out the second command. Without restarting Finder, the change doesn’t appear. If you’d rather not type killall, hold Option, Control-click the Finder icon in the Dock, and choose Relaunch.
Hide the Files Again
- Used the shortcut: press Command-Shift-Period once more in a Finder window.
- Used Terminal: run
defaults write com.apple.finder AppleShowAllFiles -bool false, thenkillall Finder. - Not sure which you used: run the Terminal “false” command and relaunch Finder. That resets the preference, and the shortcut still works afterward for quick peeks.
What You Will See, and What to Leave Alone
Once hidden items show, folders that looked tidy fill up with dimmed names. Here is what the common ones are.
| Item | What it is | Safe to touch? |
|---|---|---|
| .DS_Store | Finder’s record of a folder’s view settings, such as icon positions | Leave it; Finder recreates it anyway |
| .zshrc, .zprofile | Settings for the Terminal shell | Only edit if you know why |
| ~/Library | Your app settings, caches, logs and support files | Open and copy freely; delete only what a trusted guide names |
| .Trash | The folder behind your Trash | Use the Trash in the Dock instead |
| Top-level folders such as private or usr | Parts of macOS | Don’t move, rename or delete |
A good rule: look, open and copy, but only delete a hidden item when a specific, trusted instruction names it. Back up first with Time Machine if you are removing app leftovers. If you came here to free up space, a broader approach to deleting junk files on a MacBook Air is safer than deleting hidden items one by one.
If the Shortcut Doesn’t Work
- Finder isn’t the active app. Click inside a Finder window first; the shortcut does nothing in other apps’ windows.
- The folder has no hidden items. Try your home folder, which always has some.
- Another app grabbed the keys. Keyboard utilities can take over shortcuts. Quit them and try again, or use the Terminal method.
- Finder is stuck. Relaunch it from the Dock with Option and Control-click, then retry.
While you are in Finder, you can also make new windows open in your home folder so hidden items are one keypress away. See how to change the default Finder window on a Mac.
Hidden File Questions
Why Doesn’t Spotlight Find Hidden Files?
Spotlight generally skips system and hidden locations, so searching a file name from the menu bar often comes up empty. Browse to the folder with Go to Folder instead.
Can I Hide One of My Own Files?
In Terminal, chflags hidden followed by a space and the file’s path hides that item, and chflags nohidden shows it again. Drag the file into the Terminal window to fill in its path. Hiding isn’t security, though; anyone using the shortcut can see the file.
Why Does Apple Hide the Library Folder?
Apple doesn’t spell out a reason, but the folder holds files apps depend on, and hiding it keeps everyday cleanup from breaking an app’s settings.
Can I Delete .DS_Store Files?
You can, but there is little point. Finder creates a new one the next time it opens that folder, and deleting it only resets things like icon positions and view style. The one time it matters is when you share a folder with someone on Windows or upload it to a website, where these files show up as clutter; deleting them from the copy you send is harmless.
Can I See Hidden Files in an Open or Save Window?
In many apps, yes. Click in the Open or Save window and press Command-Shift-Period, the same as in Finder. If an app ignores it, use Go to Folder (Shift-Command-G), which also works in those windows, and type the path.
Will Showing Hidden Files Slow Down My Mac?
No meaningful effect. Finder simply lists more items. The real cost is clutter, which is why the shortcut or Go to Folder is usually the better choice.
When you are done with the file you came for, press Command-Shift-Period once more so your folders go back to normal.

Matthew Burleigh is the founder, head writer, and editor of Solve Your Tech, which he launched in 2012. He has written technology tutorials since 2008 and worked in IT since 2003, including small-business support, IT management, and consulting. He holds Bachelor’s and Master’s degrees in Computer Science from Arizona State University.
Matthew writes practical guides for Windows, iPhone and iPad, Microsoft Office, Outlook, Google apps, and Android. Solve Your Tech’s guides are checked step by step against the device or app maker’s own documentation and tested on his own devices whenever he has the hardware or software, with clear steps, sources, and update dates.
Read more about Matthew and how Solve Your Tech writes and updates its guides, or report a correction.