To lock cells in Excel, select the cells, press Ctrl+1, open the Protection tab, and check Locked. Then go to Review and select Protect Sheet. Locking only takes effect once the sheet is protected. By default, every cell is already set to Locked, so the real work is unlocking the cells you still want people to edit.
Steps follow Microsoft’s Lock cells to protect them in Excel and Lock or unlock specific areas of a protected worksheet guides.
What You Need to Know First
- Versions: The Windows steps apply to Excel for Microsoft 365, Excel 2024, Excel 2021, Excel 2019, and Excel 2016. Mac and web steps have their own sections below.
- Two parts: The Locked checkbox is only a setting on each cell. It does nothing until you turn on Protect Sheet.
- The sheet must be unprotected to change it: If the Review tab shows Unprotect Sheet, select it first. You can’t change which cells are locked while protection is on.
- It is not security: Microsoft says worksheet protection isn’t intended as a security feature. It only stops people from changing locked cells. Anyone who opens the file can still read everything on the sheet.
How to Lock Only Certain Cells
These steps are for Excel on Windows.
- Press Ctrl+A to select the whole sheet. If only part of the sheet is selected, press it again.
- Press Ctrl+1 to open Format Cells, select the Protection tab, uncheck Locked, and select OK. Every cell is now unlocked.
- Select only the cells you want to lock. Hold Ctrl while you click to pick cells that aren’t next to each other.
- Press Ctrl+1 again, check Locked, and select OK.
- On the Review tab, select Protect Sheet.
- Enter a password if you want one, choose what people can still do, and select OK. If you entered a password, type it again to confirm.
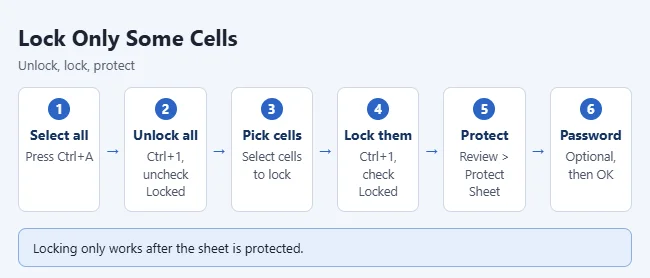
Now only the cells you marked are locked. Everyone can still type in the other cells.
The password is optional. Without one, anyone can select Unprotect Sheet and change the locked cells.
How to Lock the Whole Sheet
Because every cell starts out locked, just go to Review > Protect Sheet and select OK. To stop people from adding, moving, deleting, hiding, or renaming sheets, use Protect Workbook on the same tab instead. You can use both.
How to Lock Only Cells With Formulas
- Unlock the whole sheet first: press Ctrl+A, press Ctrl+1, and uncheck Locked on the Protection tab.
- On the Home tab, select Find & Select, then Go To Special.
- Choose Formulas and select OK. Excel selects every cell with a formula.
- Press Ctrl+1, check Locked, and select OK.
- Go to Review > Protect Sheet and select OK.
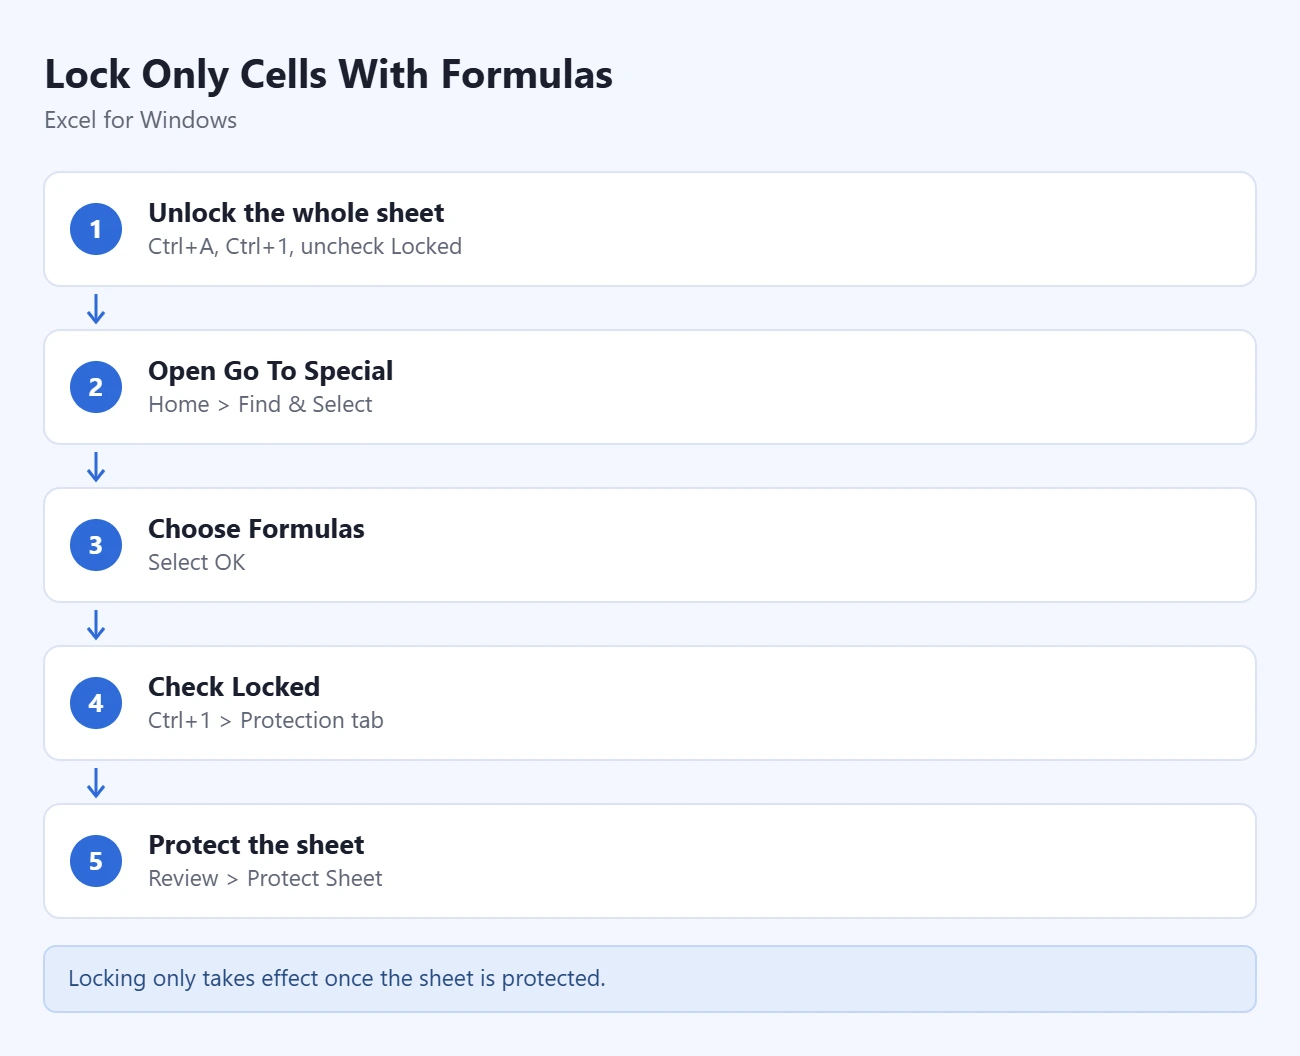
People can now change the numbers your formulas use, but not the formulas themselves. This works well on a sheet where others pick values from a list. See how to create a drop-down list in Excel to set one up before you protect the sheet.
Choose What People Can Still Do
The Protect Sheet box has a list of checkboxes. Anything you check stays allowed after the sheet is protected.
| Option | What it allows |
|---|---|
| Select locked cells | Click on locked cells. They still can’t be edited. |
| Select unlocked cells | Click on unlocked cells and press Tab to move between them. |
| Format cells, columns, or rows | Change formatting, column width, or row height, and hide columns or rows. |
| Insert or delete columns and rows | Add or remove columns and rows. |
| Sort | Sort data from the Data tab. Ranges that contain locked cells still can’t be sorted. |
| Use AutoFilter | Change filters on a range that already has filter arrows. |
| Use PivotTable reports | Format and change PivotTables. |
| Edit objects | Change charts, shapes, text boxes, and comments. |
Uncheck Select locked cells if you don’t want people to click on locked cells at all.
How to Let Certain People Edit a Range (Allow Edit Ranges)
Allow Edit Ranges is in Excel for Windows. It unlocks a range with its own password, or for named people on a work or school network domain. Set it up before you protect the sheet. The button is only available while the sheet is unprotected.
- On the Review tab, select Allow Edit Ranges.
- Select New.
- Type a name in the Title box.
- In Refers to cells, type an equal sign and the range, such as
=B2:B20. - Type a Range password if you want people to enter one before they edit the range. To pick specific people instead, select Permissions, then Add.
- Select OK, then select Protect Sheet in the same box and finish as usual.
Picking people by name only works when your computer is on a domain. At home, use a range password.
How to Lock Cells in Excel for Mac
These steps apply to Excel for Microsoft 365 for Mac, Excel 2024 for Mac, and Excel 2021 for Mac.
- Select the cells you want people to edit.
- Press Command+1, or open the Format menu and select Cells.
- Select the Protection tab and uncheck Locked.
- On the Review tab, select Protect Sheet.
- Under Allow users of this sheet to, check what people can still do.
- Enter a password if you want one, type it again under Verify, and select OK.
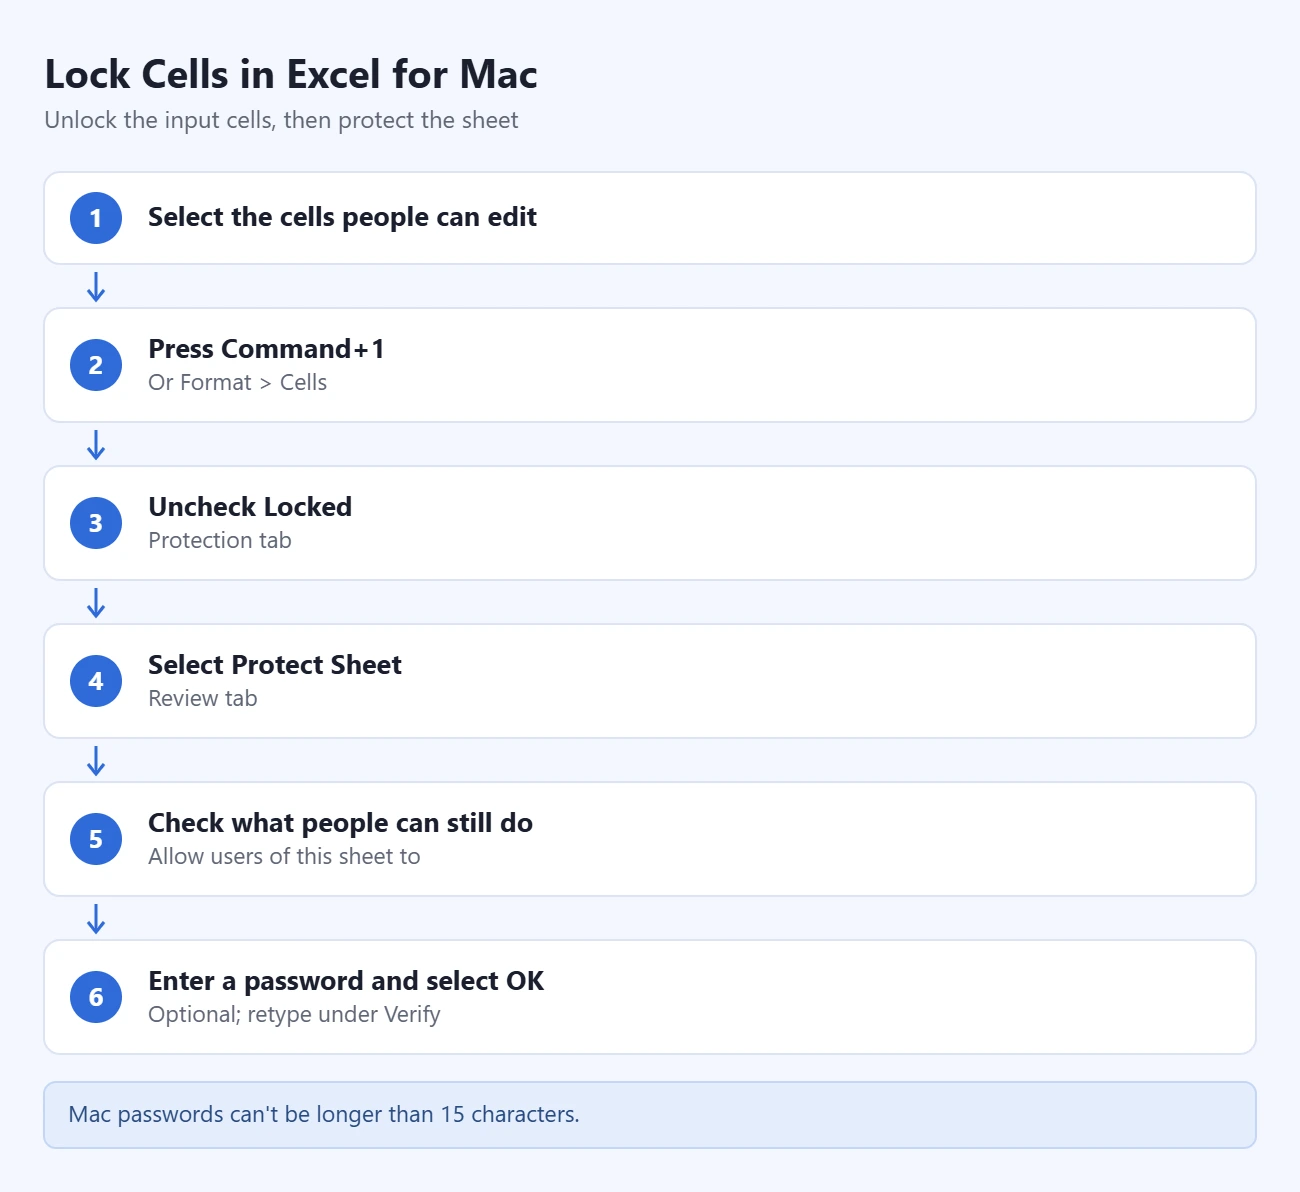
Passwords in Excel for Mac can’t be longer than 15 characters. The filter option is labeled Filter on a Mac, not Use AutoFilter. To undo it, select Review > Unprotect Sheet.
What Excel for the Web Can Do
Excel for the web handles protection in a side pane, not in the Format Cells box. Go to Review > Manage Protection and turn on Protect sheet. The whole sheet is locked by default. List the cells people may edit under Unlocked ranges. You can add a password to a range or to the sheet in the same pane.
The pane’s options only apply while Protect sheet is on. The per-person Permissions button from Allow Edit Ranges is a Windows feature. If you need it, select Open in Desktop App and set it up there. Labels in the web app change more often than the desktop apps, so check Microsoft’s Protect a worksheet page if yours looks different.
How to Check That It Worked
- Click a locked cell and try to type. Excel shows a message that the cell is on a protected sheet.
- Click an unlocked cell and type. The change should go through.
- Look at the Review tab. Protect Sheet now reads Unprotect Sheet.
Test it before you send the file to anyone.
How to Unlock Cells Again
- Go to Review and select Unprotect Sheet.
- Enter the password if you set one.
You can also go to File > Info > Protect > Unprotect Sheet. Once the sheet is unprotected, every cell can be edited. To change which cells are locked, select them, press Ctrl+1, change the Locked checkbox, and protect the sheet again.
Keep the password somewhere safe. Microsoft warns that it can’t recover a lost password for you.
Sheet Protection Is Not a Security Feature
Locked cells stop accidents. They don’t hide or encrypt anything. Microsoft states that worksheet protection is not intended as a security feature, and its Protection and security in Excel page explains the three levels:
- Worksheet: controls what people can change on one sheet. This is what locked cells use.
- Workbook: stops people from adding, moving, deleting, hiding, or renaming sheets.
- File: controls who can open or change the file at all, with encryption or a password.
If the data is private, protect the file itself, or don’t put it in a workbook you share. If you only want to keep people from changing your copy, you can also make the spreadsheet read-only for others.
Troubleshooting
- Locked cells can still be edited. The sheet isn’t protected yet. Go to Review > Protect Sheet.
- Every cell is locked, even the ones for typing. You protected the sheet without unlocking anything. Unprotect it, select the input cells, press Ctrl+1, uncheck Locked, and protect it again.
- Locked is already checked when you open Format Cells. That’s normal. All cells are locked by default.
- Allow Edit Ranges is grayed out. The sheet is already protected. Unprotect it first.
- Unprotect Sheet is grayed out. Microsoft says to turn off the older Shared Workbook feature first.
- Format Cells is grayed out. The sheet is protected. Unprotect it before you change the Locked setting.
- You can’t click on locked cells. Select locked cells was unchecked when the sheet was protected. Unprotect and protect it again with that box checked.
- Sorting or filtering stopped working. Unprotect the sheet, then protect it again with Sort or Use AutoFilter checked. Sorting still won’t work on a range that contains locked cells, so unlock those cells first. Filter arrows must be added before you protect the sheet.
- You forgot the password. Microsoft can’t retrieve it. Go back to an earlier copy of the file that isn’t protected.
Frequently Asked Questions
Can I lock cells without protecting the sheet?
No. The Locked setting has no effect until you turn on Protect Sheet. To leave most of the sheet open, unlock every cell first and lock only the ones you care about.
Can I lock cells but still allow sorting or filtering?
Partly. In the Protect Sheet box, check the options you want to allow, such as Sort or Use AutoFilter. Sorting only works on ranges that have no locked cells in them, even with Sort checked. Add the filter arrows before you protect the sheet, because the option only lets people change filters that are already there.
Can I hide formulas in locked cells?
Yes. Select the cells, press Ctrl+1, and check Hidden on the Protection tab. Then select Review > Protect Sheet. The formula no longer shows in the formula bar. The result still shows in the cell.
Can people still see what’s in a locked cell?
Yes. Locking only blocks changes. People can still read the cell.
How do I lock a whole column or row?
Unlock the whole sheet first. Then click the column letter or row number to select it, press Ctrl+1, check Locked, and protect the sheet.
How do I lock a cell reference in a formula?
That’s different from protecting cells. Add dollar signs, as in $A$1, so the reference doesn’t change when you copy the formula. Select the reference in the formula bar and press F4 to add them. To keep rows visible while you scroll, see how to freeze panes in Excel.
Next Step
Save the file after you protect the sheet, then open it and try to type in a locked cell. If Excel blocks the change and your input cells still work, the sheet is ready to share.

Matthew Burleigh has been writing tech tutorials since 2008. His writing has appeared on dozens of different websites and been read hundreds of millions of times.
After receiving his Bachelor’s and Master’s degrees in Computer Science he spent several years working in IT management for small businesses. However, he now works full time writing content online and creating websites.
His main writing topics include iPhones, Microsoft Office, Google Apps, Android, and Photoshop, but he has also written about many other tech topics as well.