Google Docs documents can contain a lot of different page and formatting options, including the number of columns. So you may be wondering how to switch from two columns to one column in Google Docs if the current settings no longer match your current document needs.
Certain types of documents that you might create with Google Docs will require the document to be formatted into multiple columns.
However, if you are editing such a document and need to put it into a one column document, then you might be wondering how to do that without a lot of editing or copying and pasting.
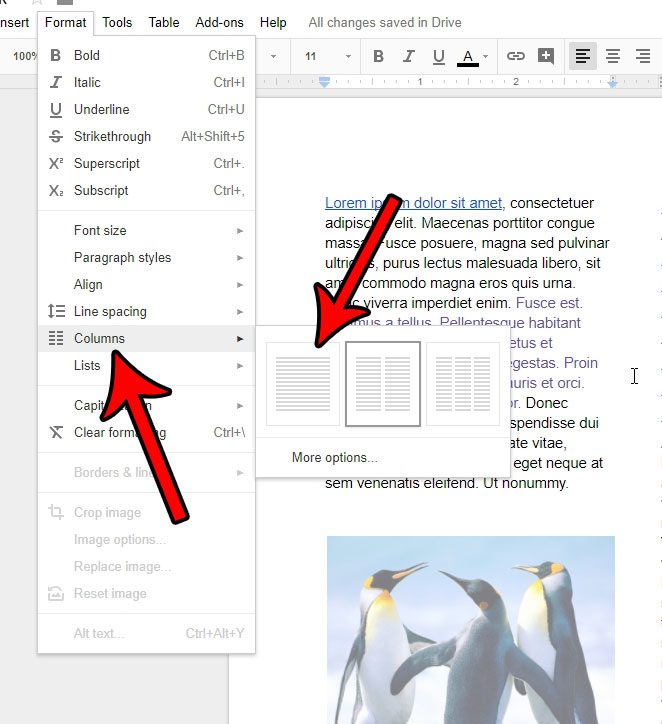
You can choose how many columns are in your Google Docs document by opening the document, clicking the Format menu at the top of the window, then choosing Columns. There you can click the single column icon for one column, the two column icon for a two column format, or the three column icon to make the entire document have three columns.
Fortunately, the menu in Google Docs that lets you choose the number of columns for your document makes it relatively simple to switch back and forth between those different column options.
Our tutorial below will show you how to take a two-column document and turn it into a one-column document with just a few short clicks.
How to Switch Between Columns in Google Docs (Changing the Number of Columns)
- Open your document.
- Choose Format.
- Select Columns.
- Click on the desired number of columns.
Our article continues below with additional information on switching the number of columns in a Google Docs document, including pictures for these steps.
Do you need to use subscript or superscript in your documents? Find out how to do subscript in Google Docs.
How to Go Back to One Column in Google Docs (Guide with Pictures)
The steps in this article were performed in Google Chrome. The same steps will also work in most other desktop Web browsers. This guide assumes that you currently have a two column document that you would like to switch to a single column document.
Our tutorial on how to split a page in half on Google Docs can show you a quick way to add columns to your document.
Note that if you have any images or other objects in your document, you may need to resize them. Therefore it is always a good idea to proofread your document after making this switch so that you can ensure nothing unusual has happened. If you included a page break at some point and want to delete it, or if you need to add one, then check out this tutorial for more information.
Step 1: Go to your Google Drive at https://drive.google.com/drive/my-drive and open the document that you wish to switch back to one column.
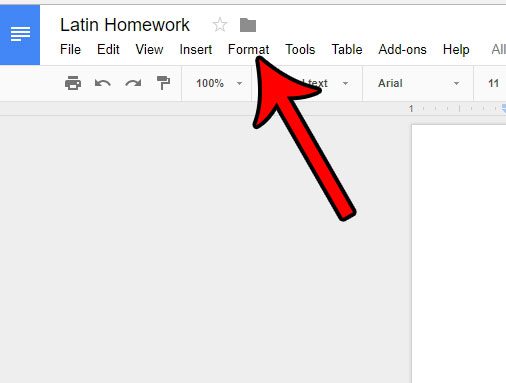
Step 2: Click the Format tab in the menu bar at the top of the window.

Step 3: Select the Columns option, then click the leftmost option to switch the document to one column.
This columns sub menu lets you switch between a single column format, as well as add a second column or a third column.

Our tutorial continues below with additional discussion about how to remove or create Google Docs columns.
Check out our how to double space Google document tutorial and find out how to change the spacing for new and existing documents.
More Information on How to Switch from Two Columns to One in Google Docs
One other item related to columns in Google Docs involves the column break. A column break in a Google doc is similar to a page break. Whereas a page break will automatically advance you to the next page when you use one, a column break will automatically advance you to the next column.
You can find the column break option by clicking Insert in the menu bar at the top of the window, choosing Break, then clicking Column break.
Related: How to Remove a Google Docs Page Break
Note that the Column break option will be grayed out unless you have two or three columns in your document.
You can delete a Google Doc column break by placing your cursor at the start of the text that comes after the break, then press the Backspace key to remove the break.
You can create columns in Google Docs by clicking the Format button at the top of the window, choosing the Columns option, then clicking on the number of columns that you want in your document.
If you click the Column options button under the column icons it will open a new Column options dialog box. Here you will see the following options:
- Number of columns – You can also choose between 1, 2, and 3 columns from this drop down list.
- Spacing (inches) – This allows you specify the amount of blank space that appears between each of your document columns.
- Line between columns – If you check this box it will add vertical lines between each of the columns in your document.
Related: How to Do Hanging Indent on Google Docs
Unfortunately, Google Docs doesn’t let you create multiple columns beyond the three that you will find on this column formatting menu. If you need to insert columns beyond this then you will need to use another word processing application like Microsoft Word. The method for creating columns in Word involves opening the document, clicking the Layout tab at the top of the window, then clicking the Columns button and specifying the number of columns for the document.
If you click the More Columns option, you will be able to add columns beyond the first column options shown on the menu. While adding columns might be useful in some situations, using this column feature to use four or more columns will make them very small, as the default formatting for four or more text columns is not ideal for a lot of content.
Note that there are some other options on this formatting menu that you may need to use. Our guide here discusses strikethrough and how to use it or remove it.
Do you have a document in the Google Docs format, but you need to submit it as a Word document? Learn how to save as a Word doc from Google Docs so that you can create the needed file without even using Microsoft Word.
Related: Google Docs Space After Paragraph – How to Add or Remove

Matthew Burleigh has been writing tech tutorials since 2008. His writing has appeared on dozens of different websites and been read over 50 million times.
After receiving his Bachelor’s and Master’s degrees in Computer Science he spent several years working in IT management for small businesses. However, he now works full time writing content online and creating websites.
His main writing topics include iPhones, Microsoft Office, Google Apps, Android, and Photoshop, but he has also written about many other tech topics as well.