If you send a lot of emails throughout the course of a typical day, then you are probably looking for ways to reduce the amount of time that you spend writing those emails.
One simple way to do this is with an email signature. You can set up an email signature in Outlook 2013 that will automatically be added to the end of any message you send. You can even customize that signature with a picture or logo.
Using a signature allows you to quickly and accurately provide your email recipients with important contact information, while also adding a level of professionalism to your messages. So follow our tutorial below to learn how to make your email signature in Outlook 2013.
How to Create a Signature in Microsoft Outlook 2013
This tutorial is going to create a simple email signature that includes your name, address and phone number. There are some additional customizations that you can add as well, such as including a URL in your signature. So once you have followed our guide and gotten the hang of creating a signature, you can experiment with ways to better suit it for your needs.
Step 1: Launch Outlook 2013.
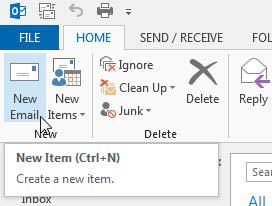
Step 2: Click the Home tab at the top of the window, then click the New Email button in the New section of the ribbon at the top of the window.
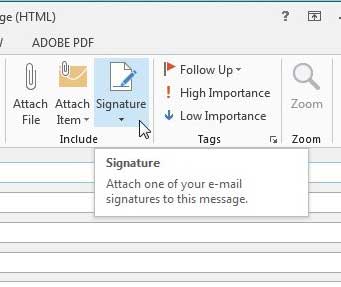
Step 3: Click Signature in the Include section of the ribbon at the top of the window.
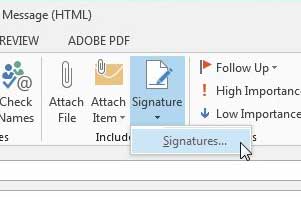
Step 4: Click Signatures.
Step 5: Click the New button.
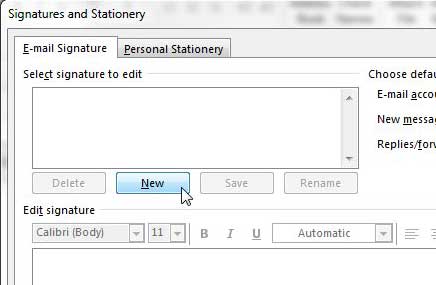
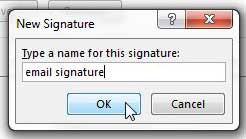
Step 6: Type a name for the signature, then click the OK button.
Step 7: Enter the information to include with your signature into the field at the bottom of the window.
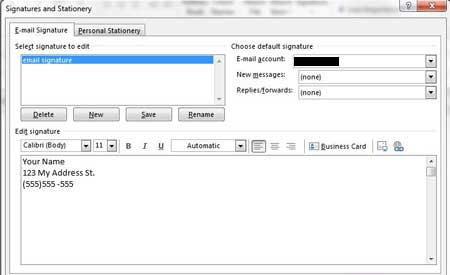
Step 8: Click the drop-down menu to the right of New messages, then click your signature from the list. If you have multiple email accounts configured in Outlook, then you will also need to click the drop-down to the right of E-mail account and set the default signature option for each account.
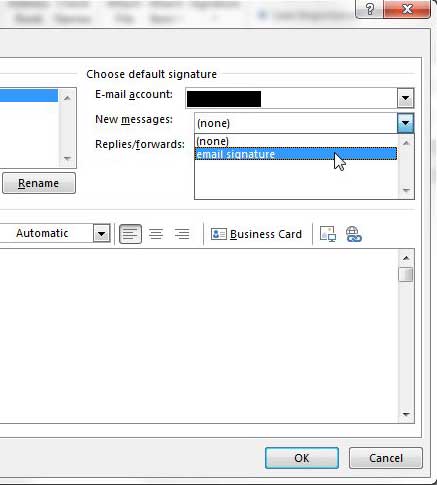
Step 9: Click the OK button at the bottom of the window when you are finished.
Now that you know how to make a signature in Outlook 2013, you will be able to automatically include important information or links that you want to send to all of your email cotnacts.
Do you wish Outlook was downloading new messages more often? Learn how to increase the send and receive frequency in Outlook 2013.

Matthew Burleigh has been writing tech tutorials since 2008. His writing has appeared on dozens of different websites and been read over 50 million times.
After receiving his Bachelor’s and Master’s degrees in Computer Science he spent several years working in IT management for small businesses. However, he now works full time writing content online and creating websites.
His main writing topics include iPhones, Microsoft Office, Google Apps, Android, and Photoshop, but he has also written about many other tech topics as well.