Many people that are just learning how to edit video files on their Windows 7 computers might wind up taking the route of downloading third-party video editing programs.
While many of them are good, some even great, the fact that you can download a Microsoft video editing program, called Windows Live Movie Maker, is something that not everyone is aware of.
Windows Live Movie Maker is a great program for making simple edits to your video files, and the interface is very familiar if you are accustomed to working with other Microsoft programs, such as Microsoft Office.
Movie maker even gives you the option of importing multiple files, whether they are images, videos or a combination of the two, which allows you to join video clip files in Windows Live Movie Maker.
Combine Multiple Video Clip Files Into One Video with Windows Live Movie Maker
If you have not already done so, you can follow the instructions in this article about installing Windows Live Movie Maker to get the program on to your computer.
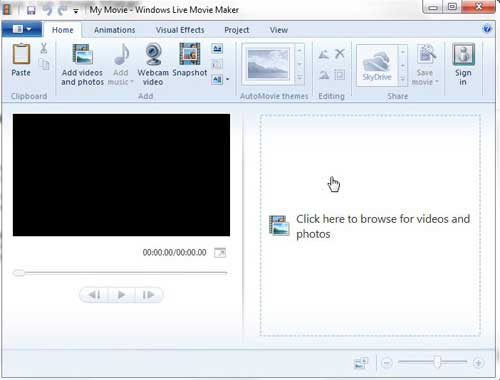
Once you have downloaded and installed Windows Live Movie Maker, you can launch it by clicking the Start button at the bottom-left corner of your screen, clicking All Programs, then clicking Windows Live Movie Maker.
Click the Click here to browse for photos and videos option at the center of the window, then double-click the first video file that you want to join. Repeat this step for each additional clip. You do not need to add the clips in any particular order, as you can rearrange them within Windows Live Movie Maker.
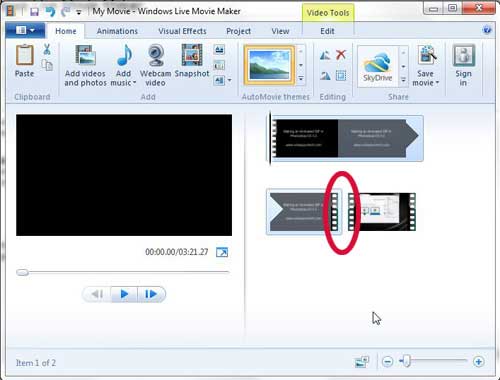
Each individual clip is separated in Windows Live Movie Maker by a tiny break in the timeline at the right side of the window. For example, in the image below, I have circled the break between the two clips that I have added to my project.
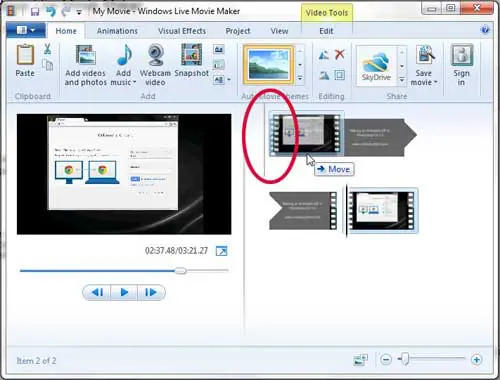
You can rearrange the clips by clicking on the one you want to move, then dragging it to the desired position in the timeline. Note that there is a vertical line that is displayed at the point in the timeline where your moved clip will be added. I have circled the line to which I am referring in the image below.
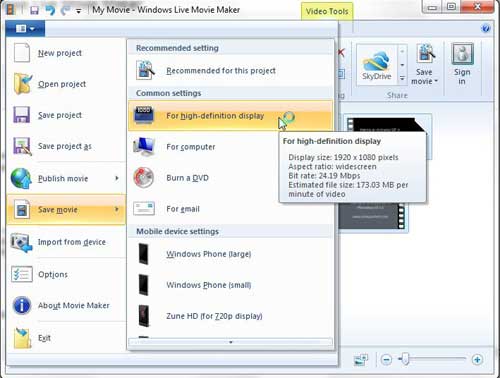
When your clips are properly arranged, click the Movie Maker tab at the top-left corner of the window, click Save Movie, then choose the appropriate resolution based upon your needs.
Now that you know how to join video clips in Windows Live Movie Maker, you can use these steps to combine multiple video files into one larger one.
Note that you do not need to do anything extra to your video clips once you have added and organized them within Windows Live Movie Maker. They will automatically be joined into one video file once you save the movie.

Matthew Burleigh has been writing tech tutorials since 2008. His writing has appeared on dozens of different websites and been read over 50 million times.
After receiving his Bachelor’s and Master’s degrees in Computer Science he spent several years working in IT management for small businesses. However, he now works full time writing content online and creating websites.
His main writing topics include iPhones, Microsoft Office, Google Apps, Android, and Photoshop, but he has also written about many other tech topics as well.


