Microsoft Excel workbooks can often contain important or sensitive data that you may not want anyone with the file to be able to see.
One way that you can help to protect that data is by adding a password to the file.
Our tutorial will show you how to protect a workbook in Excel 2011 by following a couple of short steps.
As an Amazon affiliate, I earn from qualifying purchases.
How to Add Protection to a Microsoft Excel for Mac Workbook
- Open the Excel file.
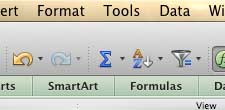
- Select the Tools tab.
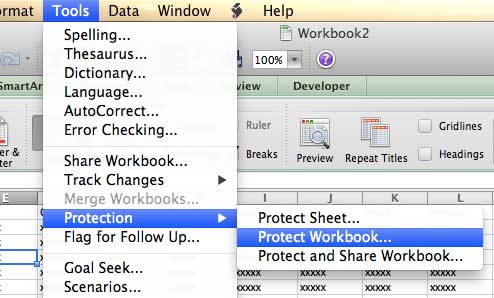
- Choose Protection, then Protect Workbook.
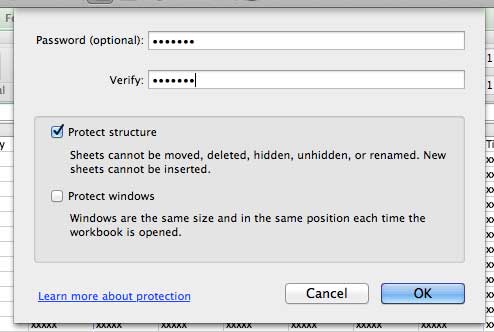
- Enter the password, then re-enter it to verify.
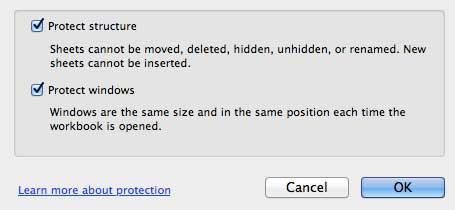
- Choose whether to protect the structure and the windows, then click OK.
- Save the file.
Our guide continues below with additional information on how to protect a workbook in Excel 2011, including pictures of these steps.
When you are creating a workbook in Excel 2011 that you plan to share with other people, it may be important that people not be able to change the names of the worksheets contained within the workbook.
One simple way to do this is by protecting the workbook.
This requires anyone that wants to edit the workbook to know a password, which they will need to enter before they make changes.
How to Lock an Excel 2011 Workbook (Guide with Pictures)
The Protection feature in Excel 2011 actually allows you to specify between protecting certain elements of the current active worksheet or protecting the structure of the entire workbook.
We are just going to focus on protecting the entire workbook for the purposes of this tutorial, but you can easily apply this same procedure to the Protect Sheet option if you just want to protect one of the worksheets instead of the entire workbook.
Step 1: Open the workbook in Excel 2011.
Step 2: Click Tools at the top of the window.

Step 3: Click Protection, then click Protect Workbook.

Step 4: Type your desired password into the Password field, then re-type it into the Verify field.

Step 5: Check the box next to Protect structure and Protect windows (based upon your needs,) then click the OK button.

Step 6: Save the file to apply the changes.
Now that you know how to protect a workbook in Excel 2011, you will be able to use this technique anytime you create a spreadsheet with important data that you wish to block from other people.
Note that protecting the workbook is not going to prevent people from being able to change cell values. It only protects the structure of the workbook, and the existence and name of worksheets. If you want to protect the contents of the worksheets, then you need to protect the sheets as well.
You can remove the protection of a workbook by clicking Tools -> Protection -> Unprotect Workbook at the top of the screen, then enter the password.
Looking for a simple but useful gift? Amazon gift cards have an incredible number of uses, and you can even customize them with your own pictures. Click here to learn more.
If you need to print your spreadsheet in Excel 2011, using gridlines can make it much easier to read. Click here to learn how to print a spreadsheet with gridlines in Excel 2011.

Matthew Burleigh has been writing tech tutorials since 2008. His writing has appeared on dozens of different websites and been read over 50 million times.
After receiving his Bachelor’s and Master’s degrees in Computer Science he spent several years working in IT management for small businesses. However, he now works full time writing content online and creating websites.
His main writing topics include iPhones, Microsoft Office, Google Apps, Android, and Photoshop, but he has also written about many other tech topics as well.