While it’s likely that you have used spellcheck in Powerpoint to check the spelling on your slides and in your text boxes, you may want to check for more than just spelling errors.
Fortunately, you can also check for grammar errors by enabling an option found on the Powerpoint Options window.
Spell check is an important part of most files that you create in Microsoft Office programs, whether it is a spreadsheet in Excel, a document in Word, or a slideshow in Powerpoint.
But Office programs are also able to check grammar, which can be helpful if you have a Powerpoint presentation that contains a lot of text.
Our tutorial below will show you the option that you need to enable to allow Powerpoint 2013 to check grammar when you run the spell checker.
How to Turn on the Powerpoint Grammar Checker
- Open Powerpoint 2013.
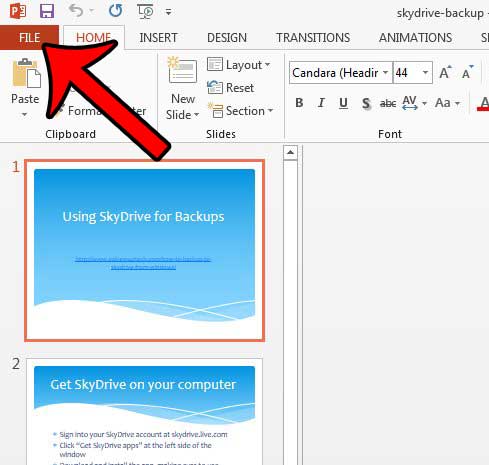
- Click the File tab.
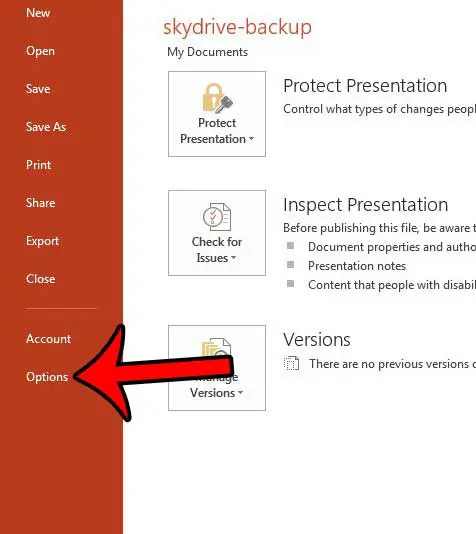
- Select Options at the bottom-left.
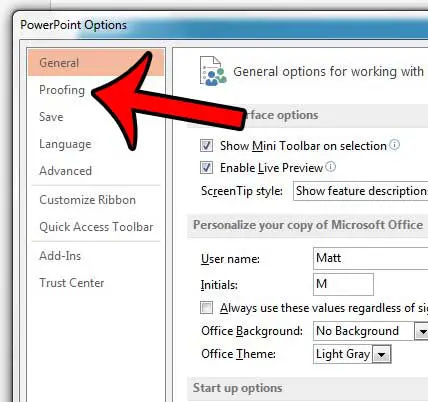
- Click the Proofing option at the left side of the Powerpoint Options dialog box.
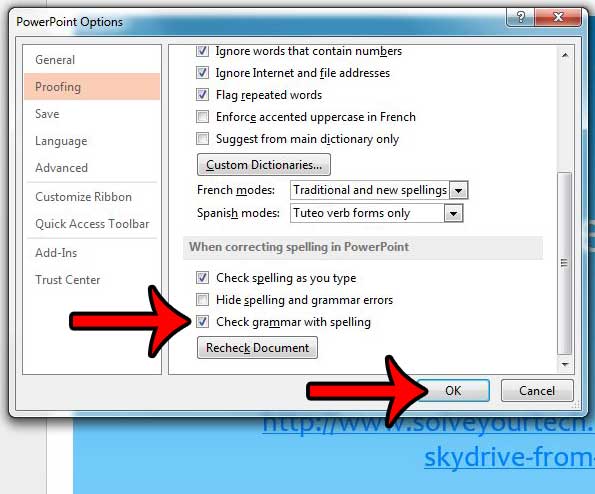
- Check the box to the left of Check grammar with spelling, then click OK.
Our article continues below with additional information on how to enable the spelling and grammar checker in Powerpoint so that you can find spelling and grammar errors on your slides.
Would you like to use this option in your documents, too? Our how to check grammar and spelling in Word guide can show you where to find that option.
Enabling the Grammar Check Option in Powerpoint 2013 (Guide with Pictures)
The steps in this article will change a setting in Powerpoint 2013 so that the grammar in your presentation is checked along with the spelling. This setting is for the entire Powerpoint program, so it will run any time that you run a spell check on one of your presentations.
Step 1: Open Powerpoint 2013.
Step 2: Click the File tab at the top-left corner of the window.

Step 3: Click the Options button at the bottom of the column at the left side of the window. This opens the Powerpoint Options menu.

Step 4: Click the Proofing tab at the left side of the Powerpoint Options window.

Step 5: Scroll down to the When correcting spelling in Powerpoint section, check the box to the left of Check grammar with spelling, then click the OK button to apply your changes.

Do you need to present your Powerpoint presentation in an environment where it would be more effective as a movie? Learn how to save a Powerpoint slideshow as a video that you can upload to places like YouTube.
More Information on Using the Spelling and Grammar Check in Powerpoint
- Unfortunately, there is no Grammarly for Powerpoint add-on or application. It is only available for the Word and Outlook desktop apps.
- The spelling and grammar check in Powerpoint is a helpful way to find spelling and grammar errors in your slides, but it can occasionally be problematic with unusual words and proper nouns.
- You can manually check for spelling errors and grammar errors by going to the Review tab and clicking the Spelling button in the Proofing section of the ribbon.
- If you don’t want to see the spelling or grammar error indicators on your slides, you can elect to hide spelling and grammar errors from the Proofing tab on the Powerpoint Options menu as well. There is also an option to check spelling as you type on that menu, which can be disabled as well.

Matthew Burleigh has been writing tech tutorials since 2008. His writing has appeared on dozens of different websites and been read over 50 million times.
After receiving his Bachelor’s and Master’s degrees in Computer Science he spent several years working in IT management for small businesses. However, he now works full time writing content online and creating websites.
His main writing topics include iPhones, Microsoft Office, Google Apps, Android, and Photoshop, but he has also written about many other tech topics as well.