While you may be accustomed to creating documents in Microsoft Word, there is another application in the Microsoft Office suite called Microsoft Publisher that can help, too.
Publisher can be a little difficult to start using, but it’s a very effective way to create documents or projects that might not work well in the traditional document layout.
Our tutorial below will show you how to insert a text box in Microsoft Publisher so that you can then add text to the document.
How to Add a New Text Box in Publisher 2013
- Open your Publisher document.
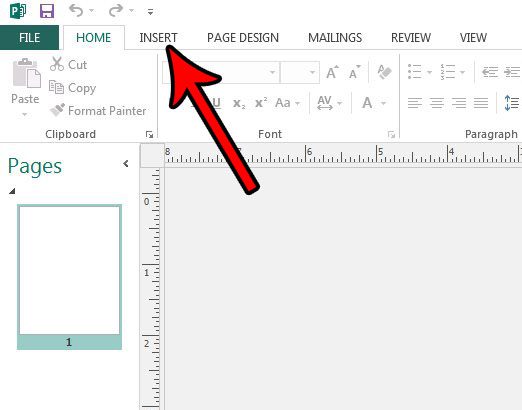
- Select the Insert tab.
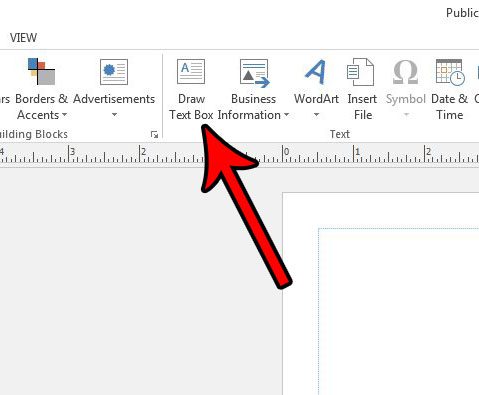
- Click the Draw Text Box button.
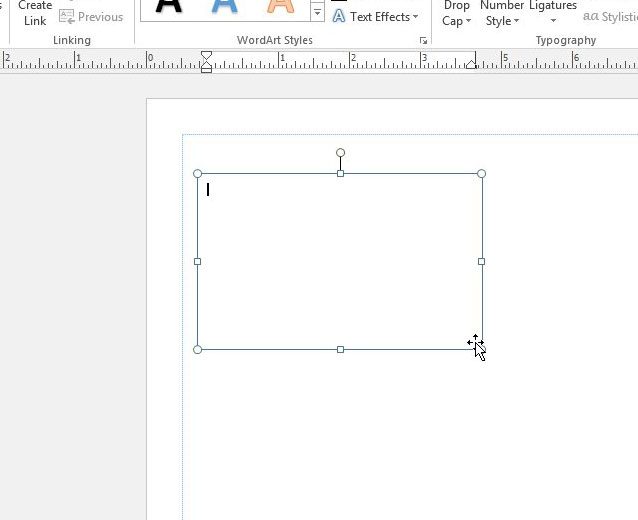
- Draw the text box on the canvas.
Our guide continues below with additional information on how to insert a text box in Microsoft Publisher 2013, including pictures of these steps.
Microsoft Publisher is a little different than the rest of the Microsoft Office applications with which you may already be familiar.
Publisher provides you with a blank canvas upon which you add different objects to complete your project.
One of the objects you can add is a text box, which becomes necessary when you have letters and numbers that you need to place.
Our guide below will show you where to find the button that lets you add a text box to your document. You are then free to add your text to the document, then move and format that text to suit the needs of the project.
Related Topic: Our how to insert text box in Google Docs article will show you how to add a text box to a document in Google’s word-processing application as well.
How to Add Words to Publisher 2013 With a Text Box (Guide with Pictures)
The steps in this article were performed in Microsoft Publisher 2013.
The result of completing these steps will be a new text box that you have added to an existing Publisher file.
That new text box can then be moved and formatted using a number of text-box-specific tools and options.
Step 1: Open your document in Publisher 2013.
Step 2: Click the Insert tab at the top of the window.

Step 3: Select the Draw Text Box option in the Text section of the ribbon.

Step 4: Click and hold on the document, then drag the mouse to create the desired text box shape.
You can then release the mouse button to complete the addition of the text box.

Now that you know how to insert a text box in Microsoft Publisher, you may discover that you need to adjust something about it.
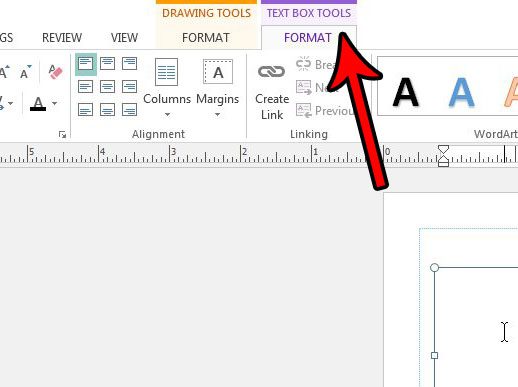
There is a Text Box Tools tab at the top of the window that appears when the text box is added. You can use the options on that tab to change many of the text box elements that you may wish to adjust.

Note that there is also a Draw Text Box button on the Home tab as well.
Both buttons perform the same action, but in my experience, it’s a little easier to remember that the text box can be added from the Insert tab, as that is where you will also be adding most of the other document objects as well.
Have you added a picture to your Publisher document, only to find that you need to remove part of the picture before finalizing the project? Find out how to crop a picture in Publisher 2013 and finish your task without the use of a separate program.

Matthew Burleigh has been writing tech tutorials since 2008. His writing has appeared on dozens of different websites and been read over 50 million times.
After receiving his Bachelor’s and Master’s degrees in Computer Science he spent several years working in IT management for small businesses. However, he now works full time writing content online and creating websites.
His main writing topics include iPhones, Microsoft Office, Google Apps, Android, and Photoshop, but he has also written about many other tech topics as well.