If you’ve ever seen a document with some faint text or an image that is grayed out and behind the document text, then you have likely seen a watermark. These can come in the form of a text watermark or picture watermark, and provide a useful method for identifying documents quickly. You might even wonder how to use these yourself, such as if you want to add a draft watermark to your document in Microsoft Word.
Watermarks in Word 2013 can be useful as a quick means to identify the particular status of a document. It doesn’t interfere with anyone’s ability to read the document, but it clearly tags the document with whatever label you would like to affix to it. One of the default watermark options in Word 2013 will place the word “Draft” behind your document.
If you would like to use the Draft watermark option, however, you might be having difficulty finding where to set it. Our tutorial below will show you where to find the watermark option and how to specifically apply one of the Draft watermarks to every page of your document.
How to Add a Draft Watermark in Word 2013
- Open the document.
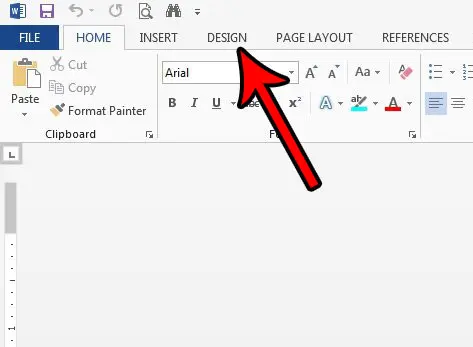
- Click the Design tab.
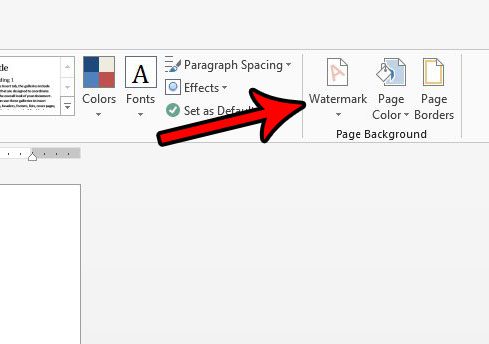
- Click Watermark.
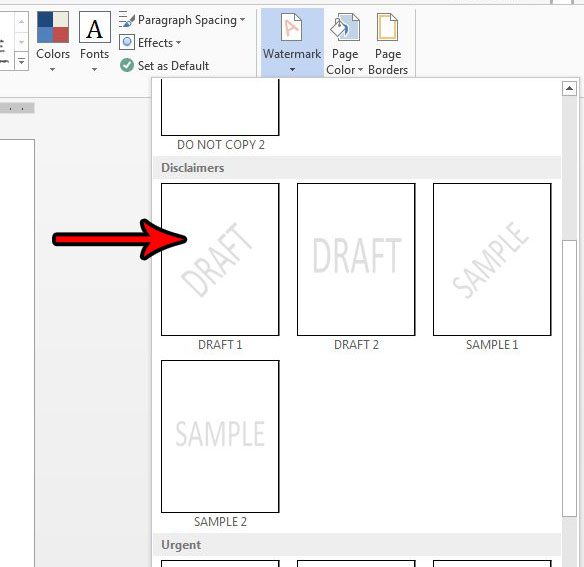
- Select a Draft option.
Our article continues below with additional information on how to insert a draft watermark in Word, including pictures of these steps.
How to Put the Word “Draft” in the Page Background in Word 2013 (Guide with Pictures)
The steps in this article are going to add a watermark that says “Draft” to every page of your Word 2013 document. There are several other watermark options as well, if you would prefer to use a different one. You can also use your own custom image as a watermark, if you would prefer.
Step 1: Open your document in Word 2013.
Step 2: Click the Design tab at the top of the window.

Step 3: Click the Watermark button in the Page Background section of the ribbon.
The Page Background group where you find the watermark option includes some additional items that you might find useful, such as Page Color and Page Borders.

Step 4: Scroll to the Disclaimers section of this menu, then click one of the Draft options.

Our guide continues below with more information, including how to remove a watermark that has been added to a document.
How to Remove a Draft Watermark in Word 2013
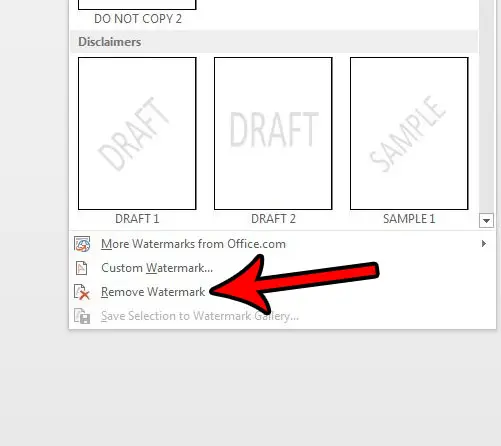
If you wish to remove this watermark later, then you can do so by returning to the menu in Step 4 above, but clicking the Remove Watermark option at the bottom of the menu.

Note that this will work for any watermark that has been added to the document, not just the draft option.
More on How to Insert Draft Watermark in Word 2013
While this article focuses specifically on a watermark that says “Draft” you can also select from a variety of other options. You can even include your own custom watermark, such as a company logo, or any other image that you would like to use. You can accomplish this by clicking the “Custom watermark” option at the bottom of the watermark menu, which will open a new window called Printed Watermark.
Aside from the picture watermark option that is available with the custom watermark option you will find some other items on the Watermark Dialog Box as well. For example, if you want to create a text watermark but you need custom text, then you can simply choose the Text watermark option. You even have the ability to specify the font, size, color, and layout.
While many of the options for customizing your page appearance are found on the Design tab, you can also find some useful settings on the Layout tab (or Page Layout tab in earlier versions of Word, such as Word 2010.) This includes page setup options like Margins, Orientation and paper size, as well as indentation and spacing options.
Conclusion
Now that you know how to insert a draft watermark in Word 2013 you will have a new option in your Word toolbelt that can make it easier for you to identify different versions of your printed documents in the future.
Do you have a document with a lot of formatting, and individually removing each formatting setting is too tedious? Learn how to quickly clear multiple formatting settings with a single button in Word 2013.

Matthew Burleigh has been writing tech tutorials since 2008. His writing has appeared on dozens of different websites and been read over 50 million times.
After receiving his Bachelor’s and Master’s degrees in Computer Science he spent several years working in IT management for small businesses. However, he now works full time writing content online and creating websites.
His main writing topics include iPhones, Microsoft Office, Google Apps, Android, and Photoshop, but he has also written about many other tech topics as well.