Print Preview is a helpful option in programs like Microsoft Word because the printed version of your document may be the only thing that your audience is seeing.
They won’t be able to see how beautiful it might look on your screen, but rather their entire opinion will be based on how it appears on the page.
So if your document has some unusual formatting, or if you are about to print a lot of copies, it’s helpful to get an idea of how it will appear on paper. Print Preview serves this function, and Microsoft Word 2010 even has a zoom function where you can get a closer look at the document.
As an Amazon affiliate, I earn from qualifying purchases.
A laser black and white printer costs less per page than an inkjet printer, and the pages print much faster. This wireless laser printer is a great choice and is even less expensive than some of the more popular inkjet options available.
Zooming In On a Print Preview in Word 2010
If you are used to Microsoft Word 2003, where there was a dedicated option for Print Preview, then Word 2010 is a little different. There is now a “main” Print screen where you select all of your printing options and where you also check out the Print Preview.
Step 1: Open your document in Word 2010.
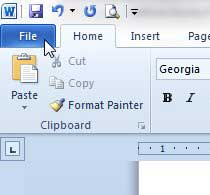
Step 2: Click the File tab at the top-left corner of the window.

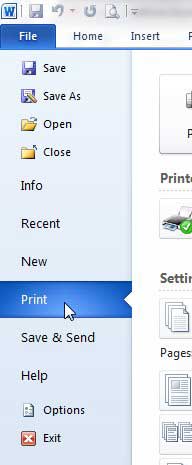
Step 3: Click the Print option in the column at the left side of the window.

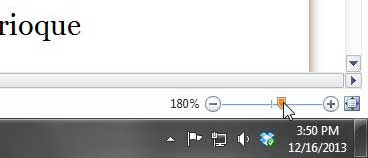
Step 4: Click the slider at the bottom-right corner of the window, then drag it to the left to zoom out or drag it to the right to zoom in. You can reset it to the default zoom level by clicking the button to the right of the slider bar.

Now that you know how to zoom in the Print Preview in Word 2010, you can use this feature anytime that you want to get a closer look at something before you print it out.
You can usually find ink for your printer at a cheaper price from Amazon than in a brick-and-mortar store. Visit their Ink and Toner page to search for ink for your printer and see if you can save some money.
Find out how to print address labels in Word 2010.
One of the various programs and devices that has a zoom capability is the Apple Watch. If the screen on your Apple Watch has zoomed in and you are unable to change it, the next section explains how to unzoom it.
How to Restore a Zoomed Apple Watch
The Apple Watch’s screen is typically crisp and easy to see despite its diminutive size, but occasionally you might find that zooming in on an image or piece of text that is too small to easily read is handy.
This how-to article contains further instructions for utilizing the zoom feature and explains why my Apple Watch keeps zooming in.
Until you reverse the zoom on your Apple Watch, using the device could be challenging, whether you did it intentionally or accidentally zoomed in.
Either double-tap the watch face with two fingers or use the steps below to unzoom your Apple Watch from your phone.
- First, launch the Watch app.
- Select the tab for My Watch.
- Choose the Accessibility menu.
- Tap on Zoom.
- Turn off the Zoom setting.
You can use this feature to enhance your Apple Watch experience if you know how to reverse zoom on the device.

Matthew Burleigh has been writing tech tutorials since 2008. His writing has appeared on dozens of different websites and been read over 50 million times.
After receiving his Bachelor’s and Master’s degrees in Computer Science he spent several years working in IT management for small businesses. However, he now works full time writing content online and creating websites.
His main writing topics include iPhones, Microsoft Office, Google Apps, Android, and Photoshop, but he has also written about many other tech topics as well.