Have you recently watched a Powerpoint presentation and noticed that the presenter’s mouse looked like a laser pointer instead of a typical mouse cursor?
This isn’t a special add-on or additional feature that this person has added to their computer, but it is actually part of the default installation of Microsoft Powerpoint 2013.
In our article below, we will show you how you can start using the laser pointer when you give presentations in Powerpoint 2013. It can provide a better viewing experience for your audience, plus it can often just look better than the default mouse cursor that would otherwise be used instead.
Change Cursor to Laser Pointer in Powerpoint 2013
The steps in this article will show you how to switch your mouse to a laser pointer when you are giving a Powerpoint 2013 presentation.
Note that this can only be done when you are in Slide Show mode. You cannot switch to the laser pointer when you are on the regular editing screens for your presentation.
Step 1: Open your spreadsheet in Powerpoint 2013.
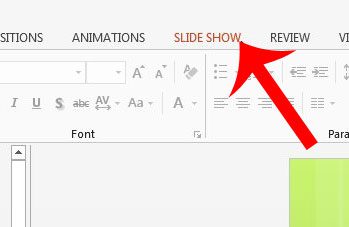
Step 2: Click the Slide Show option at the top of the window.

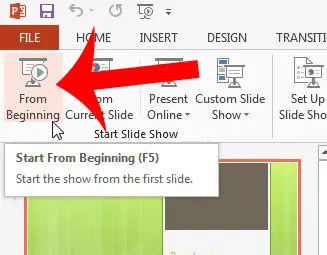
Step 3: Click the From Beginning option in the Start Slide Show section of the navigational ribbon.

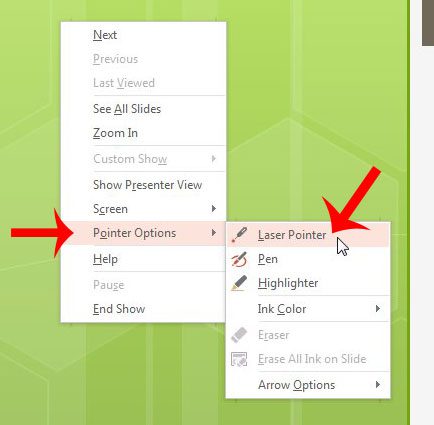
Step 4: Right-click anywhere on the slide, click Pointer Options, then click the Laser Pointer option.

You can exit this mode at any time by pressing the Esc key on your keyboard.
Now that you know how to use a later pointer in Powerpoint 2013, you can use that option when you are giving your presentation if you prefer it to the default cursor option.
If this doesn’t meet your presentation needs, then you might be better off ordering an actual laser pointer.

Matthew Burleigh has been writing tech tutorials since 2008. His writing has appeared on dozens of different websites and been read over 50 million times.
After receiving his Bachelor’s and Master’s degrees in Computer Science he spent several years working in IT management for small businesses. However, he now works full time writing content online and creating websites.
His main writing topics include iPhones, Microsoft Office, Google Apps, Android, and Photoshop, but he has also written about many other tech topics as well.