Screenshots are a helpful way to show someone something on your screen, particularly if it is something that might be difficult to find or recreate.
In fact, we use many screenshots in every article that is written on this site. If you are familiar with taking screenshots, then you know that the process can be a little tedious, as it will require either an image editing program or an application that specifically generates screenshots and saves them as images.
So, if you wanted to insert a screenshot into Microsoft Word 2010, you would have to take the screenshot, save it as an image, then insert that picture into Microsoft Word.
But Word 2010 actually has a utility that allows you to take a screenshot from directly within the program, thereby negating all of the extra steps that can make the process a chore.
Inserting a Screenshot in Microsoft Word 2010
This feature is very helpful for people that often write documents that rely upon screenshots. It will reduce the amount of time spent creating these images, and it takes away the frustration that comes from constantly having to switch between programs. Continue reading below to learn how to take a screenshot in Microsoft Word 2010.
Step 1: Launch Microsoft Word 2010.
Step 2: Click the Insert tab at the top of the window.
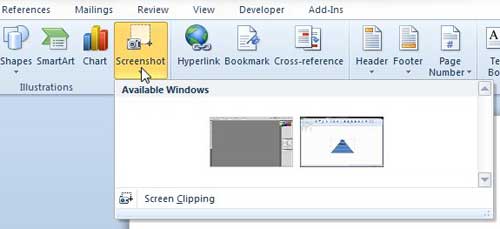
Step 3: Click the Screenshot drop-down menu, then choose the open window from which you want to pull the screenshot.
Note that there is also an option at the bottom of this menu that says Screen Clipping. If you choose that option, it will take you to the window that was last open, and you can draw on the screen to choose only the portion of it that you want to include as the screenshot. This is very helpful if you want to include a partial screenshot of one of your windows.
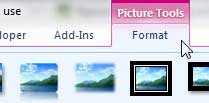
Word 2010 will treat the inserted screenshot as an image, so you can use the Picture Tools tab at the top of the window to apply various changes to the image.
This will allow you to make some common edits, essentially eliminating any need that you might have for editing the screenshot image in a separate program before adding it to Word.
Continue Reading
- How to insert a check mark in Microsoft Word
- How to do small caps in Microsoft Word
- How to center text in Microsoft Word
- How to merge cells in Microsoft Word tables
- How to insert a square root symbol in Microsoft Word

Matthew Burleigh has been writing tech tutorials since 2008. His writing has appeared on dozens of different websites and been read over 50 million times.
After receiving his Bachelor’s and Master’s degrees in Computer Science he spent several years working in IT management for small businesses. However, he now works full time writing content online and creating websites.
His main writing topics include iPhones, Microsoft Office, Google Apps, Android, and Photoshop, but he has also written about many other tech topics as well.

