The iCloud backup feature on your iPhone makes it very easy to save the data from your iPhone to a location that is convenient. All Apple IDs have iCloud storage, and you can buy additional space if the size of your backups start to exceed the 5 GB that you get for free.
Once you have configured your iCloud backups, they will occur daily when your iPhone is connected to Wi-Fi and a charger.
Unfortunately, this could leave you with an incomplete backup, as any data that you have created after the last backup won’t be a part of that backup file. This can be problematic if you are using your iCloud backup to set up a new phone and you can’t find something new that you added that same day.
One way to avoid this scenario is to create a manual iCloud backup from your iPhone right before you need it. Our guide below will show you a short series of steps to follow that can accomplish this.
How to Create an iCloud Backup on an iPhone
The steps below were performed on an iPhone 7 Plus in iOS 10.2. This is going to create a backup of your iPhone that is stored in iCloud. Note that this will require your iCloud account to have enough available storage for the backup file that you are about to create.
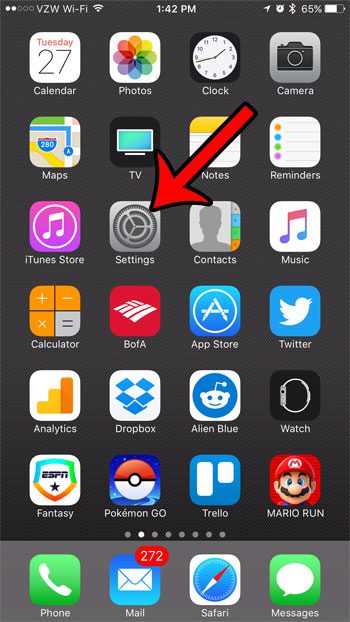
Step 1: Open the Settings menu.

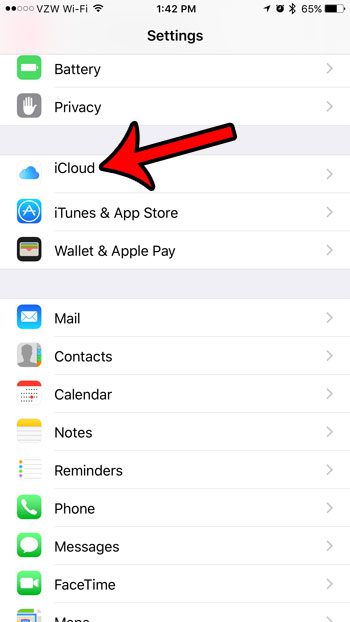
Step 2: Scroll down and select the iCloud option.

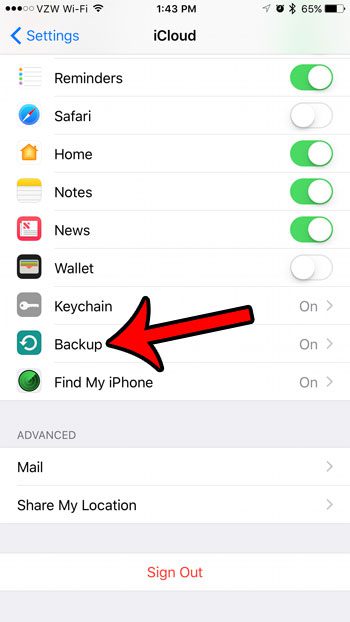
Step 3: Scroll to the bottom of the menu and tap the Backup option.

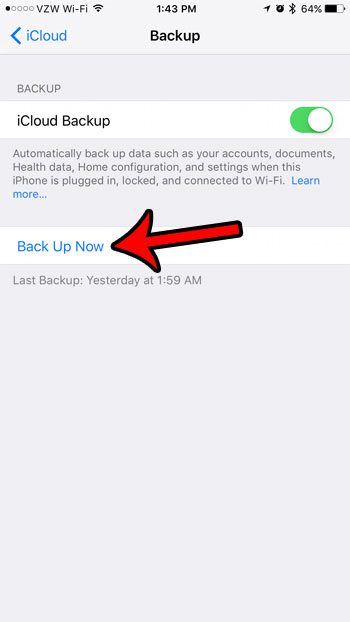
Step 4: Tap the Back Up Now button.

Now that you know how to run a manual iCloud backup on an iPhone 7, you will be able to use these steps to create device backups whenever you need to.
Are you running low on storage space on your iPhone? Our complete guide to deleting items on the iPhone might give you a few ideas on places to check for ways to increase your available space.
Continue Reading

Matthew Burleigh has been writing tech tutorials since 2008. His writing has appeared on dozens of different websites and been read over 50 million times.
After receiving his Bachelor’s and Master’s degrees in Computer Science he spent several years working in IT management for small businesses. However, he now works full time writing content online and creating websites.
His main writing topics include iPhones, Microsoft Office, Google Apps, Android, and Photoshop, but he has also written about many other tech topics as well.