Your iPhone has a lot of convenience features that you might not know about until they pop up on the device.
Some of these features involve your location and the tracking data that your phone has collected on you.
One such feature is called “Next Destination” and it will pop up as a notification on your screen when your phone thinks that you are heading to work or home. It will also tell you how long that trip is going to take.
If you don’t wish to use this feature on your iOS 7 device then you can disable it by following our steps outlined below.
As an Amazon affiliate, I earn from qualifying purchases.
How to Disable Next Destination on an iPhone
- Open Settings.
- Choose Notification Center.
- Turn off the Next Destination option.
The Notification Center and the Control Center on your iOS 7 iPhone contain a lot of helpful information and features.
One new one that is particularly noticeable is a notification that says “Right now, it would take you about x minutes to drive home,” or something similar.
This information is pulled from information that is stored on a menu called Frequent Locations, and is displayed as long as you have an option enabled that is called “Next Destination.”
So if you want to remove this feature from your Notification Center, you can follow the steps outlined below.
Amazon has tons of great deals every day on a wide variety of products. One area where these are displayed is a place called “Today’s Deals.” Click here to see the specials for today.
How to Turn Off the Notification That Says “Right Now, It would take you about x minutes to drive to x”
If you aren’t going to be using this feature, then you might also want to consider turning off the Frequent Locations option as well.
We will provide a step-by-step method at the end of this tutorial for doing that as well. But to simply stop displaying your next destination, follow these simple steps.
Step 1: Tap the Settings icon.
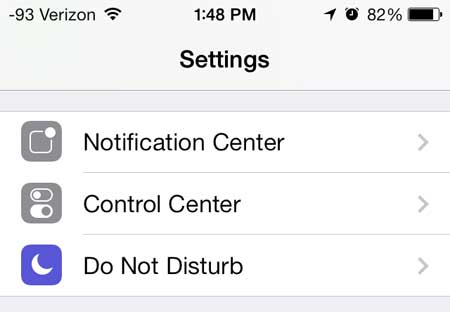
Step 2: Touch the Notification Center option.
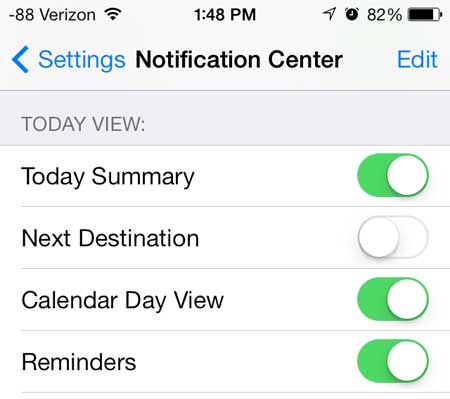
Step 3: Move the slider to the right of Next Destination from the right to the left.
When it is off there will not be any green around the slider button.
If you would also like to turn off the Frequent Locations information, you can do so by following the steps outlined in the section below.
How to Shut Off the IPhone Frequent Locations Option
One of the items that you will find on your phone’s Privacy menu involves the use of frequent locations. This is where the iPhone stores information about the places that you visit regularly, like home or work.
If you don’t like this, however, then you can choose to turn it off with the steps below.
Step 1: Touch the Settings icon.
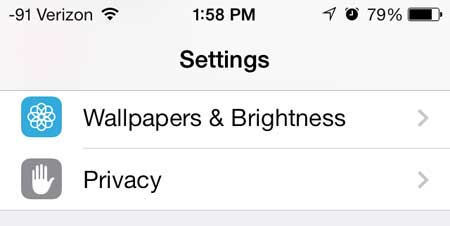
Step 2: Scroll down and touch the Privacy button.
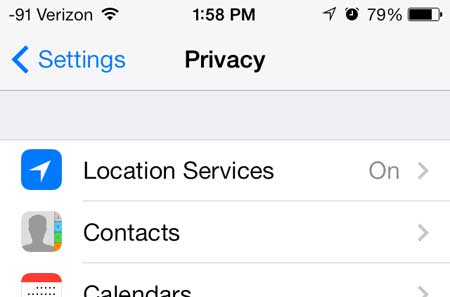
Step 3: Touch Location Services at the top of the screen.
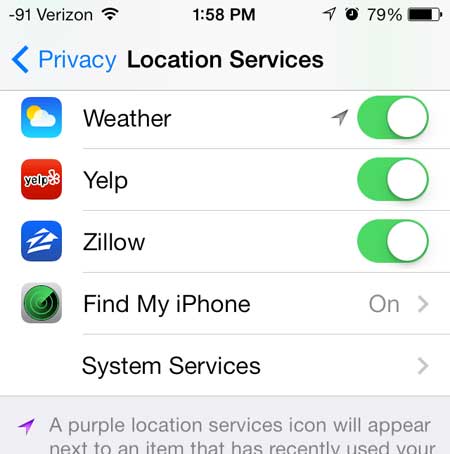
Step 4: Scroll all the way to the bottom of the screen and touch System Services.
Step 5: Touch the Frequent Locations button at the bottom of the screen.
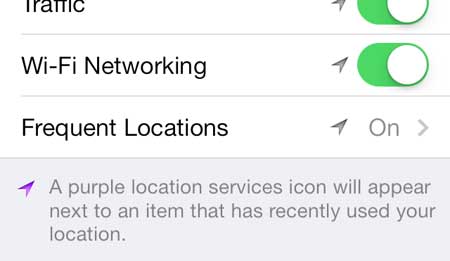
Step 6: Move the slider to the right of Frequent Locations from the right to the left.
Again, there will be no green coloring surrounding the button when it is turned off.
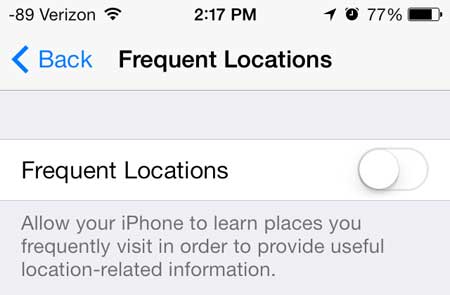
You can also clear the history of your frequent locations by touching the Clear History button at the bottom of this screen.
One of the best new features in iOS 7 is the ability to block unwanted callers. Click here to learn how.
How to Turn Off AirPod Notifications
AirPods are a popular iPhone accessory that offer a wireless and simple method to listen to music, make phone calls, and interact with Siri. The continuous notifications from AirPods, on the other hand, might be irritating and disruptive, especially if you’re attempting to focus on other things. Fortunately, you can disable AirPod notifications on your iPhone so you may listen to music without interruptions.
You can read our how to turn off AirPod notifications article for more information on this topic.
To disable AirPod notifications, simply follow these steps:
- On your iPhone, launch the Settings app.
- Scroll down to Notifications and press it.
- Choose Announce Notifications.
- Disable the Announce Notifications option.
When you disable AirPod alerts, you will no longer receive any notifications from your AirPods, like when they are connected or disconnected from your iPhone, or when the battery is low. This is especially beneficial if you’re using your AirPods in public or during a meeting and don’t want to cause any extra disturbances.
It’s worth noting that turning off AirPod notifications will have no effect on your ability to utilize your AirPods for music playing, phone calls, or other tasks. You can still connect your AirPods to your iPhone and use them normally, but you won’t get any notifications from them.
In addition to turning off AirPod notifications, you may want to try deactivating additional iPhone notifications to reduce distractions. You can, for example, disable notifications from individual apps or set up a Do Not Disturb schedule to mute all notifications at specific times of day.
Related: How to Remove Frequently Visited on iPhone
To stop notifications from individual apps, take the following steps:
- On your iPhone, launch the Settings app.
- Scroll down to Notifications and press it.
- Tap on the app for which you wish to disable notifications.
- Disable the Allow Notifications option.
You may decrease the quantity of notifications you receive on your iPhone by deactivating notifications from certain apps, which can help you stay focused and productive.
Turning off AirPod notifications is a simple and effective approach to decrease iPhone distractions. Whether you’re trying to concentrate on work, study, or simply relax and listen to music, shutting off notifications can help you remain on track and avoid distractions.
Additional Sources

Matthew Burleigh has been writing tech tutorials since 2008. His writing has appeared on dozens of different websites and been read over 50 million times.
After receiving his Bachelor’s and Master’s degrees in Computer Science he spent several years working in IT management for small businesses. However, he now works full time writing content online and creating websites.
His main writing topics include iPhones, Microsoft Office, Google Apps, Android, and Photoshop, but he has also written about many other tech topics as well.