Adjusting the height of rows or the width of columns in Microsoft Excel is a common activity. But if it’s something that you do a lot, then you might be looking for a faster way.
Luckily there is an AutoFit Excel shortcut that can make it much simpler for you to automatically adjust the height of your rows and width of your columns based n the size of your cell data.
Keyboard Shortcuts to AutoFit Columns and Rows in Excel 2013
- Open the worksheet in Excel 2013.
- Press Ctrl + a to select the entire worksheet.
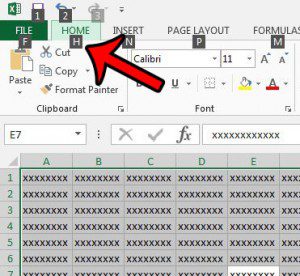
- Press Alt + h to specify the Home tab.
- Press Alt + o to open the Format menu.
- Press Alt + i to use the AutoFit Column Width command.
- Repeat steps 2, 3, and 4 to get back to the Format menu, then press Alt + a to use the AutoFit Row Height command.
Our guide continues below with additional information on how to use the Autofit Excel shortcut, including pictures of these steps.
Do you use VLOOKUP a lot? Find out how to replace na with 0 in Excel and reduce the number of displayed errors caused by the formula.
Resizing your cells in a spreadsheet gets a lot easier once you learn how to autofit all columns in Excel. Being able to click a couple of buttons instead of dragging column and row borders can be a real timesaver.
Excel can be a lot easier to use once you get comfortable using keyboard shortcuts to perform common actions. Copying and pasting, for example, is one action that can be made much quicker by using a keyboard instead of a mouse.
But there are keyboard shortcuts for many more Excel functions, including the AutoFit Column Width and AutoFit Column Height commands. Our guide below will show you how to get to them without needing to use your mouse.
If you are just trying to make your rows bigger and don’t need the shortcut, then check out our guide on how to expand rows in Excel instead.
Autofitting Rows and Columns in Excel 2013 Without Using Your Mouse (Guide with Pictures)
The steps in this article are going to show you a series of keyboard shortcuts that will allow you to use the AutoFit commands to automatically resize all of the columns and rows in your worksheet.
The result of following these steps will be a worksheet where all of the row heights and column widths have been adjusted to fit the largest piece of data in that row or column.
You can make a printed spreadsheet much easier to read by following the steps in our how to repeat first row in Excel tutorial.
Here is how to use keyboard shortcuts to AutoFit rows and columns in Excel 2013.
Step 1: Open your worksheet in Excel 2013.
Open the spreadsheet with the columns or rows to autofit.
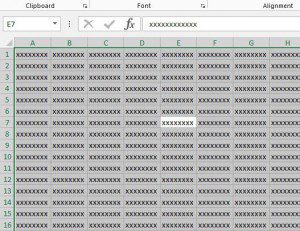
Step 2: Press Ctrl + A on your keyboard to select the entire worksheet.
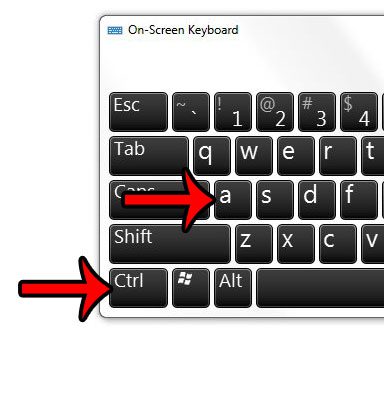
Select all of your cells with the Ctrl + a keyboard shortcut.
Step 3: Press Alt + h to select the Home tab.
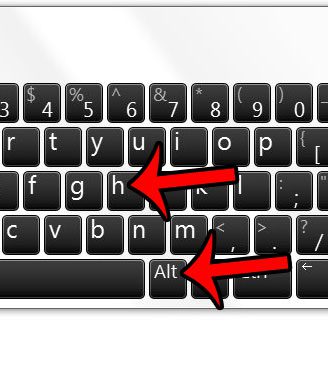
Use the Alt + h keyboard shortcut to choose the Home tab.
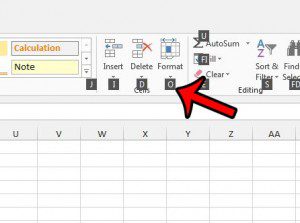
Step 4: Press Alt + o to open the Format menu.
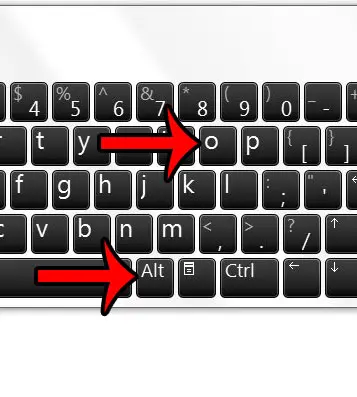
Open the Format window with the Alt + o keyboard shortcut.
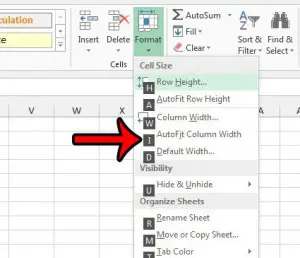
Step 5: Press Alt + i to use the AutoFit Column Width function.
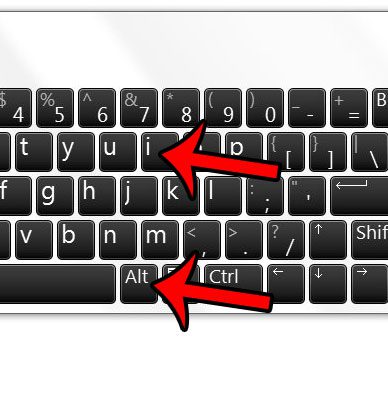
Use the AutoFit Column Width option with the Alt + i keyboard shortcut.
Step 6: Repeat steps 2 – 4, then press Alt + a to use the AutoFit Row Height function.
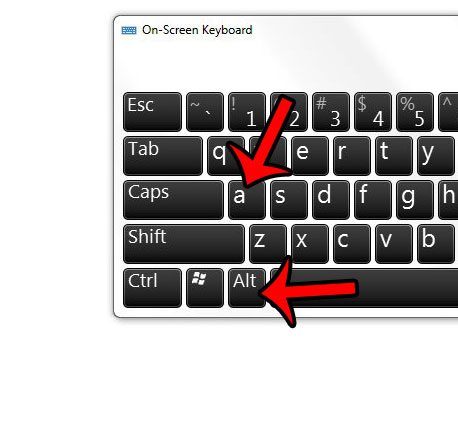
Use the Alt + a option after steps 2 through 4 to use the AutoFit Row height keyboard shortcut.
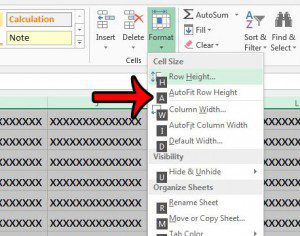
Hopefully, this article has shown you how to use AutoFit Excel shortcuts to simplify the process of making your cell data fit more easily.
If your Excel spreadsheet is difficult to print, then consider adjusting the scale. Learn how to fit a worksheet to one page in Excel 2013 without needing to manually adjust the size of your rows or columns at all.
Frequently Asked Questions About the Excel Autofit Column Width Shortcut
Can I resize columns with something other than the autofit column width option?
If you are looking for another way to set the width of your columns because you want to adjust column width settings and autofit isn’t working well, then you have other ways to define the width for an entire column.
If you click on the column header (the letter at the top of the column) it will select the entire column. You can then right-click on the selected column, choose the Column Width option, then enter a value into that field.
Is there a way to autofit column width without going through the Excel ribbon menu?
You can also use the autofit feature in Excel if you double-click on the right border of the column header, or on the bottom border of the row header. When you have your mouse cursor positioned properly you will see a double-sided arrow icon to let you know that autofit will occur when you double-click.
Since the keyboard shortcut for this process is pretty complicated, this can be much easier when you want to autofit in Excel.
Plus, if you want to autofit column widths for several columns at once, then you can select all of the columns to adjust, then double-click on the right border of one of the selected columns to autofit all of them.
You can also autofit multiple rows using this same method to autofit columns, you would just need to select all of the rows, then double click on the bottom border of one of them.
If you want to select multiple rows or columns that aren’t directly next to one another then you can hold down the Ctrl key on your keyboard and click each row number or column letter.
Is there a fast way to select multiple columns that are next to each other?
Individually clicking all of the columns or rows that you want to resize can be tedious, so you might want a faster way to do it.
If you click the leftmost column or the top row that you wish to resize, you can then hold down the Shift key and click the rightmost column or the bottom row to select all the columns or rows between the ranges you clicked.
You can then use the autofit column width or autofit row height option in the ribbon, or you can use the double click method to autofit as well.
If you want to select the entire spreadsheet then you can click the gray rectangle above the row 1 header and to the left of the column A header, or you can use the Ctrl + A shortcut keys to select all the cells as well.

Matthew Burleigh has been writing tech tutorials since 2008. His writing has appeared on dozens of different websites and been read over 50 million times.
After receiving his Bachelor’s and Master’s degrees in Computer Science he spent several years working in IT management for small businesses. However, he now works full time writing content online and creating websites.
His main writing topics include iPhones, Microsoft Office, Google Apps, Android, and Photoshop, but he has also written about many other tech topics as well.