Repeating information at the top of each printed page of an Excel spreadsheet is helpful when you wish to include a report name or some other type of identifying information with the spreadsheet. This can be accomplished by adding a header to your document.
The header and footer in Excel can be used for more than just text, however. If you wish to include a picture at the bottom of every page, or if you want to watermark your worksheet, then you can do so in a manner similar to that used for text.
Our guide below will show you how to add an image to the footer of every page of your worksheet in Excel 2013.
Here is how to put a picture in the footer in Excel 2013 –
- Open your worksheet in Excel 2013.
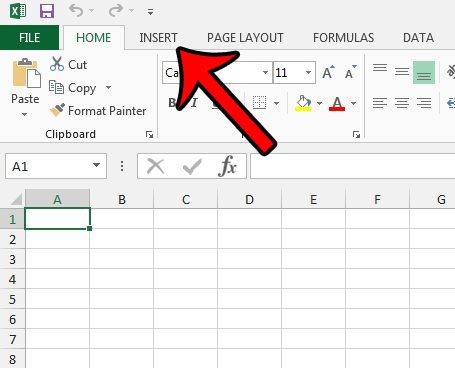
- Click the Insert tab at the top of the window.
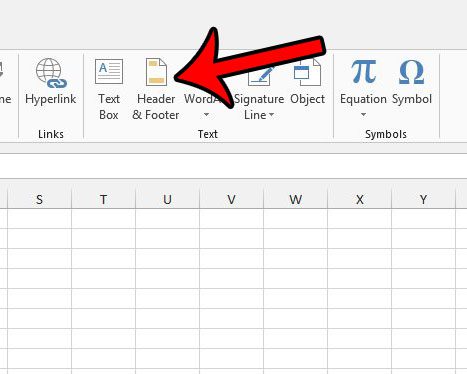
- Click the Header & Footer button in the Text section of the ribbon.
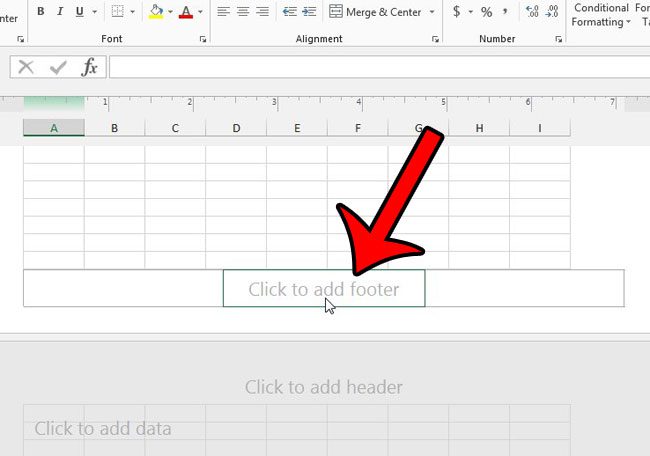
- Scroll down and click the section of the footer where you wish to add the picture.
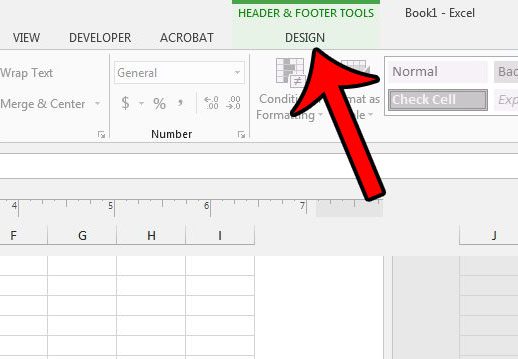
- Click the Design tab at the top of the window.
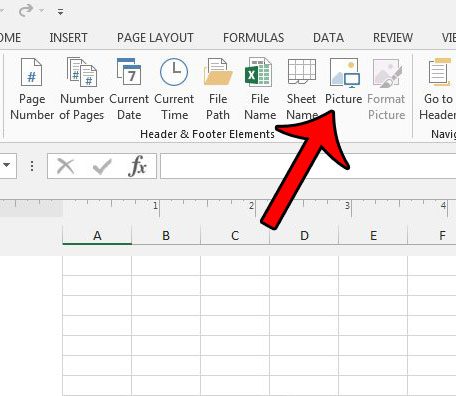
- Click the Picture button in the Header & Footer Elements section of the ribbon.
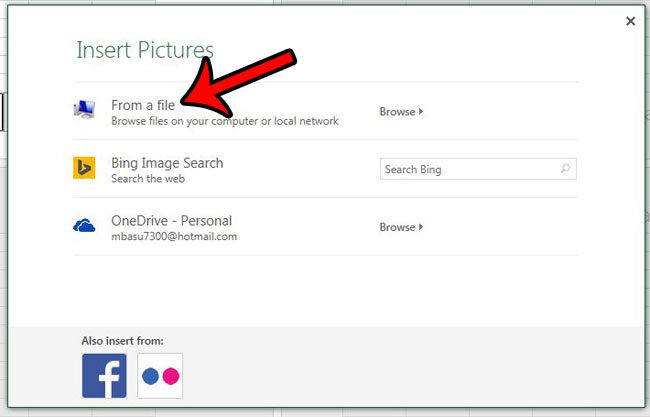
- Select the location from which you would like to insert the picture.
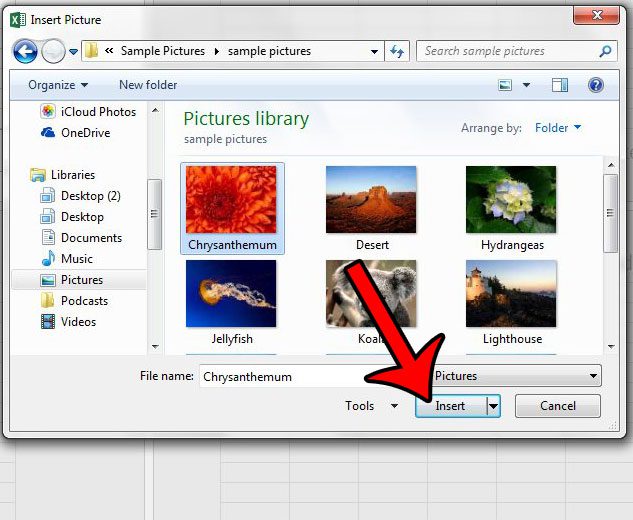
- Find the picture that you want to use, then click the Insert button.
These steps are repeated below with pictures –
Step 1: Open your Excel file in Excel 2013.
Step 2: Click the Insert tab above the navigational ribbon.
Step 3: Click the Header & Footer button found in the Text section of the navigational ribbon.
Step 4: Click on the section of the footer where you want to add the picture.
Step 5: Click the Design tab under Header & Footer Tools.
Step 6: Click the Picture button in the Header & Footer Elements section of the ribbon. Note the Format Picture button to the right of it, as you may need to return here later if you wish to adjust the size, cropping, brightness, or contrast of the picture.
Step 7: Select the location that contains your picture.
Step 8: Find your picture, then click the Insert button.
You should now see text in the footer that says &[Picture]. If you double-click in a cell in the worksheet, you will exit the Header & Footer view and return to normal. You should then see your footer image behind your worksheet. If you open the Print menu you will see how the printed page will look in Print Preview.
Now that you know how to insert a picture into the footer in Excel 2013, you can use this option to make sure that an image is visible on each page of your spreadsheet.
Are you having difficulty getting your spreadsheet to properly fit to one page? Learn three different ways to fit a worksheet to a page for better printing.

Matthew Burleigh has been writing tech tutorials since 2008. His writing has appeared on dozens of different websites and been read over 50 million times.
After receiving his Bachelor’s and Master’s degrees in Computer Science he spent several years working in IT management for small businesses. However, he now works full time writing content online and creating websites.
His main writing topics include iPhones, Microsoft Office, Google Apps, Android, and Photoshop, but he has also written about many other tech topics as well.