The files that you have on your computer all have a different file type. Use these steps to show file extensions in Windows 7.
- Open Windows Explorer.
- Click Organize.
- Click Folder and search options.
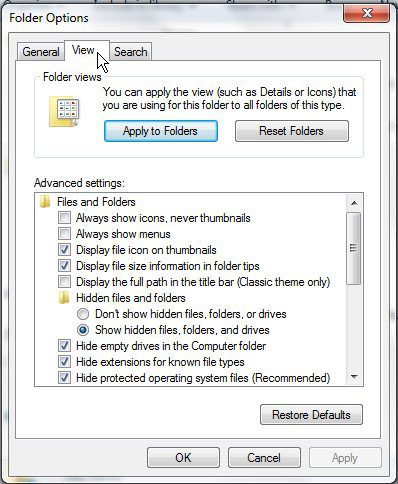
- Select the View tab.
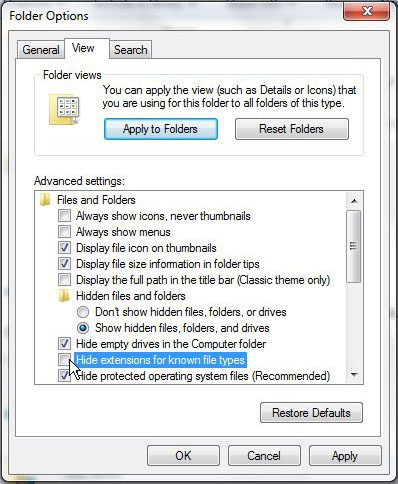
- Remove the check mark next to Hide Extensions For Known File Types.
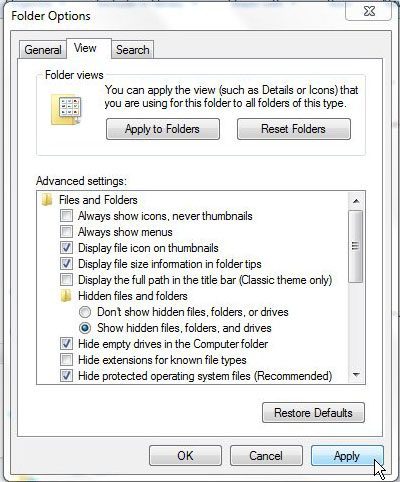
- Click Apply, then OK.
Our article continues below with additional information and pictures for each of these steps.
The Windows 7 operating system, which was released in July of 2009, offers a lot of different options and settings that one would expect from a modern operating system.
You are probably familiar with the way that Windows 7 organizes and displays your files and folders. The most common way to view this information is with Windows Explorer.
Windows 7 will, by default, hide the extension of a known file type. In many instances this is perfectly acceptable, but you may find yourself needing to modify the file type or extension, or you may need to identify a specific file when multiple files share the same name. You can modify this setting in the “Folder and Search Options” menu.
The steps in our guide below will show you where to adjust the setting that controls whether or not file extensions are displayed for the files that you see in Windows Explorer.
So if Windows 7 is currently only displaying the names of your files without the extension that lets you know what type of file it is, then the steps below will show you how to make that adjustment.
How to Display File Names in Windows 7
Note that, by choosing to display file extensions in Windows 7, you are opening yourself up to the possibility of accidentally changing the file extension for that file as well. A file with the incorrect file extension will usually not function properly, so it is best to avoid editing the file extension unless you are certain that you wish to do so.
Step 1 – Click the “Windows Explorer” icon in the task bar at the bottom of the screen. It is the folder icon.

Step 2 – Click the “Organize” button at the top-left corner of the window, then click “Folder and Search Options.”

Step 3 – Click the “View” tab at the top of the window.

Step 4 – Check the box to the left of “Hide Extensions For Known File Types” to clear the check mark.

Step 5 – Click “Apply,” then click “OK.”

As mentioned earlier, enabling this option gives you the ability to modify, or even delete, file extensions. This can corrupt the file, making it unusable. Often this can be resolved by simply restoring the file type extension, but it may not always work.
If you are only enabling this setting because you need to perform a specific action, then it might be a good idea to follow these steps again when you’re done and choose to hide the file extensions again.
You can search for files or a specific type by clicking in the search field at the bottom of the screen, then typing “.file-extension” but replacing the “file-extension” part with the type of file you are trying to locate. For example, if you wanted to find PDFs on your computer, you could do so by typing “.pdf.”
Is Windows 7 currently using a different Web browser than you would prefer? Learn how to change the default Web browser in Windows 7 if you would like to set Chrome, Firefox, or anything else as the primary way to view Web pages.

Matthew Burleigh has been writing tech tutorials since 2008. His writing has appeared on dozens of different websites and been read over 50 million times.
After receiving his Bachelor’s and Master’s degrees in Computer Science he spent several years working in IT management for small businesses. However, he now works full time writing content online and creating websites.
His main writing topics include iPhones, Microsoft Office, Google Apps, Android, and Photoshop, but he has also written about many other tech topics as well.