If there is too much or too little white space around the edge of your document, then you will need to change the margins.
But if you are new to Microsoft Word 2011 then you might be getting comfortable with the interface and not know where the margin settings are located.
Fortunately, you can switch to 1 inch margins in Word 2011 by following a short series of steps.
How to Change to One Inch Margins in Microsoft Word on a Mac
- Open the document.
- Click Layout.
- Choose Margins, then Normal.
Our guide continues below with more information on 1 inch margins in Word 2011, including pictures of these steps.
Document formatting can be a point of contention for many companies, schools, and publications, so knowing how to set up your documents to match those requirements is important knowledge to have. One common formatting requirement is related to the document margins, and a popular choice is to set all of the document margins at 1 inch.
Fortunately, all versions of Microsoft Word allow you to manually adjust your margins to 1 inch, including Word 2011 for Mac. Our guide below will show you where to find this setting in the program so that you can switch the margins to 1 inch.
You might also want to check out our guide on how to change margins in Word 2010 from inches to cm if you’ve ever had issues with the units being used.
How to Use 1 Inch Margins in Word 2011 for Mac (Guide with Pictures)
The steps in this article will show you how to use 1 inch margins for a document that you create using Microsoft Word 2011 for Mac. You can also set 1 inch margins in Word 2010 using a similar method.
If you wish to adjust the default margins for any document that you create in Word 2011, then check out our tip at the end of this article.
Step 1: Open your document in Word 2011 for Mac.
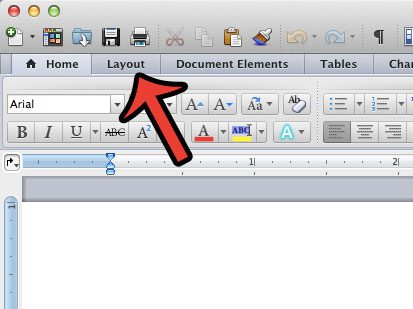
Step 2: Click the Layout tab at the top of the window.

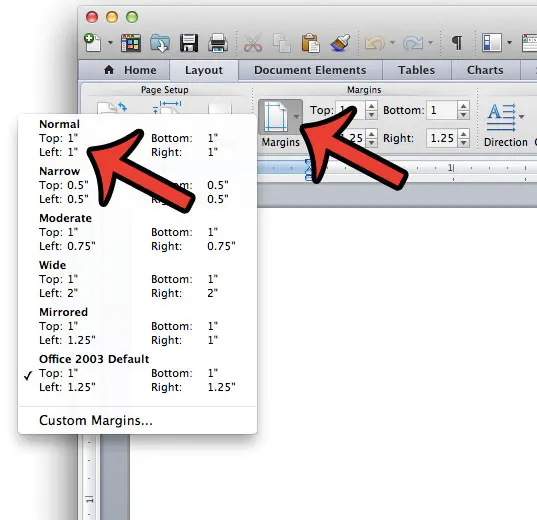
Step 3: Click the Margins button, then click the Normal option at the top of the list of options.

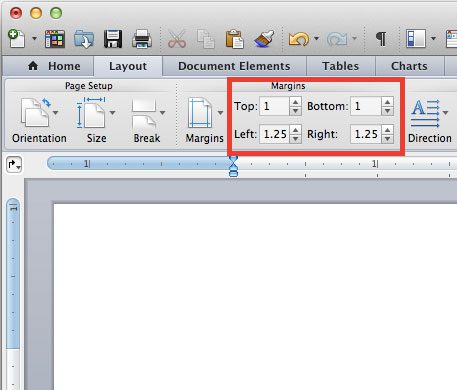
You can also choose to manually set the margin values by clicking inside each of the margin fields and changing the value to 1.

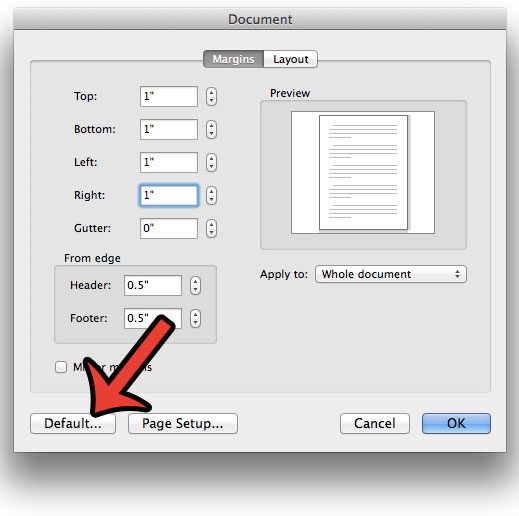
Note that following these steps will only change the margins to 1 inch for the current document. If you wish to change the default margins to 1 inch in Word 2011, then you will need to click Format > Document at the top of the screen, then adjust the margins and click the Default button at the bottom-left corner of the window.

Now that you know how to set 1 inch margins in Word 2011 you will be able to ensure that your documents are using the correct margin sizes to meet the requirements of your school or job.
Do you need to share your Word document with someone that does not have Microsoft Word installed on their computer? Save as a PDF in Word 2011 and make it easier for more people to open your document.
Additional Sources

Matthew Burleigh has been writing tech tutorials since 2008. His writing has appeared on dozens of different websites and been read over 50 million times.
After receiving his Bachelor’s and Master’s degrees in Computer Science he spent several years working in IT management for small businesses. However, he now works full time writing content online and creating websites.
His main writing topics include iPhones, Microsoft Office, Google Apps, Android, and Photoshop, but he has also written about many other tech topics as well.