It is not uncommon for people to have access to more than one printer, especially in an office environment.
And when you can print to more than one printer, certain choices can be better for certain situations.
For example, you might have a black and white laser printer connected to your computer that prints everything very quickly.
But if you need to print a document in color, then that black and white printer would no longer be a good option.
Fortunately, Word 2010 can see all of the printers that have been installed on your computer.
So if you have installed a printer and would like to send a document to it from Word 2010, then simply follow the steps below to choose a different printer for your document.
Related: How Do I Change My Printer from Offline to Online in Windows 7?
Print to a Different Printer in Word 2010
The steps in this article will assume that you have multiple printers connected to your printer or on your network, and that you want to print a document to a different printer. However, these steps will not select the new printer by default. If you would like to change the def
ult printer, then you can scroll to the end of this article, where we will explain that process.
- Step 1: Open your document in Microsoft Word 2010.
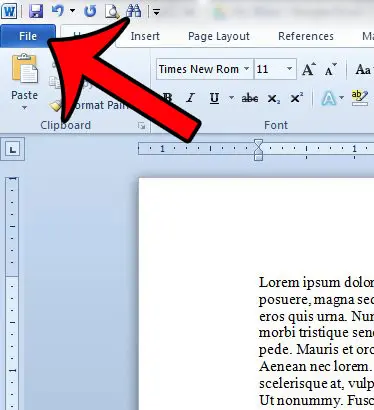
- Step 2: Click the File tab at the top-left corner of the window.
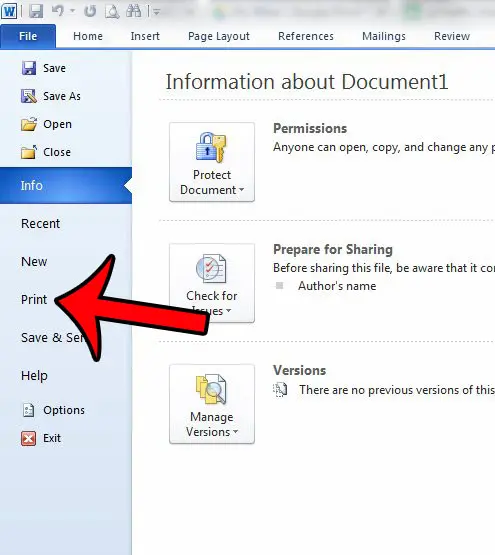
- Step 3: Click the Print option in the column at the left side of the window.
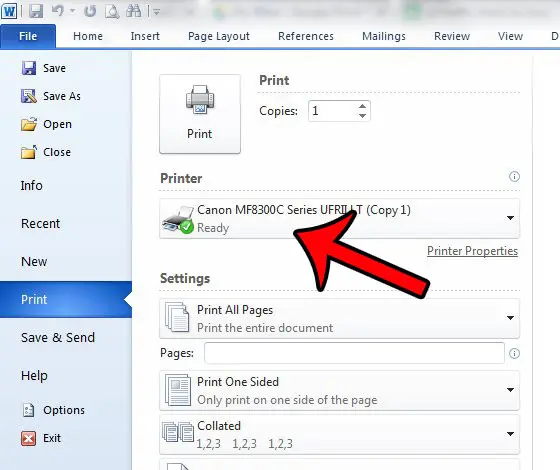
- Step 4: Click the button under Printer in the column at the center of the window.
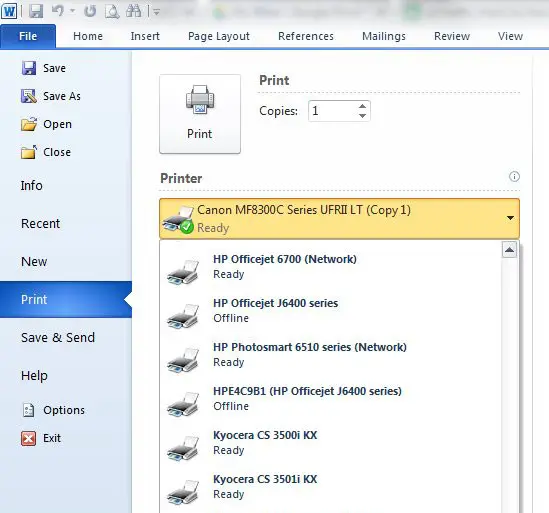
- Step 5: Select the printer that you want to use from the list of printers.
- Step 6: Confirm that the correct printer is selected, then click the Print button.
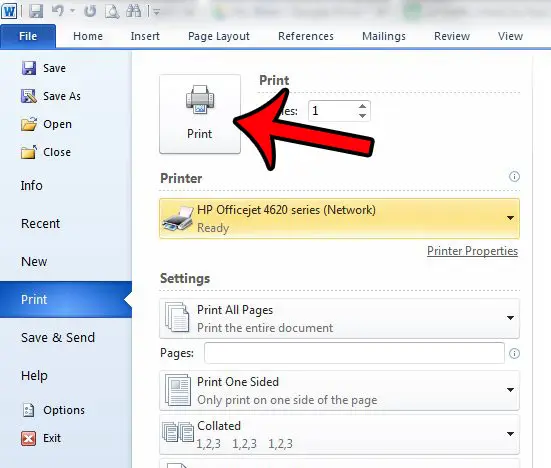
As mentioned before, this will only change the printer for the current document.
If you wish to change the default printer for every document, then you need to change the default printer in Windows 7. This can be done by clicking the Start button at the bottom-left corner of the screen, then clicking Devices and Printers in the column at the right side of the menu.
You can then right-click the preferred printer and select the Set as default printer option.
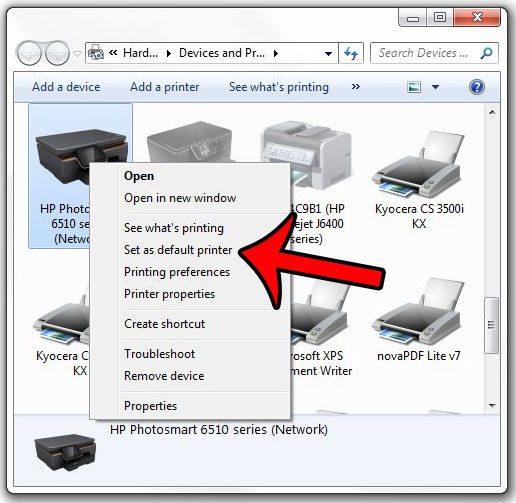
If you need additional assistance in changing your default printer in Windows 7, you can click here to read more in-depth instructions.

Matthew Burleigh has been writing tech tutorials since 2008. His writing has appeared on dozens of different websites and been read over 50 million times.
After receiving his Bachelor’s and Master’s degrees in Computer Science he spent several years working in IT management for small businesses. However, he now works full time writing content online and creating websites.
His main writing topics include iPhones, Microsoft Office, Google Apps, Android, and Photoshop, but he has also written about many other tech topics as well.