Learning how to remove a password from a Word document is crucial if you have a document that is currently password protected, but you need to be able to edit it or share it with other people.
Password-protecting a document in Word 2013 is a great way to keep information in that document private. We have previously written about creating a Word password, but you may find the process of entering that password to be tedious and would prefer to simply remove it instead.
Unfortunately, there is not a dedicated password removal option anywhere in Word 2013, so the method for deleting an existing password might be difficult to find. Our guide below will show you what you need to do to remove a password from a Word document.
Removing Password Protection from a Word 2013 Document
The steps in this article will show you how to remove a password from a document in Word 2013. You will need to know the existing password for the document in order to use these steps.
If you do not know the current password for the document, then you will need to contact the document’s creator and ask them for it or ask them to remove the password and send the unprotected document to you.
Here is how to remove password protection from a document in Word 2013 –
- Open the document in Word 2013.
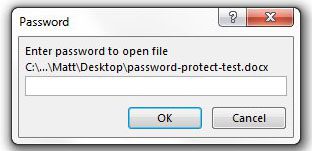
- Enter the password.
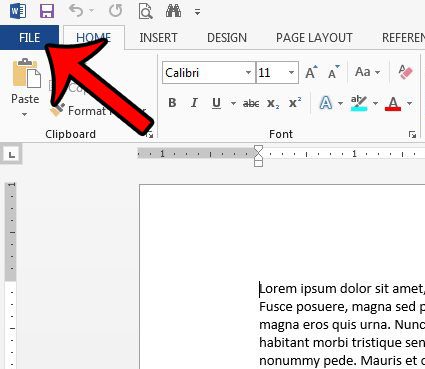
- Click the File tab at the top-left corner of the window.
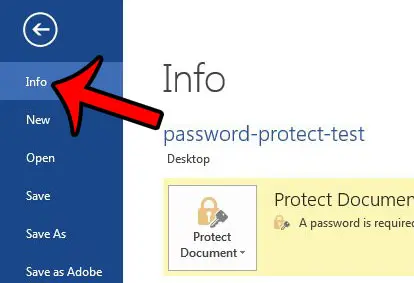
- Click the Info tab in the left column.
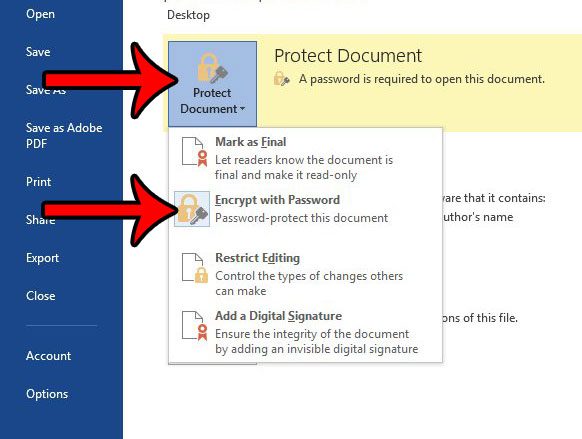
- Click the Protect Document button, then click Encrypt with Password.
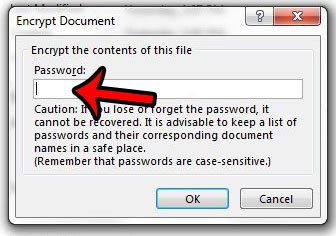
- Delete the characters in the Password field, then click the OK button.
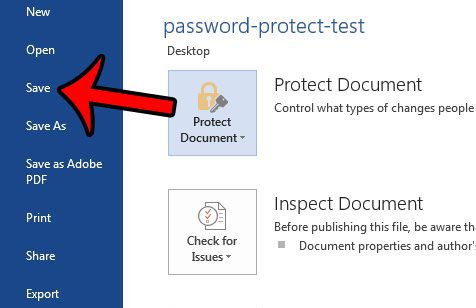
- Click the Save button in the column at the left side of the window.
These steps are also shown below with pictures –
Step 1: Open the document in Word 2013.
Step 2: Enter the password for the document.
Step 3: Click the File tab at the top-left corner of the document window.
Step 4: Click Info at the top of the column at the left side of the window.
Step 5: Click the Protect Document button at the center of the window, then click the Encrypt with Password button.
Step 6: Click inside the field under Password, then delete each of the dots in that field. Click the OK button when the field is empty.
Step 7: Click the Save button at the left side of the window to save the document without the password. The next time you open the document, it will not require a password to view the contents.
Now that you know how to remove password protection from a document in Word 2013, you can make it easier for other people to view the information in that file when you share it with them.
Word documents aren’t the only type of Microsoft Office files that can be protected with a password. If you have a password-protected Excel file, you can read about removing a password in Excel 2013 for a similar method to remove a password from your protected Excel workbook.

Matthew Burleigh has been writing tech tutorials since 2008. His writing has appeared on dozens of different websites and been read over 50 million times.
After receiving his Bachelor’s and Master’s degrees in Computer Science he spent several years working in IT management for small businesses. However, he now works full time writing content online and creating websites.
His main writing topics include iPhones, Microsoft Office, Google Apps, Android, and Photoshop, but he has also written about many other tech topics as well.