It’s helpful to know how to remove indent in Excel when you encounter a spreadsheet where many of the cells have an unwanted space at the start of the data.
This can occur for a number of reasons, but it is necessary to remove it when it’s affecting your ability to sort or execute formulas.
Our tutorial below will show you how to make this edit so that your data is formatted in the way that you need it.
How to Remove Indent in Excel
- Open your spreadsheet.
- Select the indented cells.
- Choose the Home tab.
- Click the Decrease Indent button.
Our guide continues below with additional information on how to remove indent in Excel, including pictures of these steps.
If you have too much space after your paragraphs in Google Docs, then find additional information here on how to edit document spacing.
Spaces preceding data in a cell can make your spreadsheet look less professional, and may even create potential problems for people working with your data.
This indentation can occur if you have copied and pasted the data from another source, or if it has been introduced to the worksheet by accident.
Fortunately, the amount of indentation in a cell is something that you can control, and you can remove it entirely if it is not needed.
Our guide below will show you how to select cells containing indentation and remove that indentation in Excel 2013.
Google Apps have ways for you to adjust indenting as well. You can learn how to do hanging indent on Google Docs if you have needed to indent the first line of a paragraph in a document.
How to Remove the Indentation Space Before Data in Excel 2013 (Guide with Pictures)
The steps in this article will assume that you have a worksheet containing cells that have an indentation. If you follow the steps below and the indentation is not removed, then you may have blank spaces preceding your data, as opposed to indentation formatting. If that is the case, then you will have more luck with the Excel TRIM function. For example, if you have data in the A1 cell that contains blank spaces that you wish to remove, then entering the formula =TRIM(A1) into a blank cell will remove spaces from the data. You can learn more about the TRIM function here.
Step 1: Open your Excel worksheet containing the indentation that you want to remove.
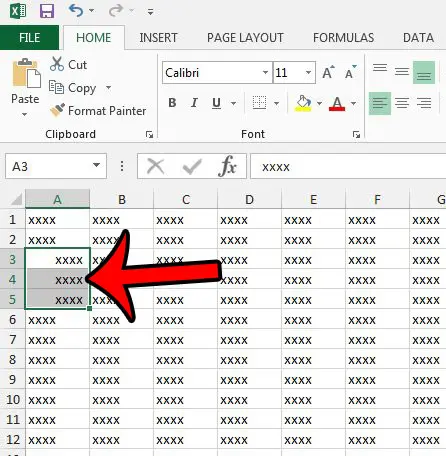
Step 2: Select the cells containing the indentation that you want to remove.
If you wish to remove all indentation from your worksheet, then you can press Ctrl + A on your keyboard, or click the gray button above the row 1 heading, and to the left of the column A heading. Both of those options will select the entire sheet.

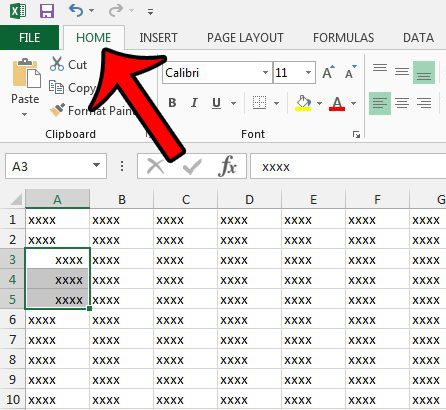
Step 3: Click the Home tab at the top of the window.

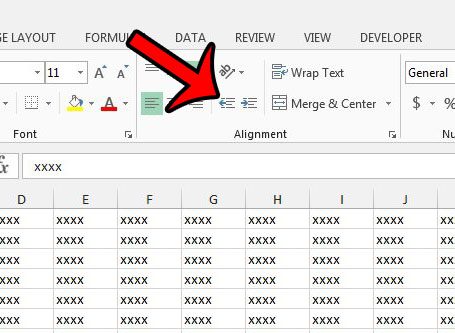
Step 4: Click the Decrease Indent button in the Alignment section of the ribbon until the indentation is remove.
Depending upon the amount of indentation that was added to the cell(s), you may need to click this button a few times.

Now that you know how to remove indent in Excel you will be able to complete this action whenever you encounter a spreadsheet that contains that unwanted indenting.
Another way to quickly remove indentation, and any other formatting, in Excel 2013 is to use the Clear Formats option. You can learn how to remove all formatting from an Excel 2013 worksheet to restore all of your cells to the default Excel format.

Matthew Burleigh has been writing tech tutorials since 2008. His writing has appeared on dozens of different websites and been read over 50 million times.
After receiving his Bachelor’s and Master’s degrees in Computer Science he spent several years working in IT management for small businesses. However, he now works full time writing content online and creating websites.
His main writing topics include iPhones, Microsoft Office, Google Apps, Android, and Photoshop, but he has also written about many other tech topics as well.