There are some uncommon document formatting options that you may encounter in Microsoft Word, which can be difficult to delete. One such option is a watermark, which can appear in the background of the document. Therefore you may be wondering how to delete a watermark in Microsoft Word.
Watermarks in Microsoft Word provide a simple way to identify a draft or confidential version of a document without altering the actual content of that document. But you may need to delete that watermark later, so it is helpful to know where the setting for that action is located.
Our guide below will show you how to remove a watermark from your Word document, as well as provide instruction in the event that the typical watermark removal method does not seem to be working.
If you would like to add a custom watermark in Word 2013 instead of using one of the default options, then learn how to add a background picture in Word 2013.
The steps in this article will show you how to remove a watermark from your Microsoft Word document.
How to Remove a Watermark in Word 2013
- Open the document in Word 2013.
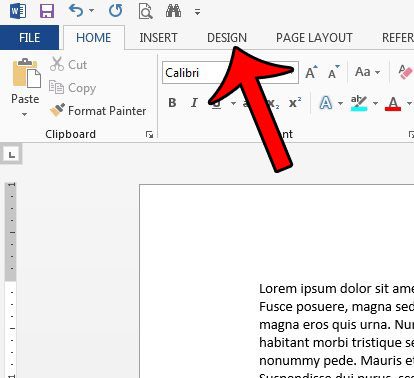
- Click the Design tab.
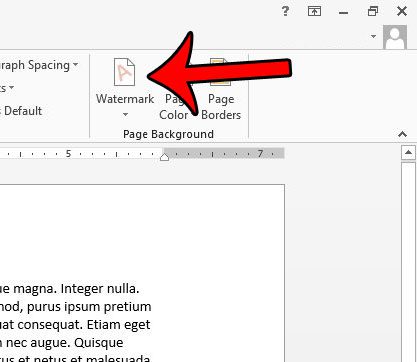
- Click the Watermark button in the Page Background section of the ribbon.
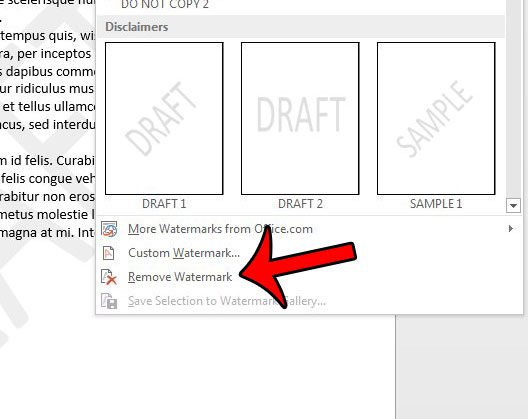
- Click the Remove Watermark button at the bottom of the menu.
Our article continues below with additional information on removing a watermark in Word, including pictures of these steps.
How to Delete a Watermark in Word 2013 (Guide with Pictures)
The steps in this article were performed in Microsoft Word 2013, but will also work in many other versions, such as Microsoft Word for Office 365.
Step 1: Open the document in Word 2013.
Step 2: Click the Design tab at the top of the window.

Step 3: Click the Watermark button in the Page Background section at the right side of the ribbon.

Step 4: Click the Remove Watermark button at the bottom of the menu.

How to Manually Remove a Watermark in Word
If this does not remove your watermark, then you will need to manually remove it. You can do so by double-clicking inside the header section of the document (the blank section at the top of the page). You can then position your cursor over the watermark (a four-directional arrow will appear) then click the watermark to select it. It should look something like the picture below –

You can then press the Delete or Backspace key on your keyboard to delete the watermark.
Is there a picture in your document that you need to crop, but you don’t want to go through the hassle of doing so in a second program? Learn how to crop a picture in Word 2013 using the default picture tools contained within the program.

Matthew Burleigh has been writing tech tutorials since 2008. His writing has appeared on dozens of different websites and been read over 50 million times.
After receiving his Bachelor’s and Master’s degrees in Computer Science he spent several years working in IT management for small businesses. However, he now works full time writing content online and creating websites.
His main writing topics include iPhones, Microsoft Office, Google Apps, Android, and Photoshop, but he has also written about many other tech topics as well.