Longtime users of Word are likely to be familiar with the different ways to affect the layout of their document, including setting the margins and adjusting the orientation.
But you can go a long time using Office without realizing that you can define a header, let alone that you can set the distance that the header is displayed from the top of the page.
So continue reading below to learn how to move the header up in Word 2013.
As an Amazon affiliate, I earn from qualifying purchases.
Have you been looking for a cheap way to get Office 2013 on up to 5 devices? Check out the Office 365 subscription, which allows you to do that, while also giving you the option to manage all of those installations.
Adjust the Header Position in Word 2013
While the header is separated from the body of the document, it is still subjected to many of the same layout adjustments that affect the body.
For example, decreasing the margin for your document will also decrease the margin for the header.
Additionally, you may need to keep the header a certain distance from the top of the page to ensure that it will still print.
This is because of certain printable area definitions on various models of printers that could cut off parts of your header if it is too close to the top.
If you are entering this realm of possibility, however, Word will typically give you a warning before you print. With this knowledge in hand, you can follow these steps to move your header up on your page.
Step 1: Launch Word 2013.
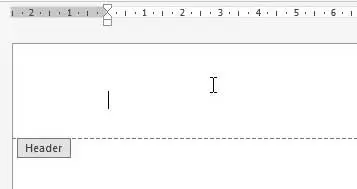
Step 2: Double-click inside the header area at the top of the page.
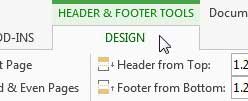
Step 3: Click the Design tab under Header & Footer Tools at the top of the window.
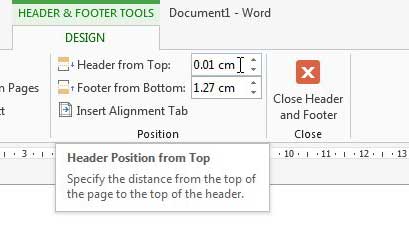
Step 4: Click inside the field to the right of Header from Top, then set the distance that you want to use. You can also click the arrows to the right of this field to adjust the value.
When you click back inside the header area, you will notice that the cursor is at your newly selected level.
Now that you know how to move the header up in Microsoft Word 2013, you can reduce the amount of empty white space that appears at the top of your pages.
For an additional way to affect the layout and appearance of your document, read this article on adding a background picture to a Word 2013 document. You can adjust the level of transparency so as not to overshadow the actual content contained within the document.

Matthew Burleigh has been writing tech tutorials since 2008. His writing has appeared on dozens of different websites and been read over 50 million times.
After receiving his Bachelor’s and Master’s degrees in Computer Science he spent several years working in IT management for small businesses. However, he now works full time writing content online and creating websites.
His main writing topics include iPhones, Microsoft Office, Google Apps, Android, and Photoshop, but he has also written about many other tech topics as well.


